Home
Motorcycle Home
Triumph Home
Export Home
Norton Info Home
Special Parts
Updated
01/29/26
Master Switch Bracket
Updated
01/29/26
MKIII Rebuild
Updated
01/29/26
Combat 5
Updated
02/01/26
High Mileage Combat
Updated
02/18/26
Roadster 850
Updated
01/29/26
Customer Combat
Partial Rebuild July 24
Delivered 03/22/25
850 Commando
Recommission
Delivered 09/20/24
Customer Combat
Build Oct 23
Shipped 7/13/24
1975 Norton Wiring
Delivered 06/07/24
Blue 69S
Delivered 05/17/24
High Mileage 850
Delivered 03/26/24
Mk3 Engine & Gearbox
Delivered 03/07/23
1973 Customer
BasketCase Build
Delivered 07/15/22
1974 Norton 850
Commando Rebuild
Sold 01/12/21
Updated 06/10/21
Customer Combat
Delivered 09/07/20
First Place Norton 05/18/2025
1972 Norton 750
Commando Rebuild
Completed 05/15/19
First Place Norton 05/16/19
Sold 01/01/20
1972 Norton Wiring
Completed 07/19/18
1974 Norton Wiring
Completed 07/27/20
Customer Combat
and 69S Builds
Closed 10/18/23
|
 | Thursday, February 19, 2026 |
I have a numbers matching frame, engine cases, gearbox cases, and title for a 1974
Norton 850 Commando Roadster. I also
have leftovers from the 1972 750 rebuild that will make a complete gearbox and engine
bottom end. Clearly, I need a lot of parts to finish the bike.
August 16, 2018 I won an almost complete 1974 850 untitled Commando today for much
less money that it should have commanded. So, now I have what I need to build the
bike. The parts bike is being delivered
this Sunday.
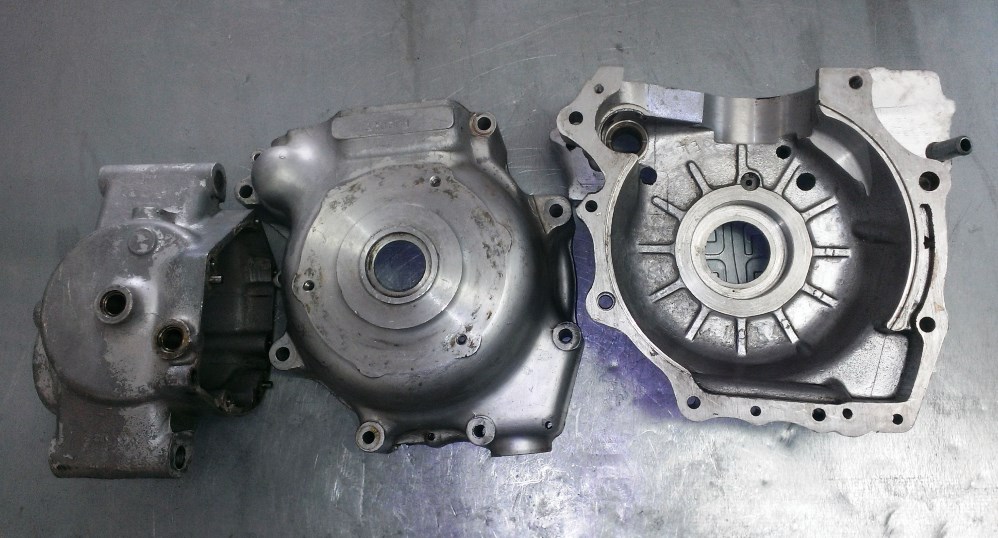
August 18, 2018 Starting on the cases. I've stripped, degreased, and inspected
them. I might decide to send them to be cleaned rather than do it myself, to speed
things up. I can make them beautiful myself but it takes time. The cases are in
good shape and almost all threaded holes have already been helicoiled so that headache
is resolved. A lot of decisions will rely on the condition of the parts bike arriving
tomorrow.
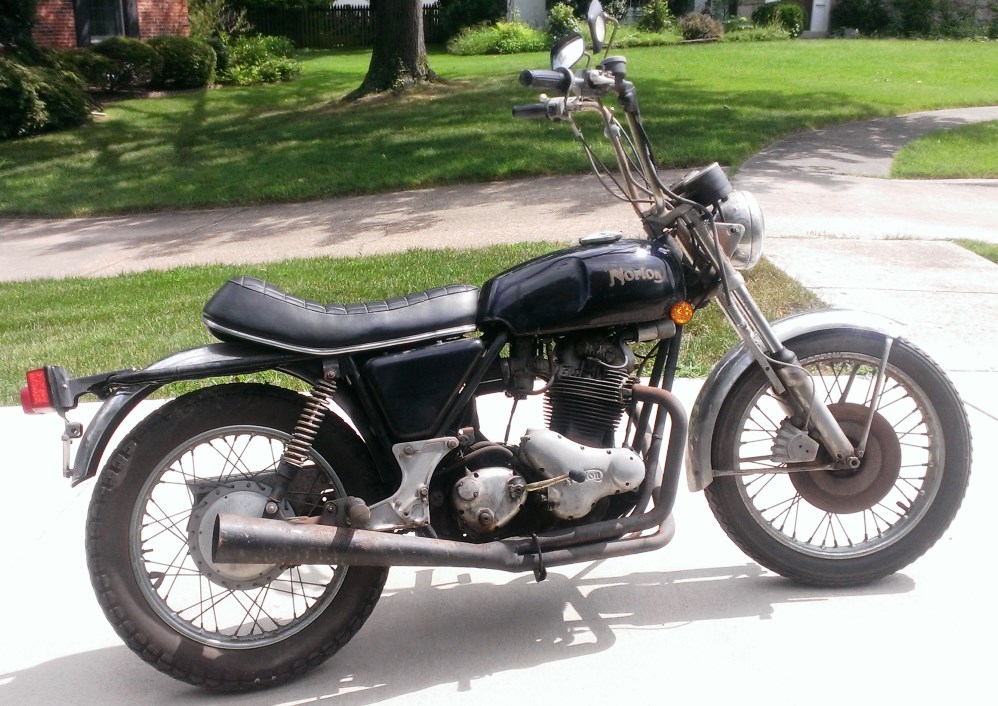
August 19, 2018 The parts bike arrived. It's a little rougher than I hoped,
but will get the job done. On quick
inspection, the tank and side covers look OK but not original paint and all chrome
parts are junk. Check that! The tank
and oil tank cover are original paint but the pinstripes have been polished off
the tank and the side cover has been painted
over without removing the decal! The drive-side cover has had a hole drilled to
mount the master switch so it's not
of much use to me. As I disassemble I'll figure out what parts are needed.
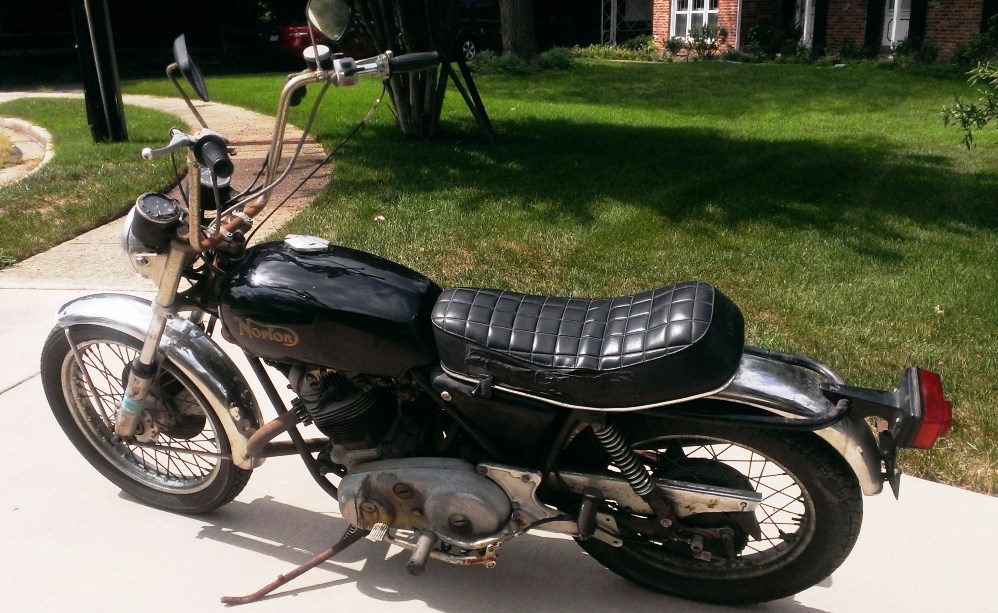
August 21, 2018 I took lots of pictures yesterday and today but I guess the lens
on my phone was smudged - this is the best
one of the bunch - certainly nothing to be proud of!
I did send the engine cases and oil tank off the CNW. They will install their
breather and cleanup the cases - saves
me time. The oil tank has a broken rear mount which I could have fixed, but
since I was sending the case, I sent the
oil tank for their service on that too.
August 22, 2018 I took lots of pictures today using a fancy Nikon camera. Generally,
the camera does a great job and won't
take a picture if it has a problem like no being in focus. Unfortunately, today
I found out that it doesn't mind taking
pictures without a memory card!
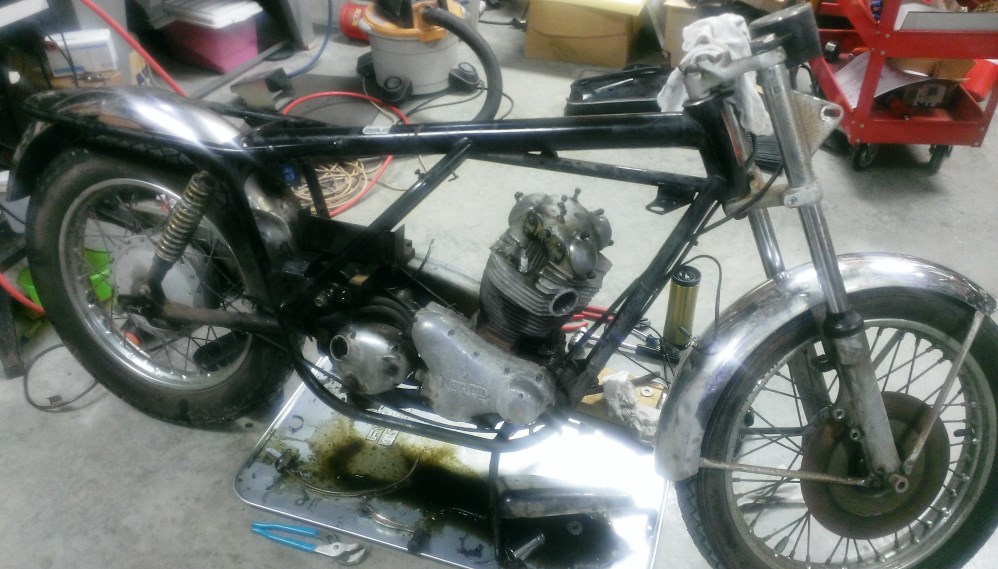
The parts bike is on a jack now and the rear wheel, fender, and battery box are
out. The power unit should have been
out, but the front end is giving me fits. It took a while but I have the top
fork nuts off. When I tried to
remove the wheel, I couldn't get the axle nut loose. My pneumatic impact
wrench won't move it even after heating
it very hot. I'll try more tomorrow, but I might end up drilling it out.
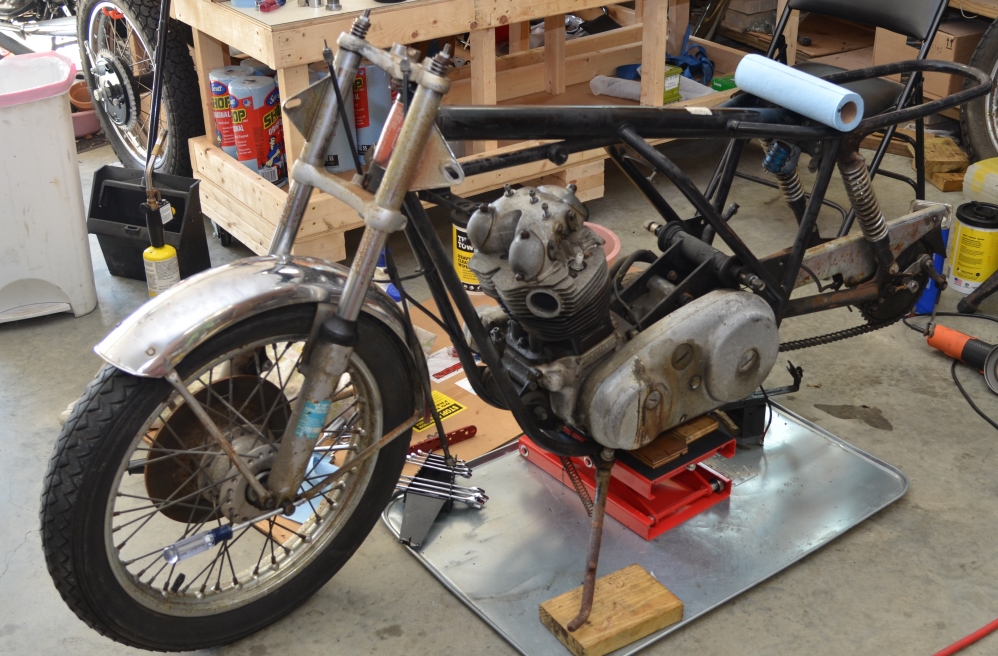
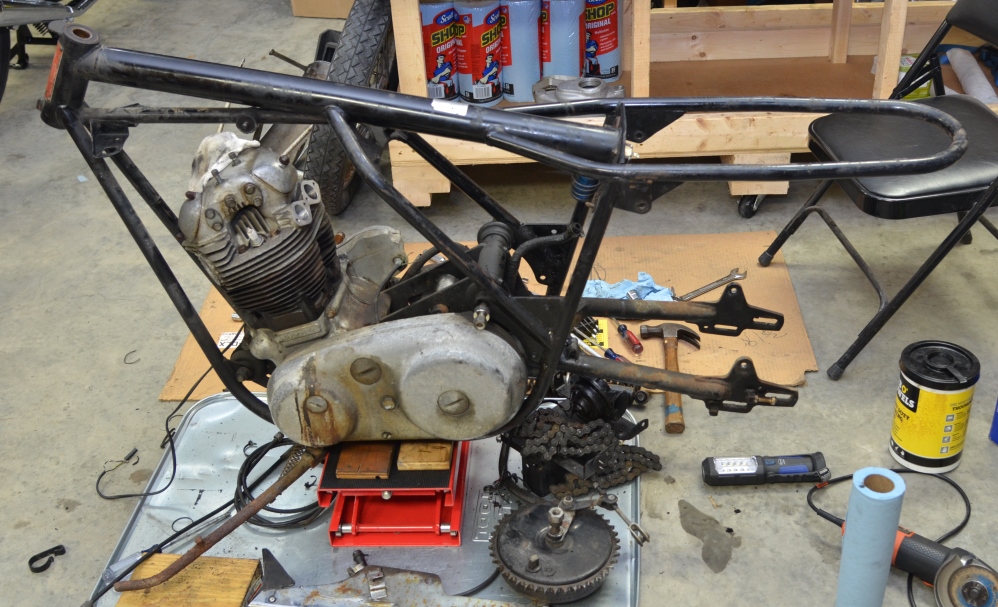
August 23, 2018 The first picture is where I started today. The second, where I
left off. Between was a lot of struggle!
I used a long old-school torque wrench on the front axle nut - at 250 ft pounds,
the socket failed! Then it was a
14" adjustable wrench and hammer. It finally cracked loose. Getting
the fender off and fork tubes off has
easy enough. I need to know at every step which parts are good, so I disassembled
the forks. The right side
internals look brand new! The left side internals are a rusty mess and the
bottom of the left side slider is broken. Fortunately I have some good spares from
the 1972 Norton I recently finished. Getting the bottom of the triple tree
off was a nightmare! I have bad shoulders and swinging a rubber hammer for
a long time does not help!
Then to the rear end. Getting it as far as you see it was easy. The
swingarm spindle is stuck solid. I'll
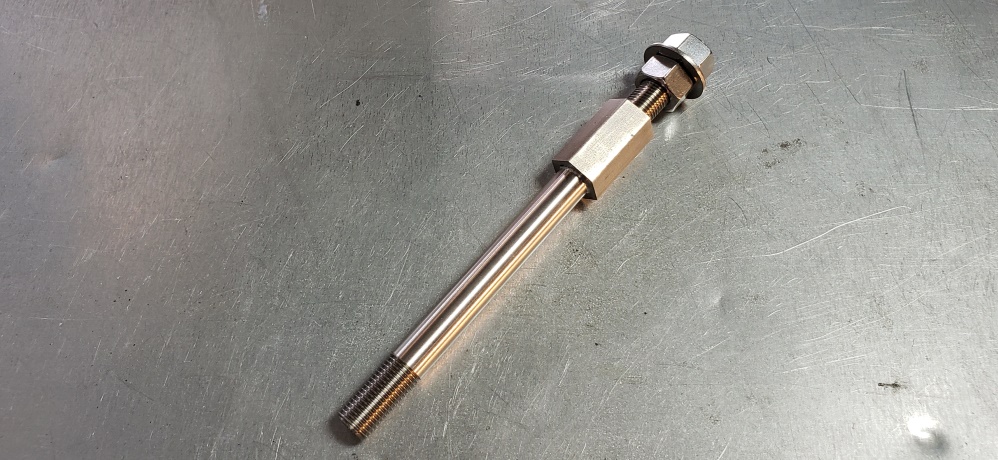
try to find a long bolt with the right threads tomorrow to use to make a puller.
I have a bolt I've used to pull
them before but it's only 2" long and I need at least 4".
Once I get the swingarm off, I'll put it on the table on its side and remove
the power unit from the frame.
August 25, 2018 I worked two hours yesterday on the swingarm and then three today
until I finally got the spindle out. When
Norton said to use 140W oil and not grease in the swingarm, they knew what they
were talking about! This swingarm spindle
was full of grease, but none of it got to the bushings or between the steel of the
spindle and engine cradle!
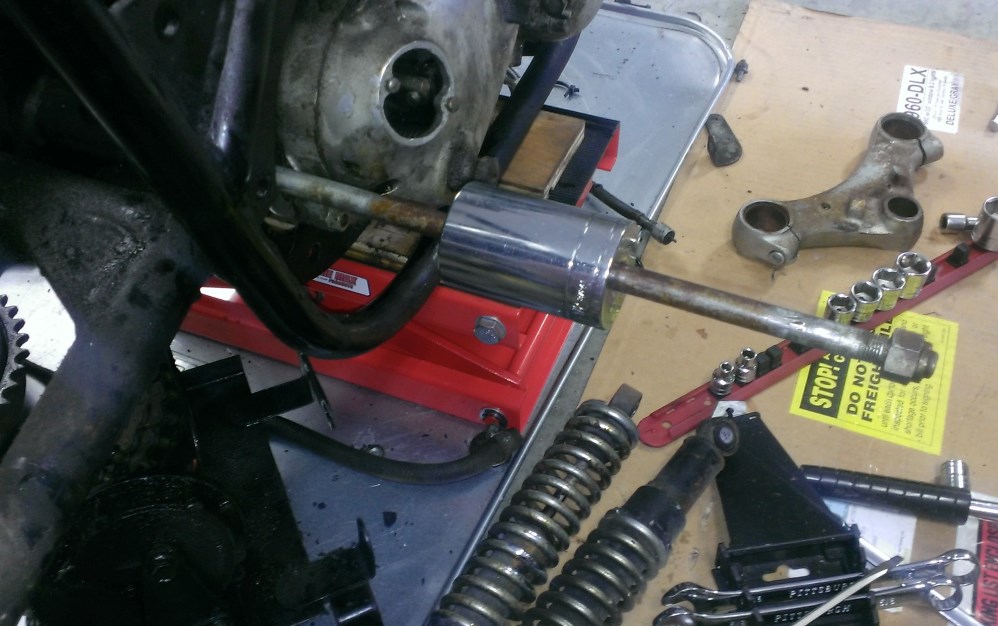
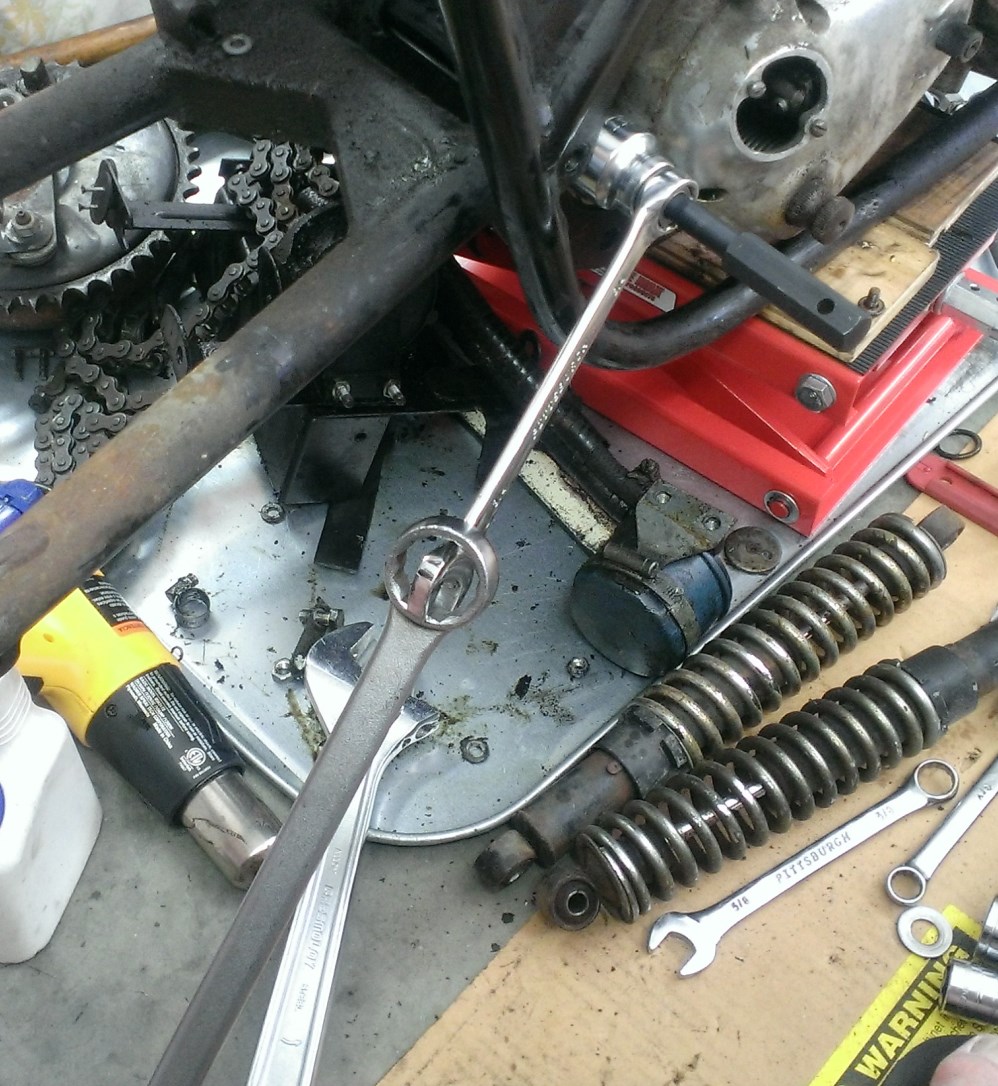
The first picture shows a redneck slide hammer that should have worked - it didn't!
The second shows the redneck puller I rigged up. I wasn't strong enough
to get it to come loose so I used the
second wrench as a persuader. It finally moved. Then about an hour of
cranking on it and adding spacers and
it finally was out.
It's on the table now. I have a few more things to remove and then I'll
- Remove the rear isolastic stud and replace it with a smaller rod.
- Remove the front isolastic bolt and replace
it with a screwdriver.
- Then I'll lay the bike on its drive side, remove the entire front isolastic,
the rod from
the rear, and lift the frame off the power unit.
From there, the engine will be easy to take apart using the engine/gearbox cradle
as an engine stand.
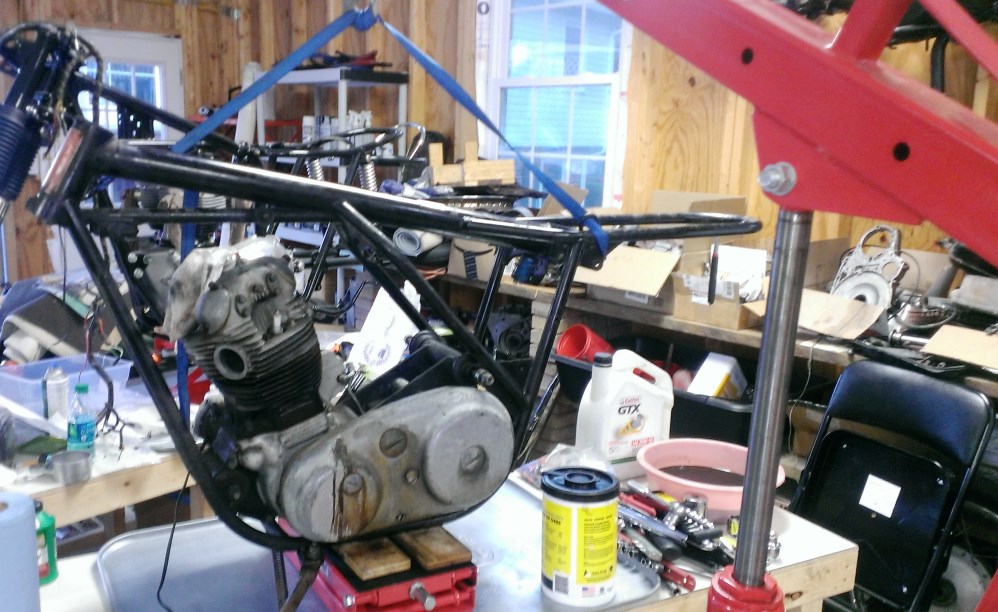
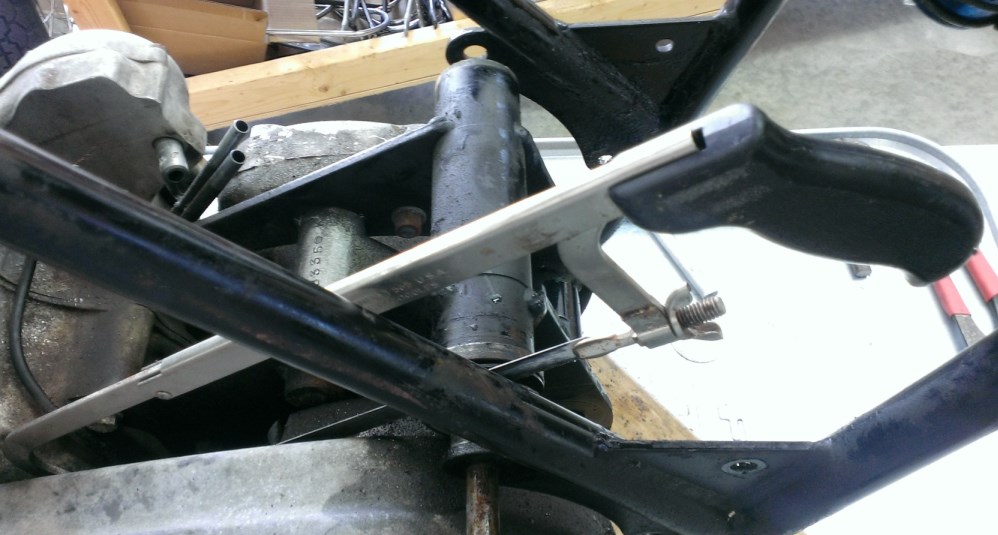
August 26, 2018 The war continues! My easy sounding steps above did not happen!
The rear isolastic stud was frozen to the tube inside the frame. After a lot
of beating on it with a hammer and making
all sorts of redneck pullers, I decided to cut both sides off. There wasn't
enough room to use my cutoff wheel
with the guard in place and it was too dangerous without the guard so it was hacksaw
time. So, I slipped the saw blade
between the isolastic plates so neither the frame of engine/gearbox cradle would
be damaged. In the first picture,
the timing side is done and I'm halfway through the drive side.
Once I got over that work (hot and humid out), I fought the front isolastic mount
- some idiot had WAY overtightened it.
Once I finally had it out, I was able to lift the frame off the engine/gearbox.
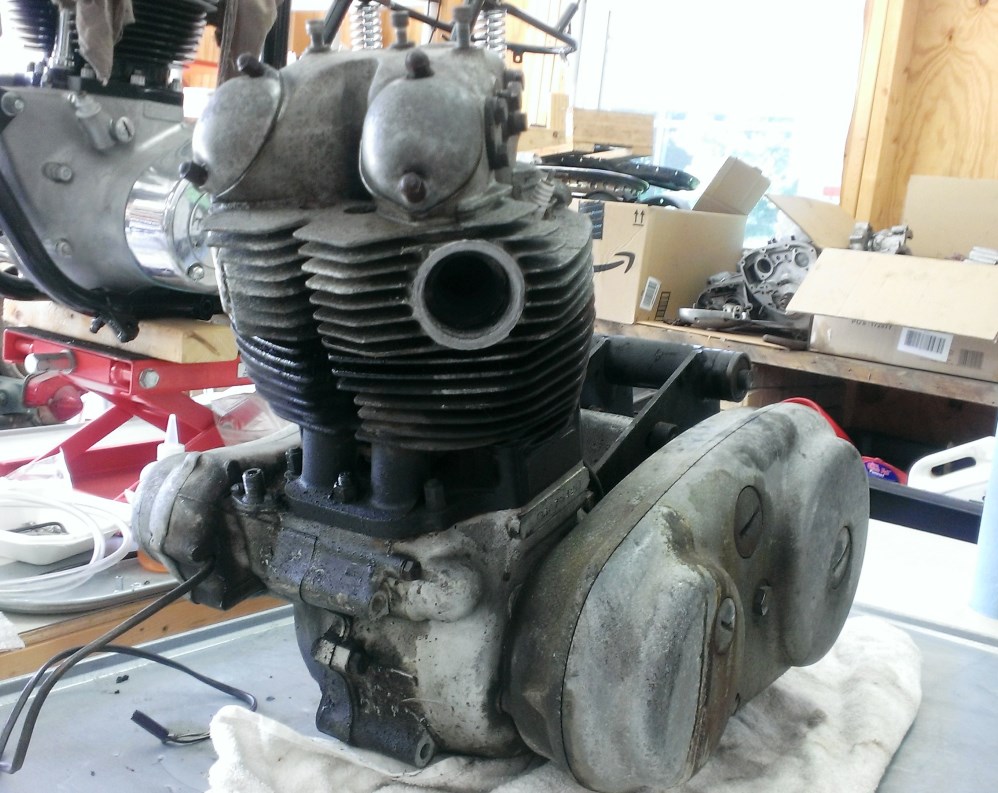
I really wanted the engine apart today so I pressed on. The head was a nightmare
- Norton heads often are. Once
I finally had all the bolts and nuts out, the head was off. The front drive
side stud was missing. Internally,
the head looks good. The right side exhaust port threads have been repaired
by welding and re-cutting but it was done
well.
The front drive side stud is broken off flush with the top of the cylinder block.
I guess that same over tightening
idiot was at work on the engine. The bores look great. I'll mike
them and I hope they don't need bored.
I'll use new rings in any case.
The engine was completely wet sumped. A good thing in this case. The
primary and timing area were full of oil.
The clutch looks new. The primary chain was EXTREAMLY tight. Hopefully
it wasn't run that way. The
sprockets look OK.
In the timing side, the idiot struck again. The oil pump drive gear/nut was
so tight that it would not come loose.
I finally used a 15" breaker bar with a fork tube persuader and got it loose.
Then came the cam sprocket nut
- same problem, same solution.
Sorry no pictures of most of this - I was so tired and sweaty that I simple forgot
to take them.
So, I have to pull the clutch center and crank drive sprocket and remove the inner
chaincase. At that point, I'll
take the rest of the engine and the gearbox out and finish the engine. The
crank and bearings feel great so I'm
hopeful that I can start assembly as soon as the cases come back from CNW.
August 27, 2018 The "feels like" temperature was 101 at 6pm today! I figured I would
quickly get the clutch and front sprocket
off - think again! The clutch center pulled very easily. The front sprocket still
isn't off. it's normally very easy to
do on a Norton but this one is really stuck on the taper. So, I left the puller
on it under tension and hopefully
it will come loose overnight.
August 28, 2018 The only thing accomplished today was getting the front sprocket
off and then the rest of the primary. The
inner primary cover is toast. The integral chain guard is broken off and the
sealing plates are bent and loose and
there is no felt seal. Although I could have replaced the sealing plates,
I wouldn't sell this to anyone with
the chain protection gone.
September 1, 2018 The heat wave continues and I've been busy with other things
anyway. I did spend most of the
day on it today. The engine is all apart and the initial cleaning of all parts
is done. The cases will be sold
along with several other parts. The cases have no issues. Like everything
else on this bike, everything was very hard
to get loose. Apparently the last person to work on it has no "feel"
for tightness and certainly doesn't
have/use a torque wrench!
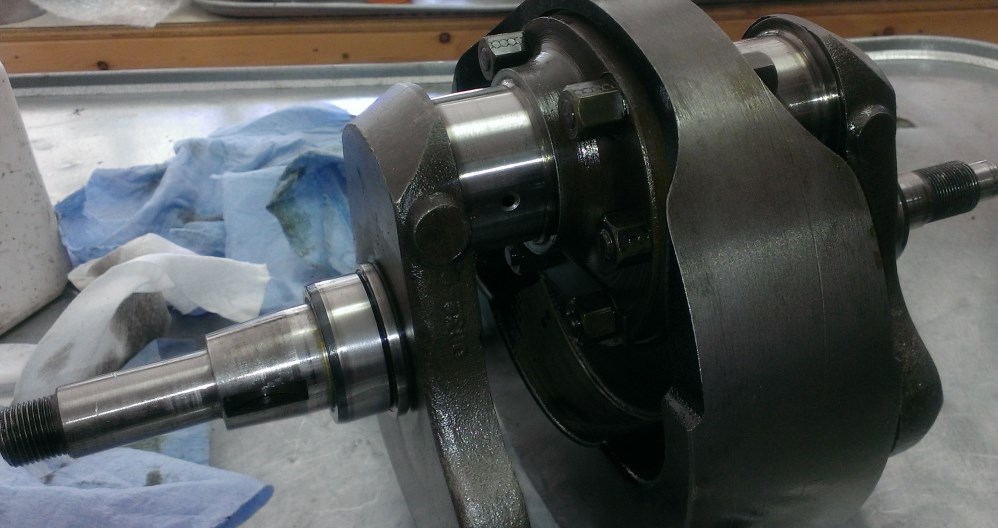
September 2, 2018 On Nortons, there's no way to know for sure if the crank
is full of sludge so I always take
them apart. Also, even though the big end shells feel perfect, I always check
the journals and replace the shells
- they don't cost that much. So, first step is to take the conrods off.
The journals are beautiful and the
micrometer says no wear. The conrods are in excellent condition.
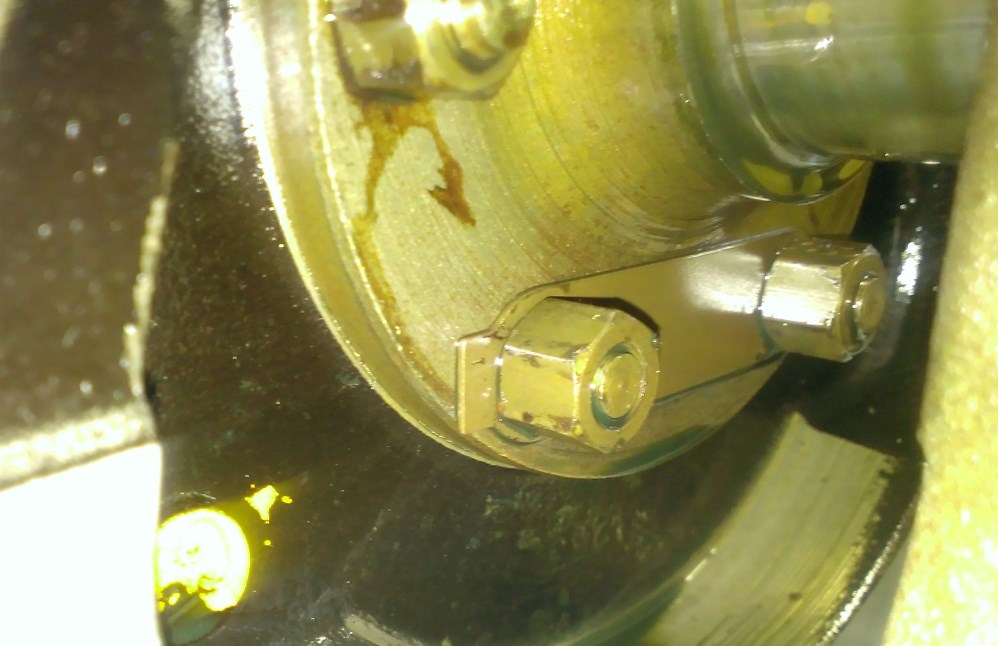
Take a look at the second picture - the last person to work on it didn't bend
the tabs! But just to be a PITA,
he used red Loctite on one side of those of the nuts - what good is that!
It looks like the engine was run very little after being apart the last time.
The bike was last registered in 1987.
Took the gearbox apart today, the oil looks brand new. I don't know if
the gearbox and engine were done at the
same time but I suspect that they were.
I have some leftover parts from the 72 and from this parts bike. I have a
couple of people interested in the parts.
If they don't buy them, I'll list them here for a while and if they still
don't sell, they'll go on eBay
for higher prices.
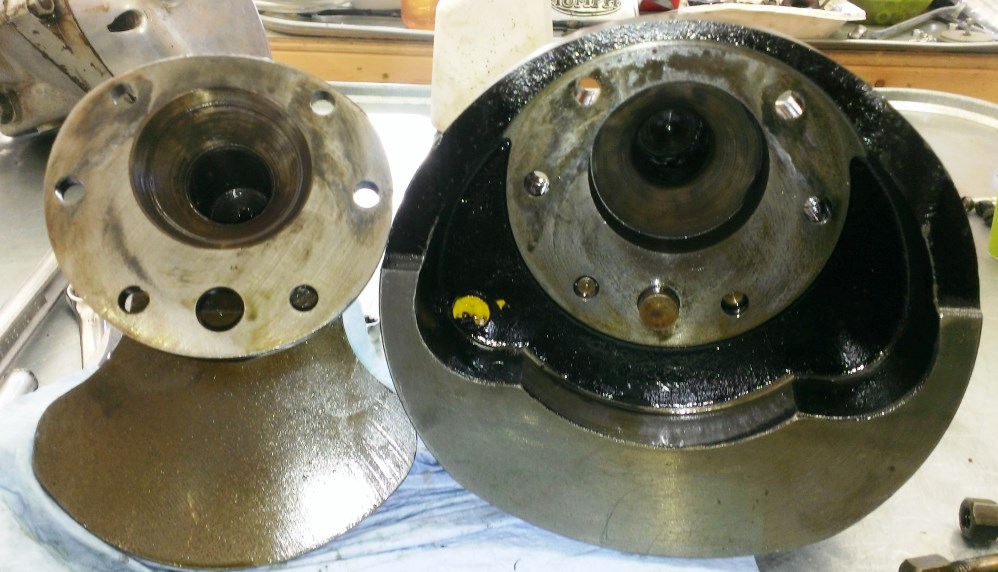
September 3, 2018 I have a complete gearbox from the extra parts with the 72 Commando,
and one from the 74 850 parts bike.
I also have the matching numbers gearbox case for this bike. So, the bike will be
built with that, a complete gearbox will
be rebuilt and sold, and the left over cases will be sold. I intended to build the
gearbox for this bike today, but first
I need to pretty up the cases. I did the first few steps and then realized
that I'm out of glass beads.
They are needed to peen the cases as the next to last step of making them look good.
So, the beads are on order.
I did clean and inspect all the gearbox parts. Everything looks perfect except
that the kick start shaft has a small
crack. It probably would work forever, but I won't use it. A new
one from Andover Norton is expensive, but
then so are the ones from India. I'll keep looking for a good used one
since I have a good one from the other
gearbox.
I had to give up after a few hours today - it was 96 degrees in the shop (not "feels
like", actual temp);
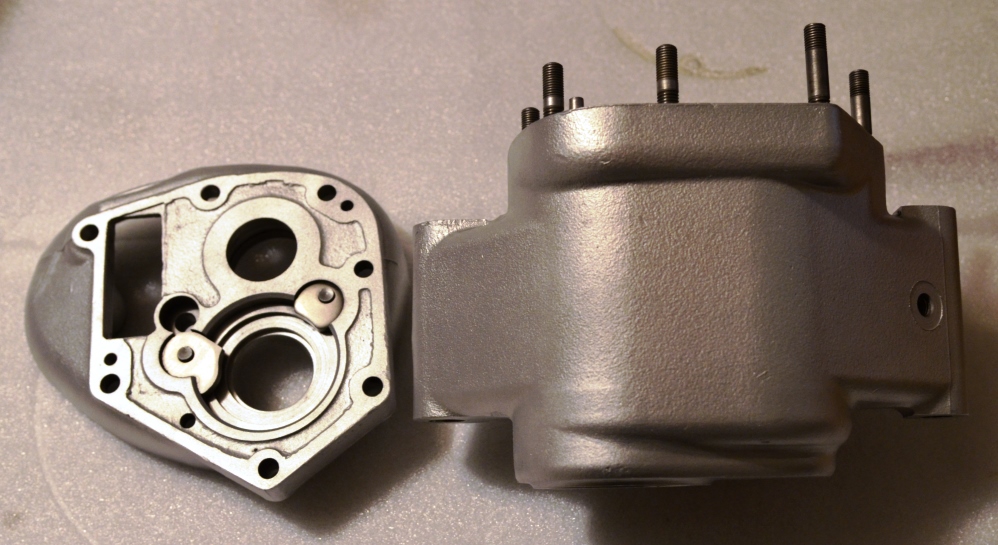
September 6, 2018 Super hot again today, but the beads arrived so the building
phase has begun. The gearbox case and
inner cover are now beautiful. They look good in the picture, but in person, they
look even better.
My big Andover order (over $1800) still has not shipped - ordered 13 days ago! I
spoke with them today, they are shipping
tomorrow. So, it will be next week before the order arrives. I need the gasket
and seal set so I can rebuild the gearbox.
Haven't heard from CNW on the crankcases either so can't build the bottom end. I
guess I'll work on the frame while I wait.
September 8, 2018 The heat is finally gone but now it's raining a lot.
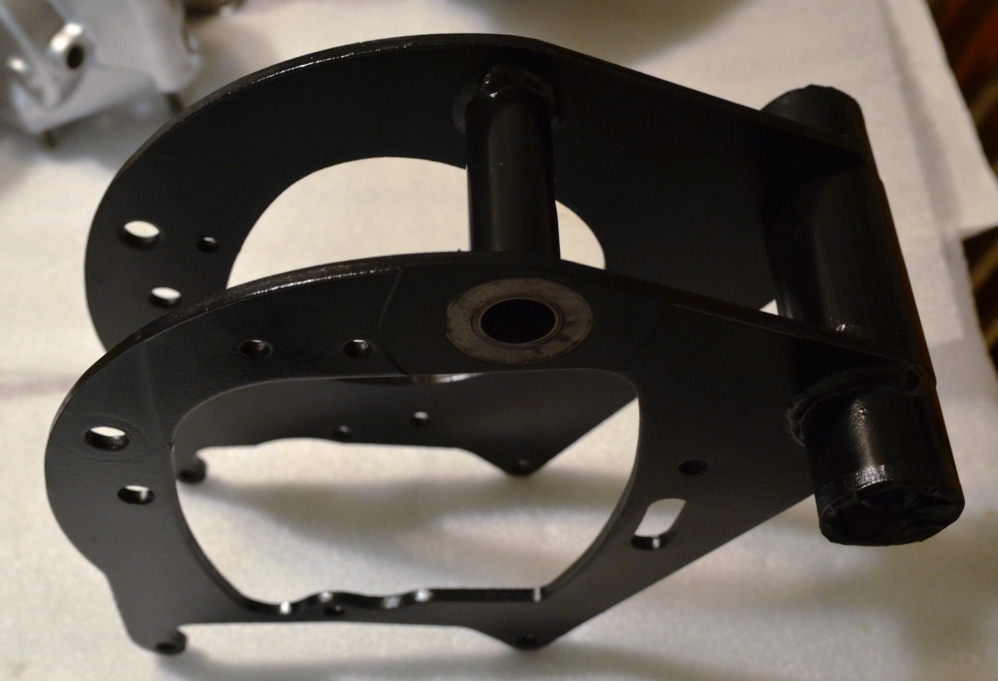
The engine/gearbox cradle was covered in grease
and grime and where not greasy, rusty. Once I cleaned it I realized that about
90% of the paint was in good shape
so I didn't blast it. I sanded down all rust and smoothed all chips in
the paint and spot primed with sandable
primer. Then I gave it an overall sanding and finally several coats of paint.
Looks great now and the gearbox
can go in it as soon as it it done.
Between steps on the cradle, I worked on the frame. The steering head bearings
are out and the VIN tag is removed.
About 1/3 of the frame is cleaned, sanded, and primed. Since Norton frames
are one-piece, I can't blast them so
I refinish them in sections. It sure is nicer to work on Triumphs that are
not OIF since I have a blast cabinet big
enough for those frames.
September 9, 2018 The frame is now clean, rust free, and primed. As soon as
there is a lower humidity, wind free day,
I'll hang it up outside and paint it. I can prime in the shop because
I do little sections at a time and hold
a piece of cardboard behind the area being primed. While possible with paint,
the paint I used must have all coats
within an hour so it's not possible with that paint. It's the only
single-stage paint I've found that
looks original and is strong.
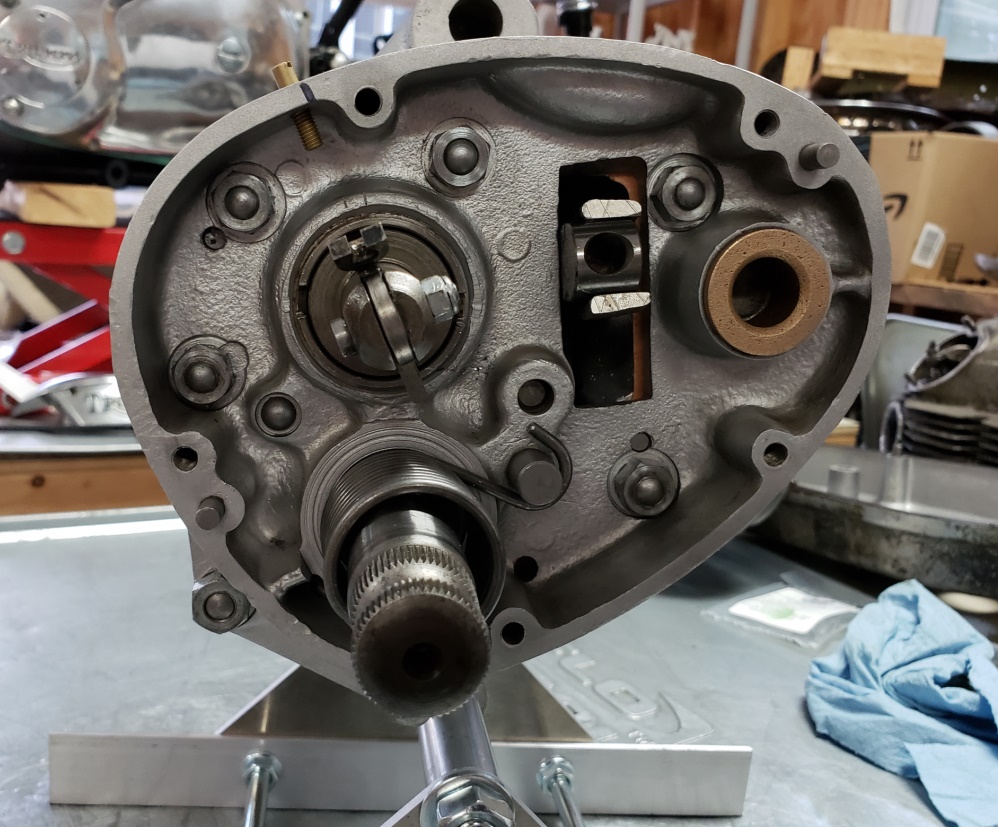
September 16, 2018 The Andover order arrived Friday and I started building
the gearbox yesterday. In case you're
wondering, building a gearbox when you have everything is about a hour job to the
point in the picture. I know how
to do it, but was really starting to think that I forgot! I must have put
it together 30 times. It would turned
freely and go through all gears until I put the inner cover on. I kept thinking
I had some gears switched or some
bad gears. I gave up yesterday and decided to start fresh today. Same
thing. Then I noticed that without
the inner cover on, when I turned it by hand that the mainshaft 1st gear would move
up and down - strange I thought.
Then it hit me - I couldn't believe it! The mainshaft is bent! How
it was possible to be bent and a running
bike when last parked is beyond me - I'm thinking that it wasn't - I think
the last person couldn't get it working
and parked it. The bend is between the 2nd and 3rd gear.
Fortunately, I had a good spare mainshaft and thirty minutes later it looked like
the picture, layshaft properly shimmed
and everything torqued. I'll polish the outer case, install it, and it
will be done.
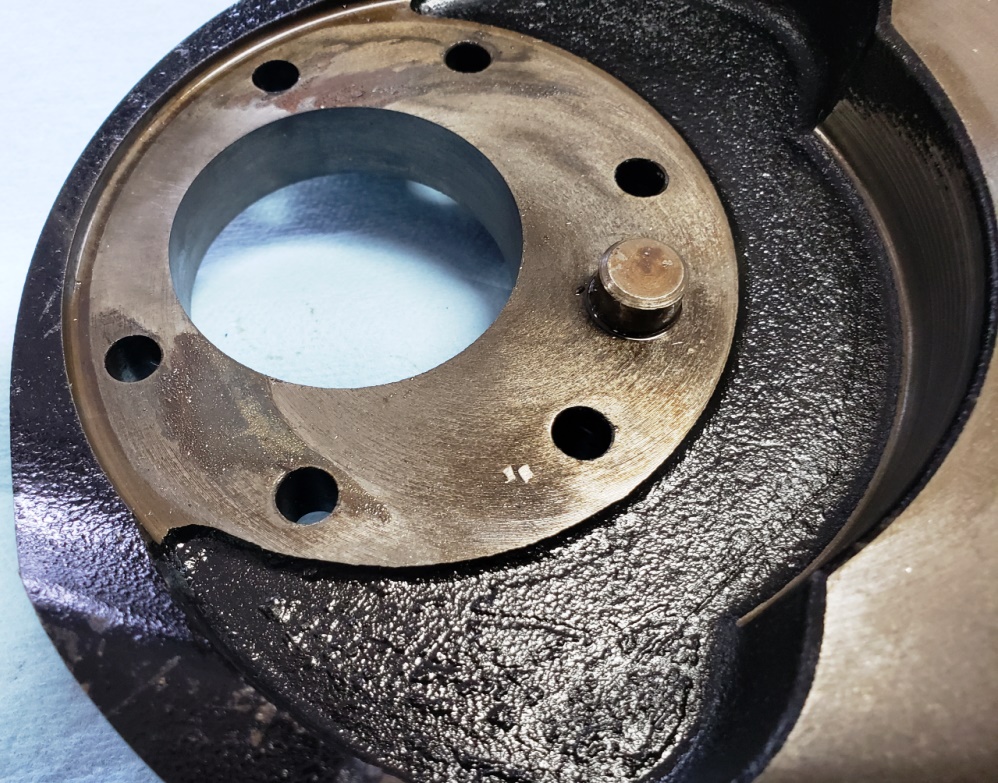
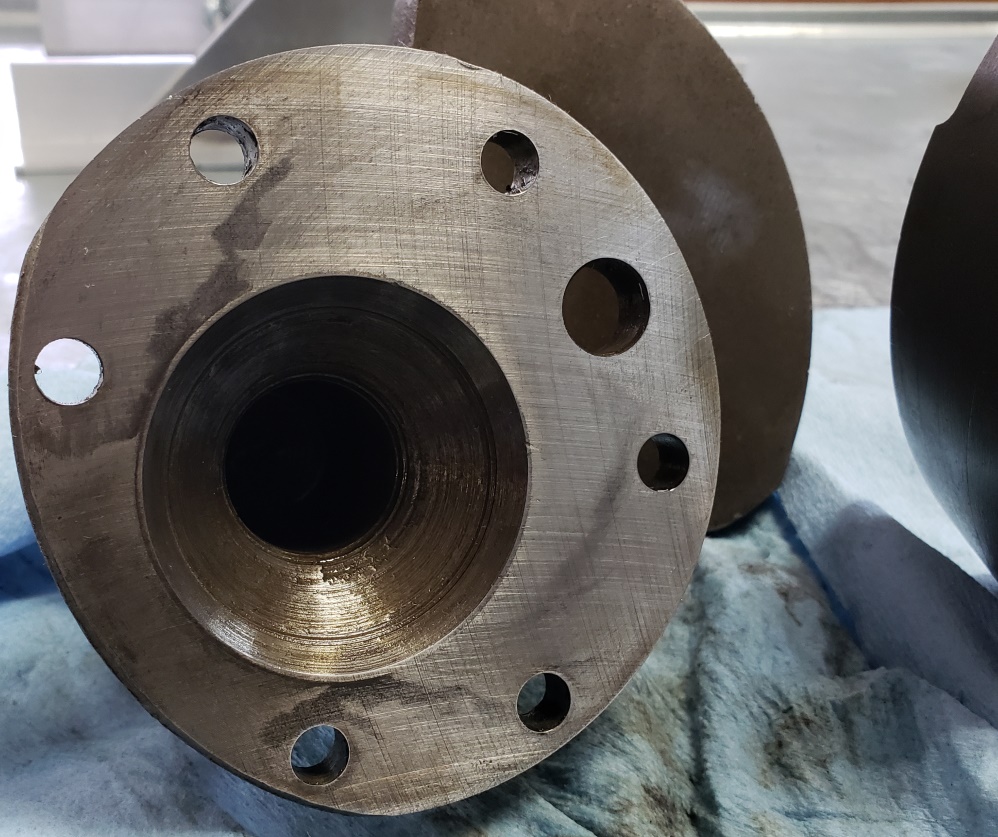
September 20, 2018 The heatwave finally broke! I've working on multiple things.
The crankcases are finally on
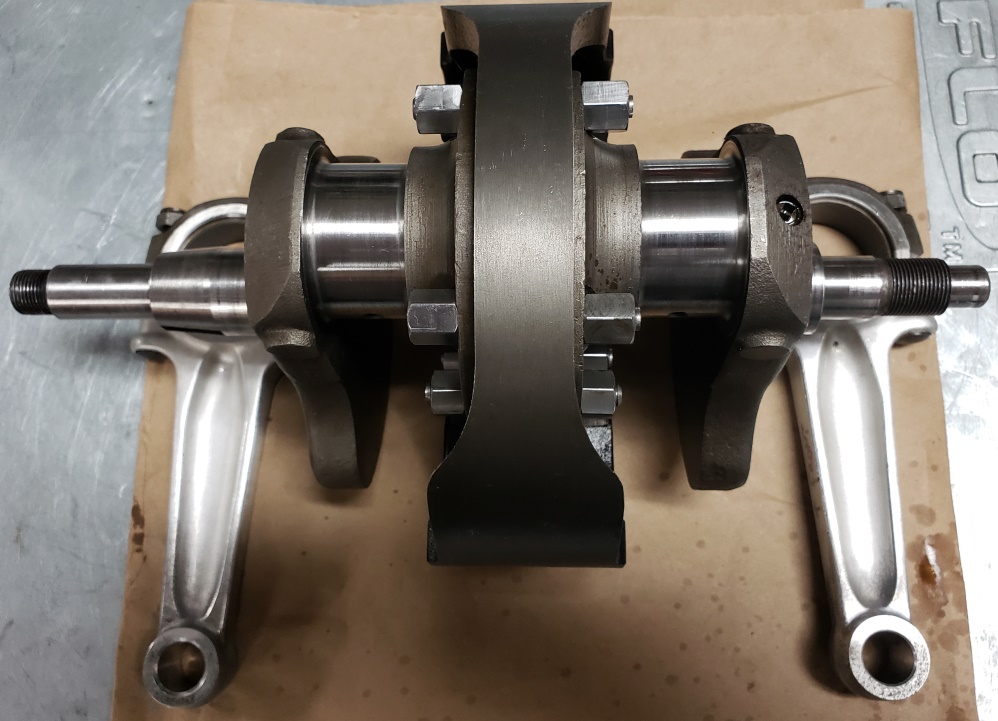
their way back so I started on the crankshaft. Notice in darkness in the 1st
picture on the mating surface of the
flywheel. Whoever last had the crank apart covered the bolts with something
like gasket varnish. It seeped into the
mating surface and in various areas on the outside. The crank was certainly
not straight due to this. A great
deal of time has been spent with a brass brush, WD40, and alcohol to get it off.
it's a little hard to tell in the 2nd and
3rd pictures, but it is gone even though the metal is stained. In the 3rd picture,
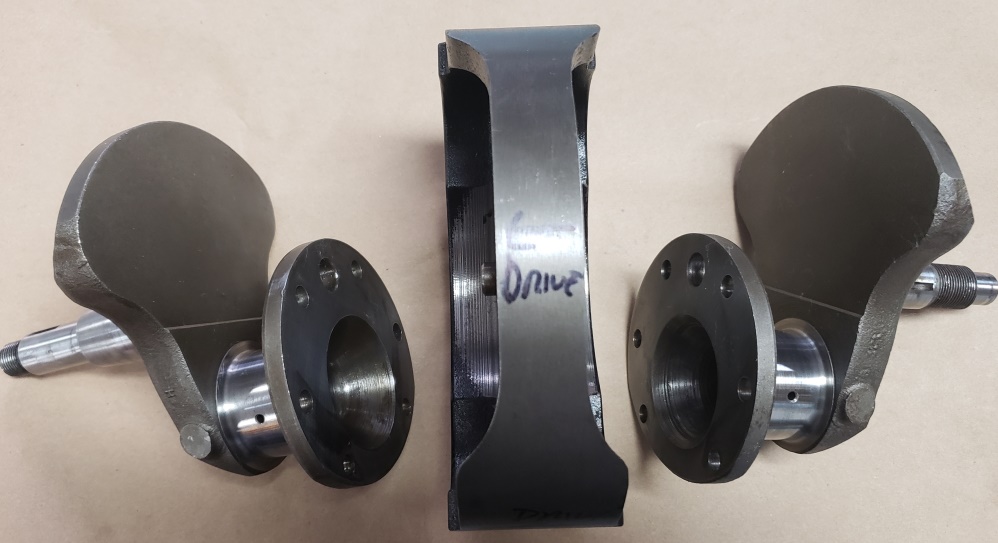
everything is spotless and ready to go
together. In the 4th picture, the crank is back together and the rods are
ready to go one.They have been cleaned,
a couple of small nicks removed, and polished. They have some discoloration,
but are in great condition as are the
journals. I ran out of time today. I'll put the superblend bearing
races on and then the rods and the crank
will be ready to go into the cases.
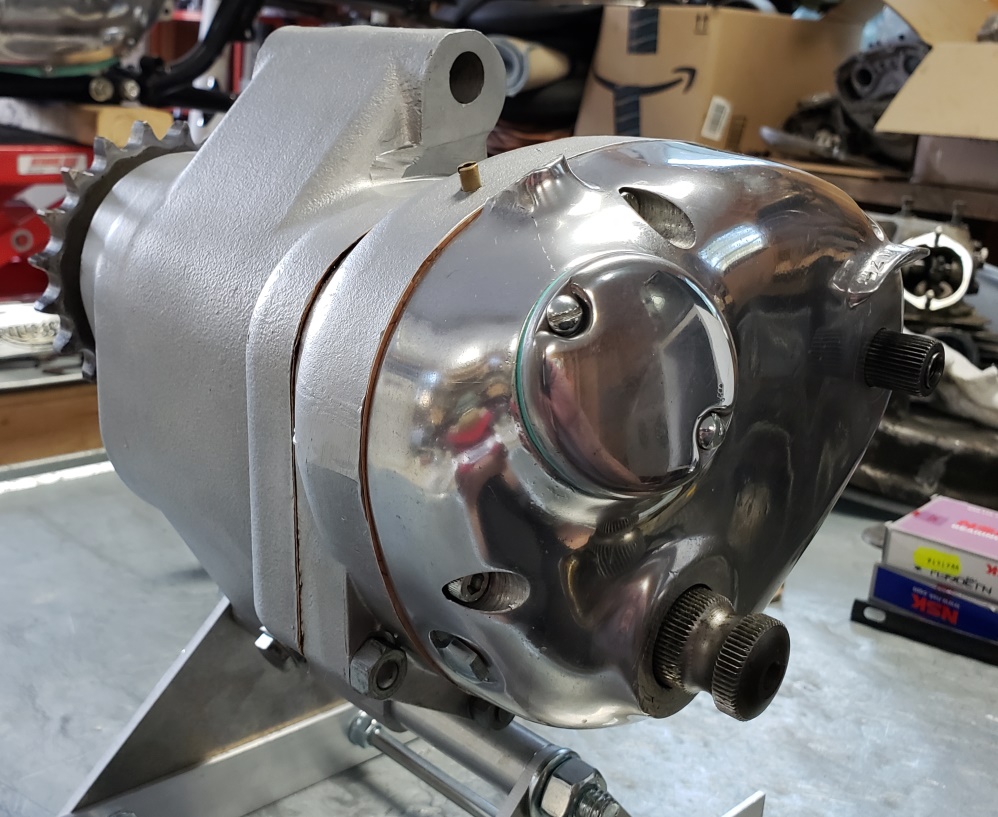
September 23, 2018 Not a good day! Spent a long time polishing the best outer
gearbox cover I have, changed the seals,
inspected, cleaned up, and reinstalled the gearchange mechanism and installed the
outer cover. Tried to do the final test
of the gear changing and the gearbox wouldn't turn - AGAIN. I guess I should have
known - bent mainshaft without bending
the layshaft, in hindsight, makes no sense. So, it's all got to come back apart
to replace the layshaft. Fingers crossed
that I can get the bearing race off the layshaft without hurting it because I don't
have a spare bearing. At least
I tested before putting the gearbox in the cradle!
September 28, 2018 The weather is finally nice! I finally got the gearbox
built and working properly - what a nightmare!
Tried about 20 ways to get the layshaft bearing off and finally modified a puller
that worked without damaging it.
Then I screwed up repeatedly on the shift quadrant. Sometimes, the simplest
jobs take the longest!
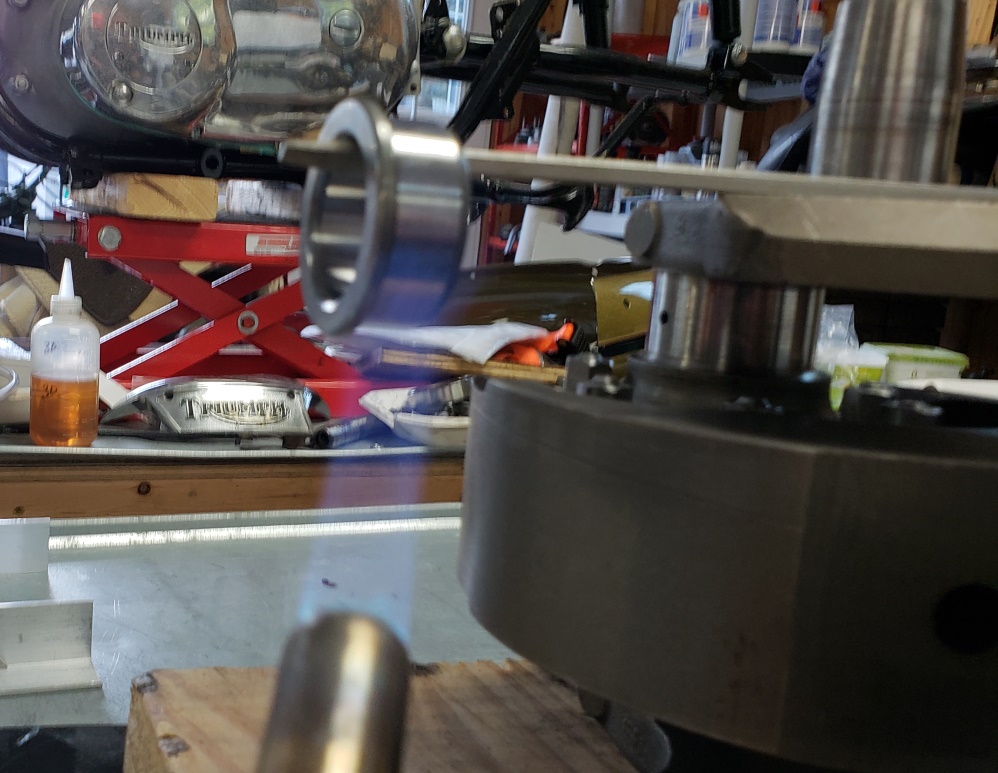
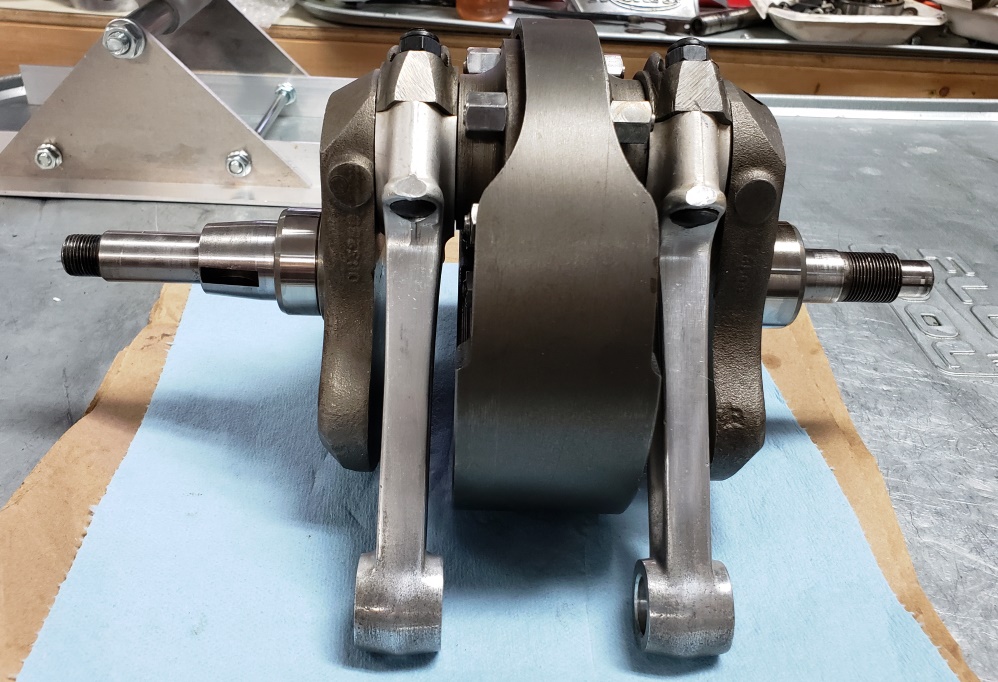
September 29, 2018 Finished cleaning and inspecting the crankshaft and conrods.
The first picture shows me heating
the inner drive side bearing race. I didn't heat it enough the first time and
had to try again - dropped right on the
second time. The timing side went on without problem. The second
picture shows the crank ready go to in
the cases. The bearing shells were fine, but I always replace them - they
don't cost that much. Of course,
I used new nuts.
September 30, 2018 Pretty good progress today. The bearings went in the cases
without trouble. I had to restore the
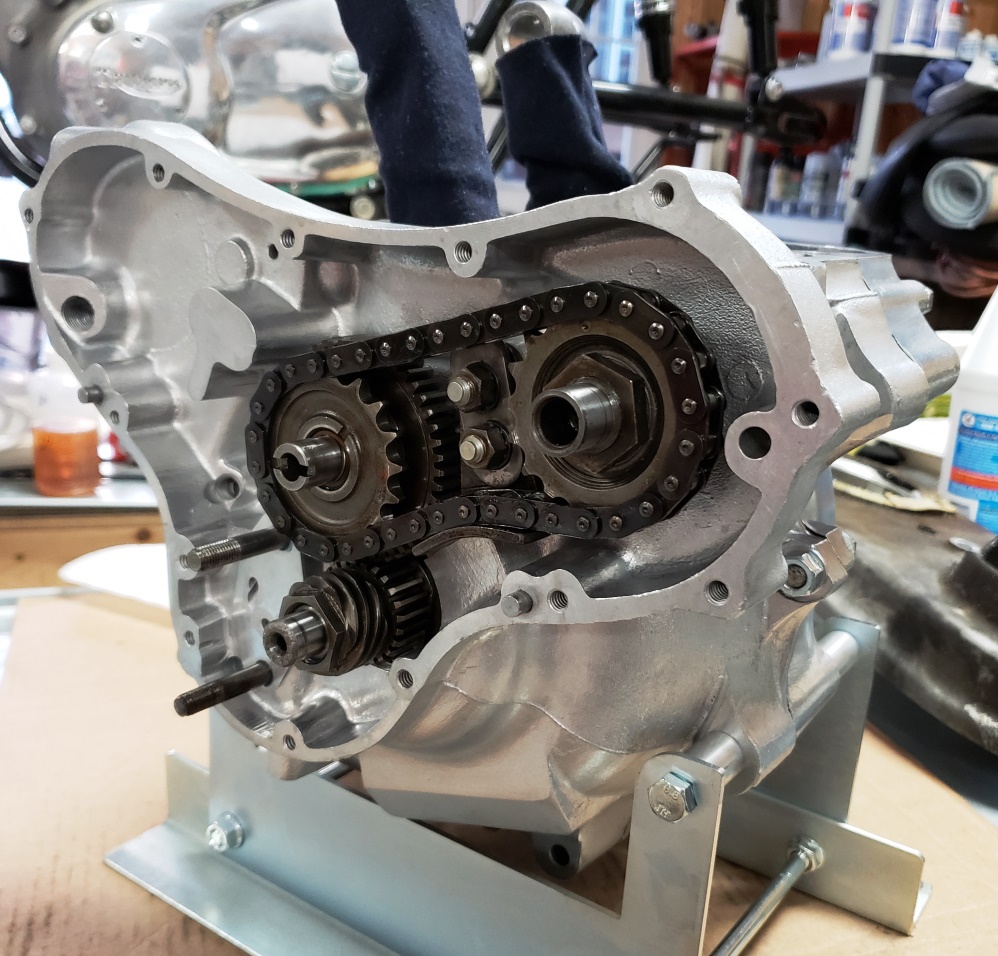
top front and rear crankcase studs but that's not hard. The cam key was destroyed
when I took it out, so I had to use a
spare that was nicked up. Spent a while recovering that but again not a big deal.
I never realized that the cam can come
out of the timing side bushing with the key still in it - I won't take them
out in the future. In the picture
you can see that it's all together. It's not torqued and I didn't
put the oil pump on because the timing
chain is more worn than I thought and the adjuster is at it's limit. I
have a new chain that I'll have to
put on so now I have to go through the PITA of getting the cam sprocket off, again.
Also, CNW was out of the reed
valves so they sent the cases without it and said that they would include the valve
and plug kit with the oil tank - not
sure where the plugs go so I'll wait for that before redoing the timing chain.
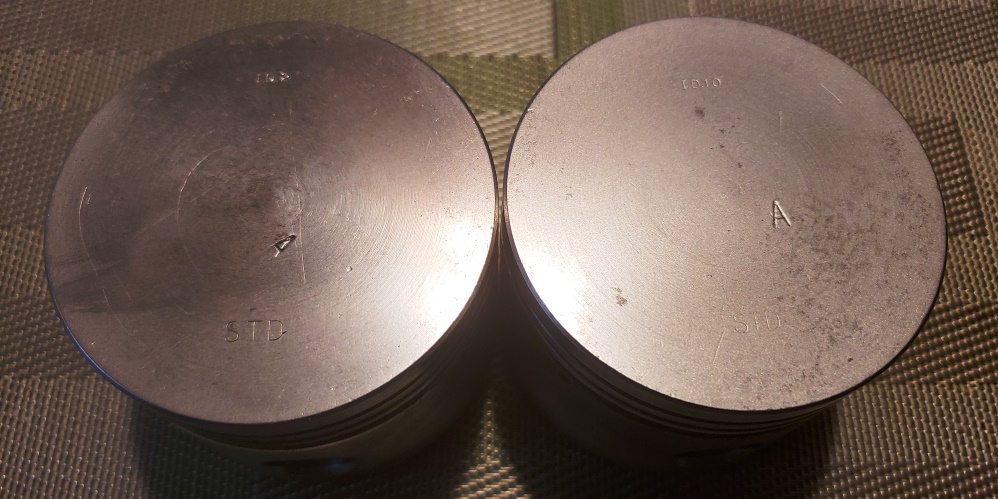
October 2, 2018 The oil tank arrived from CNW, but they forgot to include the crankcase
reed valve. I called and they
put in in the mail today. Removed the broken stud in the cylinder block and
searched my spares for a replacement -
found one along with a correct nut. Removed all carbon from the pistons and
polished them. I'll a little
more and do a final cleaning before installing them. At the right angle I
can see myself in the left one but it has
a couple of fine scratches. The right one is stained but no scratches.
The oil drain holes in both were completely open, but the small oil holes on the
right one were clogged with carbon and
the carbon was thick on the right one as well. These pistons and cylinders
are standard size and clearly had very
few miles - I think the oil control rings on the right one were bad. I'll
carefully check all that.
Need to scrub and paint the barrels, and lightly hone them. Hastings rings
are on order.
October 4, 2018 Waiting for parts and more importantly, I can't walk!
Saw the podiatrist today, got a shot, and
some pills. The weekend is supposed to be nice, I'm hoping my right ankle decides
to be operational again soon!
October 10, 2018 I'm recovered and can walk again. The weather is
still sticky and that in combination with
my foot problems has slowed progress.
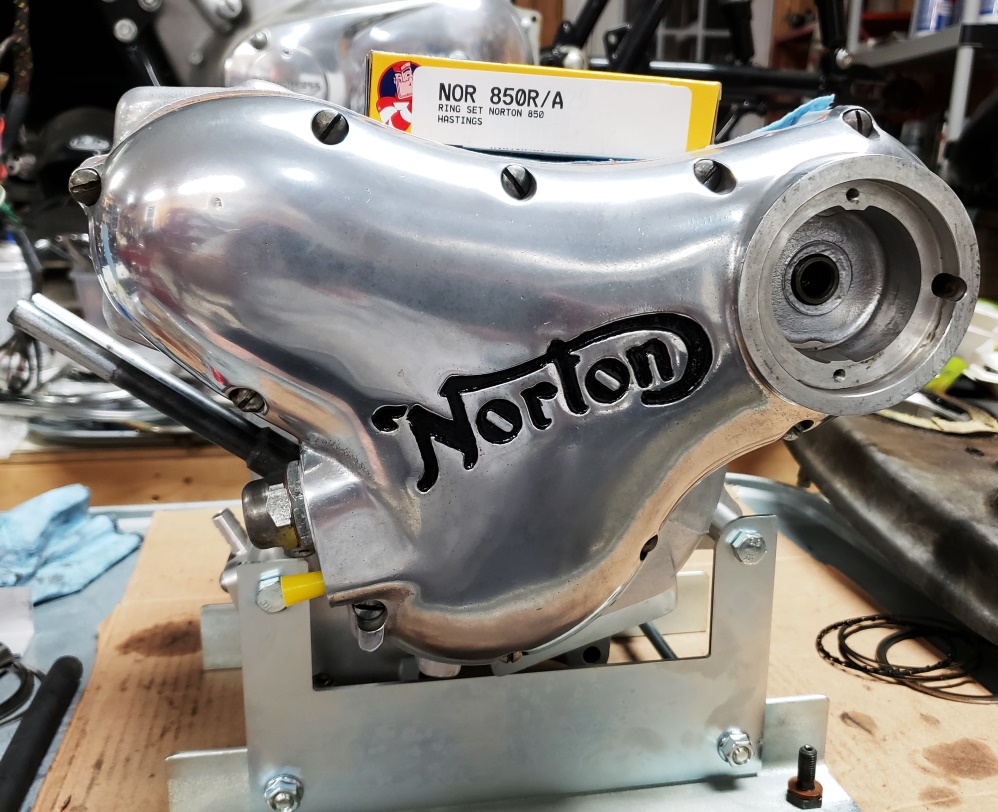
The reed valve parts and rings came in. Installing the reed valve was more
work than is was supposed to be, but I
got it done. I did have to take the timing side all back apart to install
the plugs. It's back together
again and I polished the timing cover, painted the inlaid Norton logo, and installed
it.
I forgot to order new screws so I'll either polish or replace them later.
As with other things, the oil pressure
relief valve was so tight that I thought I might have to replace it - I finally
got it apart, cleaned,and installed.
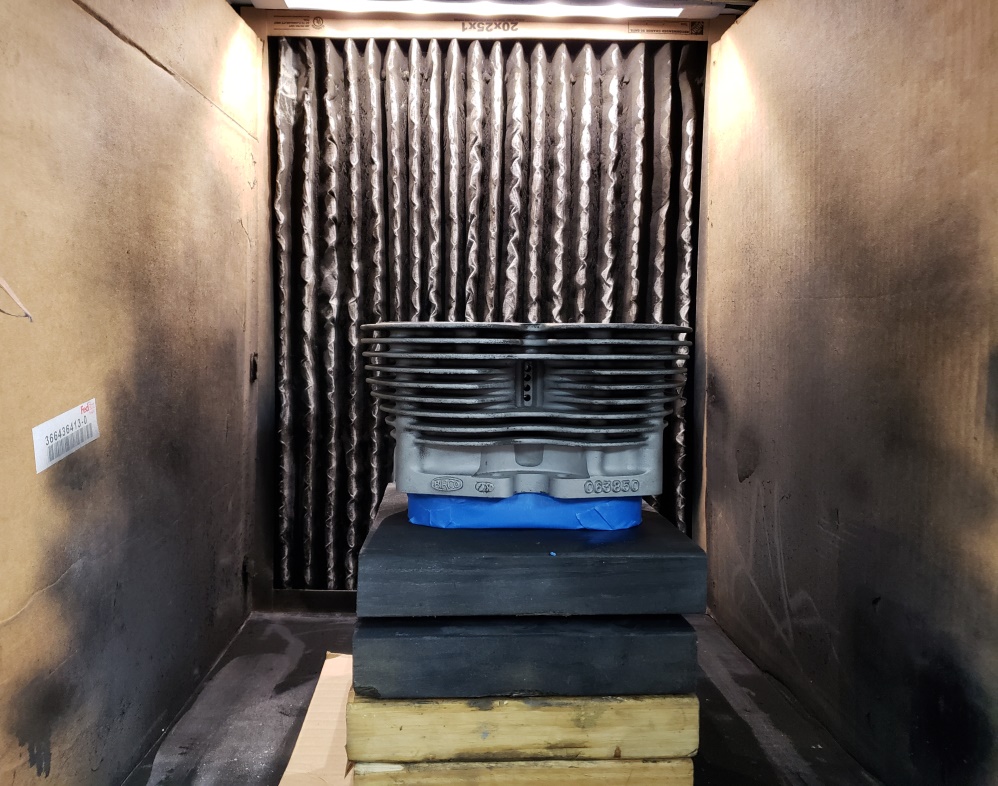
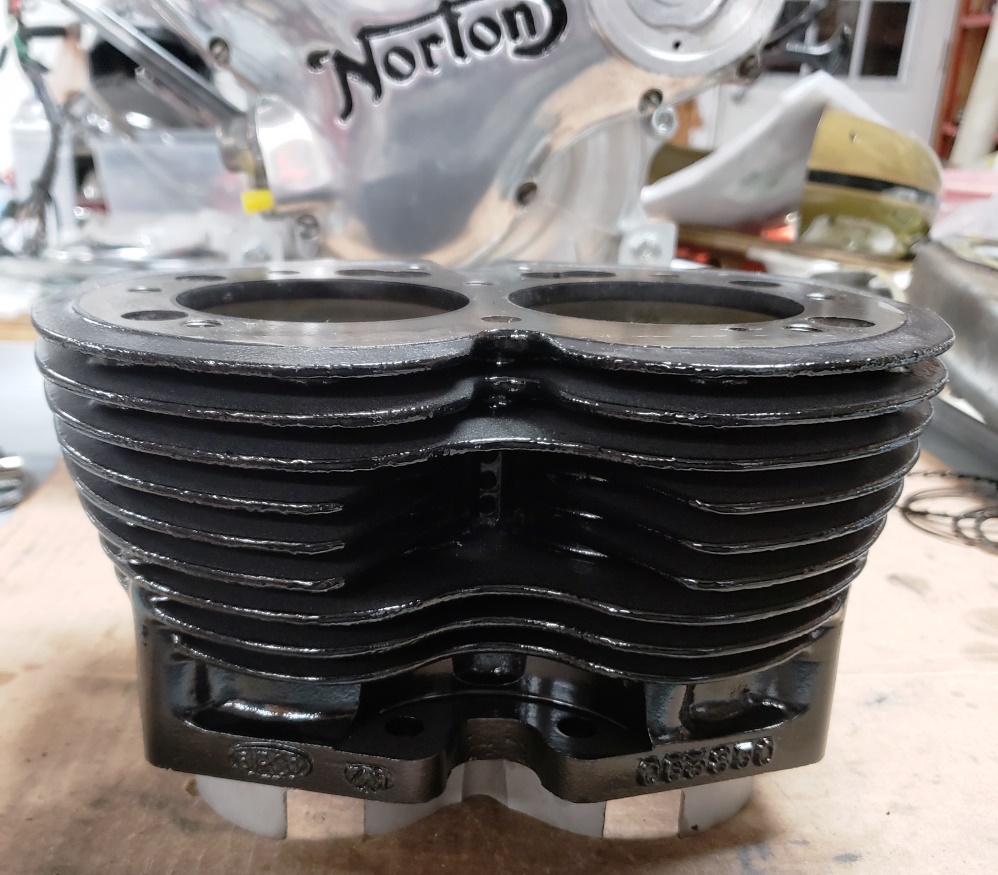
October 12, 2018 The cylinders are blasted and masked. All coats of the barrel paint must go on within an hour so I'll paint them tomorrow. When I paint, I line my power coat cabinet with cardboard so I can collect the over
spray and paint inside. Between the top two boards holding the cylinders is a lazy
susan bearing so I can turn them as I paint. I have them elevated to I can spray upward, straight, and downward. Getting cylinders fully covered takes many light coats for many angles. For Norton cylinders complete coverage is really important since they are cast iron
and rust easily.
October 17, 2018 I painted the cylinders on the 14th. The look much better
in person than in the picture below. Today,
I honed them lightly and thoroughly cleaned them. They are ready to go on but I'm
waiting for new nuts - the ones that
came on the parts bike were somewhat mangled.
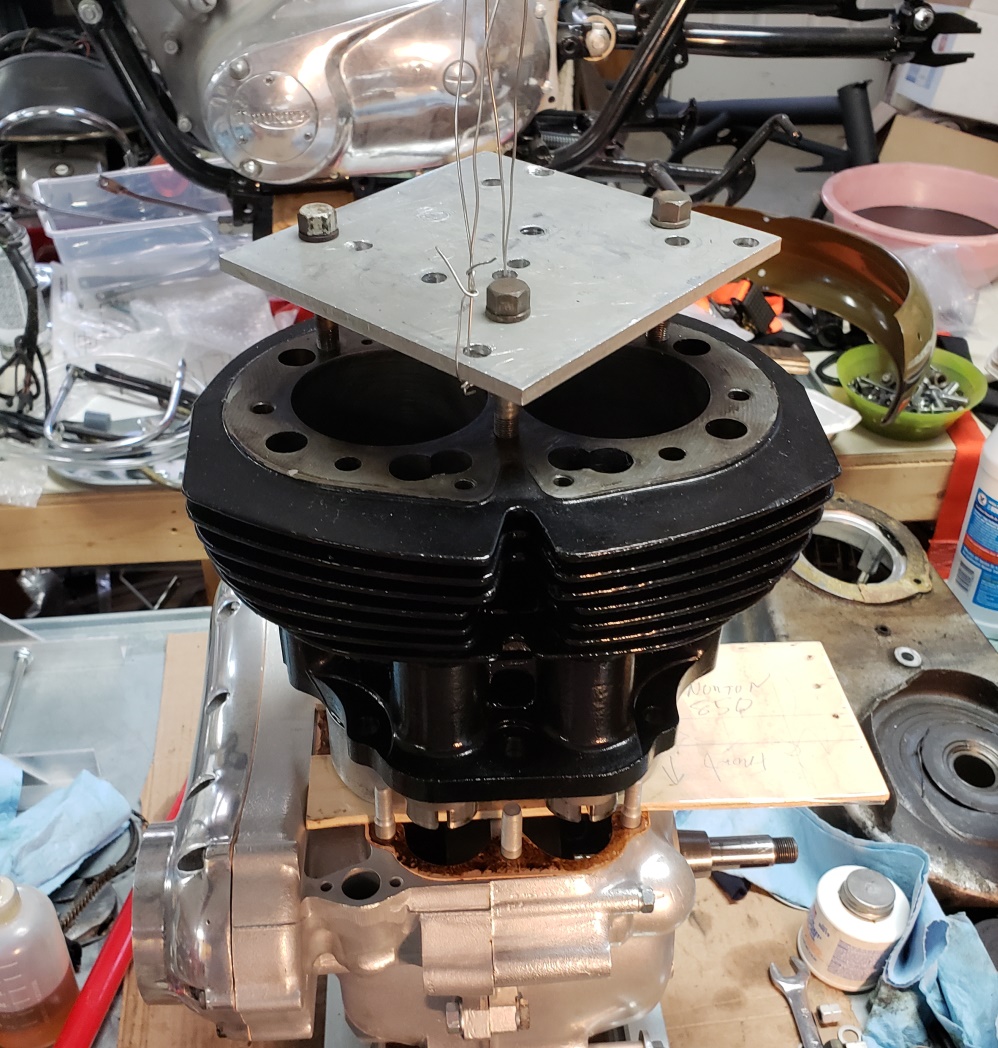
October 21, 2018 I've been fretting over how I would install the cylinders
by myself. With my messed up
shoulders and weak arms, there is no way I could hold the cylinders with one hand
and compress the rings with the other
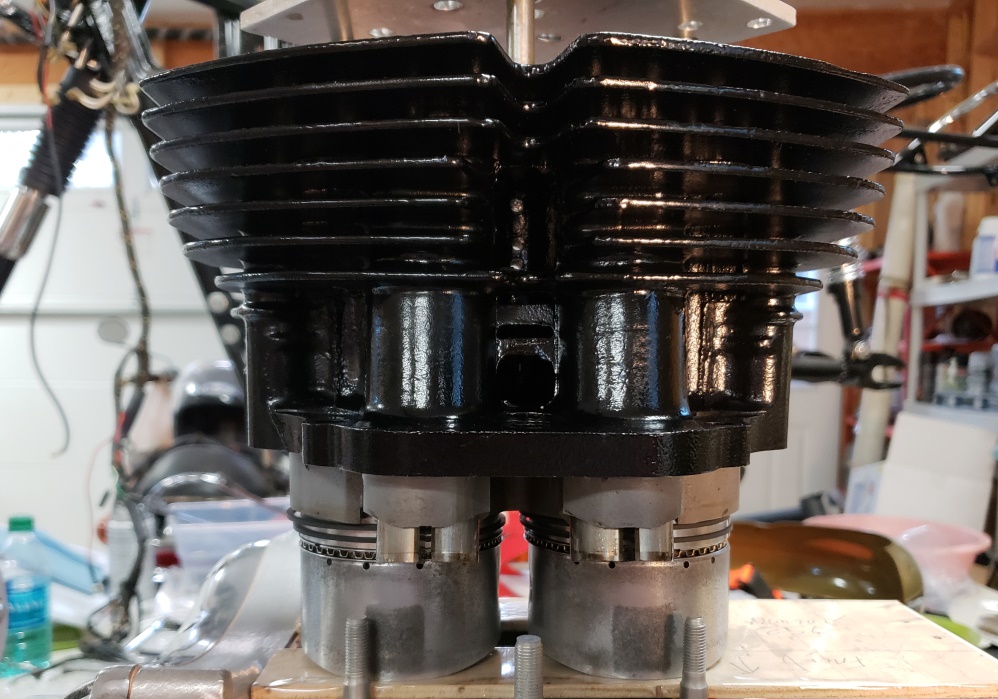
as I used to do. I didn't do a good job with the first picture below -
the cylinders are hanging from my engine
hoist. In the second picture, the piston support I made is showing and I'm
about to compress the rings and lower
the pistons. This worked out very well and I'll do it this way from now
on.
Next I'll restore the head and install it.
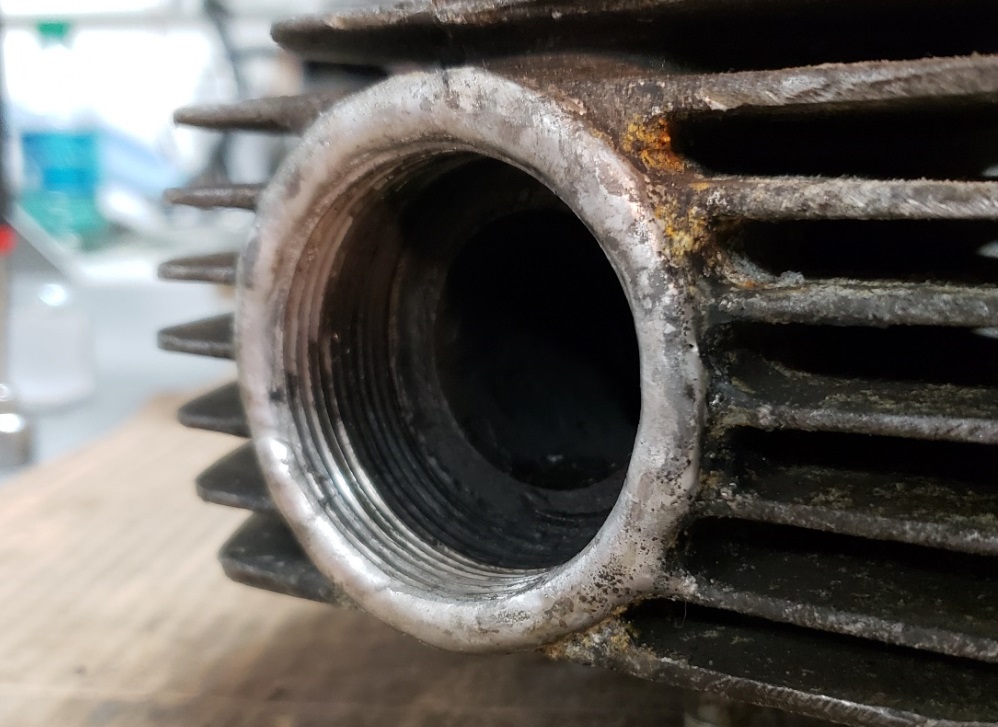
October 26, 2018 The exhaust threads are usable but the timing side had a
weld repair and the drive side doesn't look
great. So I stripped the head and sent it off to have the exhaust ports properly
fixed.
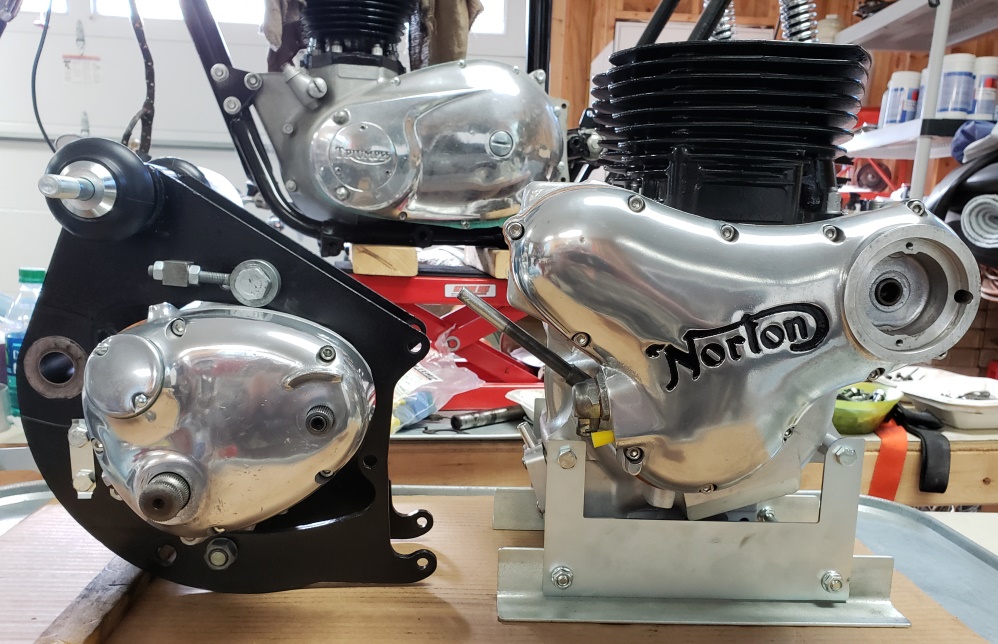
October 28, 2018 While waiting for the head, I put the gearbox in the cradle.
I won't put the engine in until the
head is installed and the frame is ready. The engine leans forward and it's
heavy enough that it will fall over. I have the frame about 1/3 sanded and primed.
November 2, 2018 Still working on the frame as time allows. I sand a section
to get rid of any rust and paint scratches
and then spray some sandable primer. Once the entire frame is done that way, I'll
give it all a light sanding and then final
paint. I have to do it this way because I have a sand blast cabinet large
enough to do Triumph frames, but not a Norton
frame. Triumph frames, except the oil in frame types, bolt together in the middle.
I bought my cabinet to do them but other
than one Trident frame, they have all been frames that won't fit :-( I
wish I had thought about that when I bought
the cabinet - $200 more would have covered a cabinet big enough for any British
frame!
November 3, 2018 Five hours of effort and the rust and scratches are gone,
the frame is primed and sanded. It's
ready for paint. Now I just need a mild day without wind to paint it.
I wish I had a place inside to paint,
but I don't.
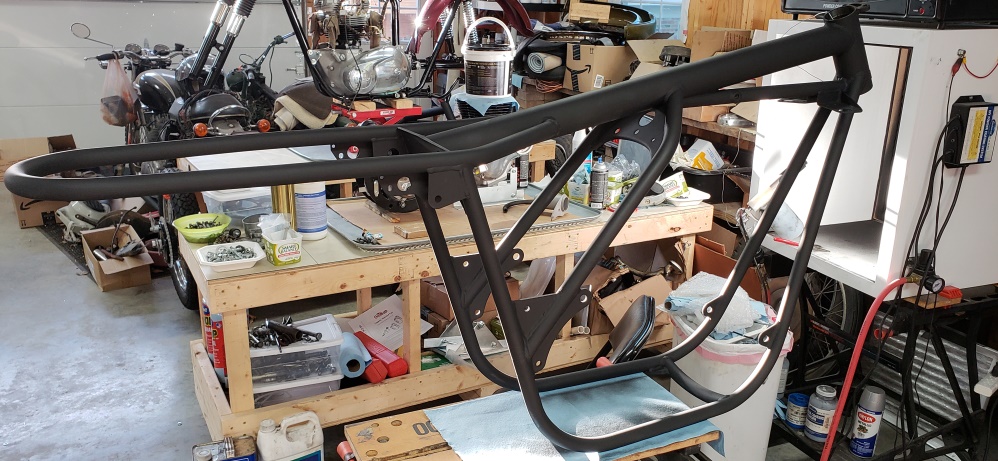
November 4, 2018 The frame is painted. it's hanging from my shop crane.
I know there are some areas where over spray
took away from the gloss and there could be areas where the coverage is not good
since I didn't have good light while
painting. Once the paint is hard, I'll inspect and fix any areas needed.
There's time since the head
will be away another week or two.
November 11, 2018 I inspected the frame and found a couple of areas where over spray
made it dull. Those area have been lightly sanded and sprayed again. The frame looks
great now. I will install the new fork neck bearings and the new certification plate
next. I won't install the triple tree until the frame and power unit are joined
and I can't do that until the head is installed. I'll also powder coated
the front isolastic mount.
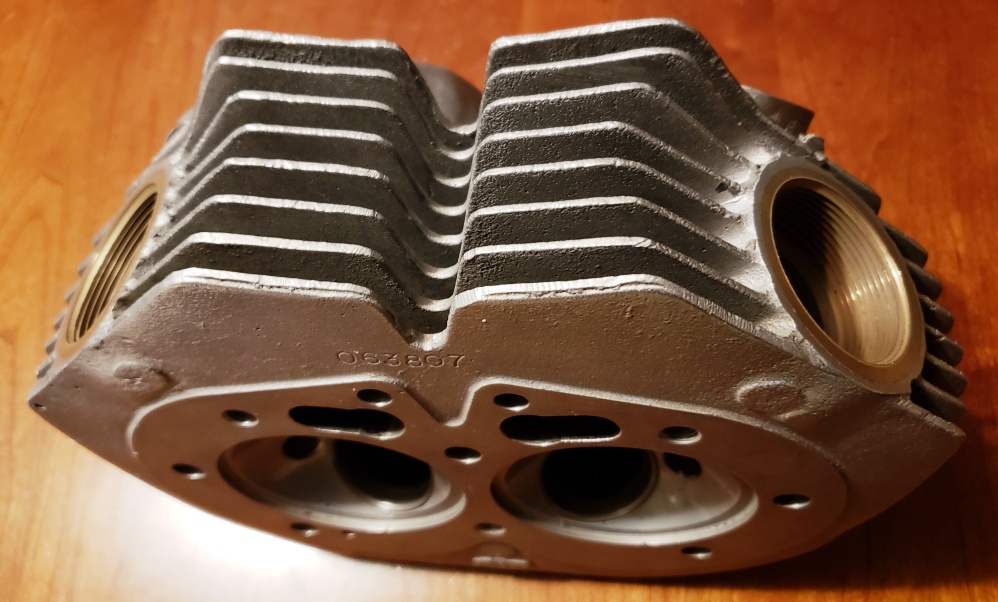
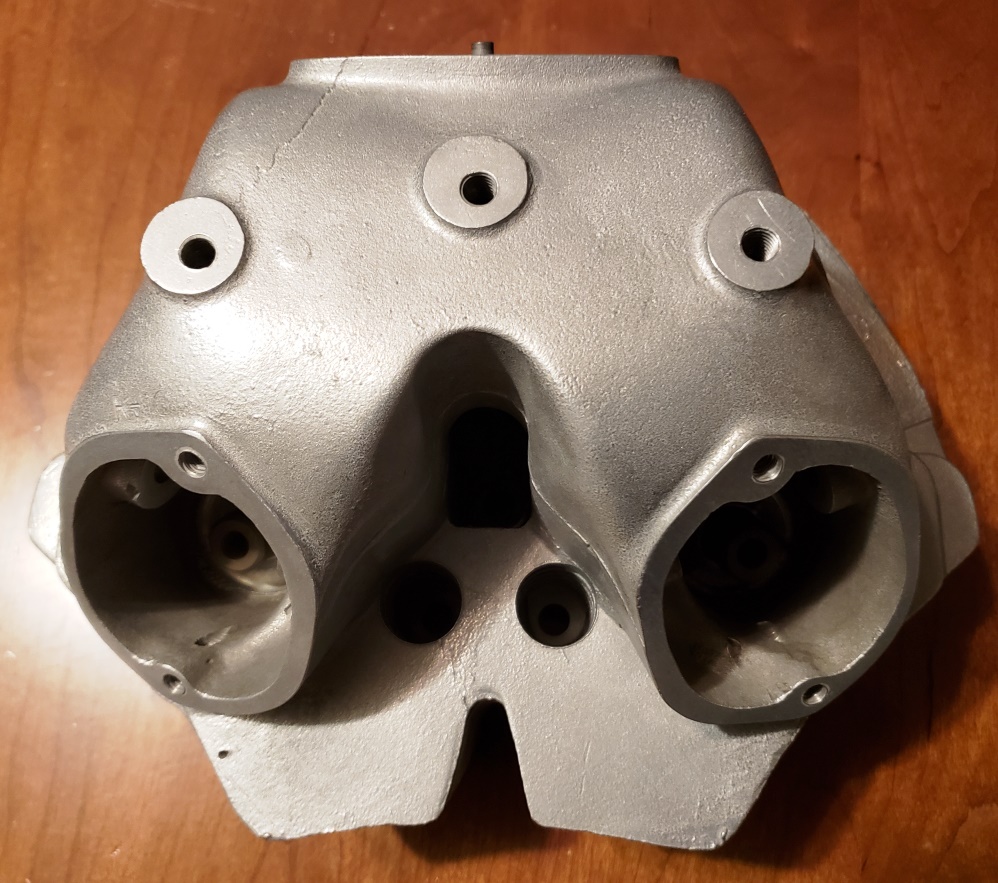
November 12, 2018 The head is back. The new exhaust threads look great and
the messy weld repair is gone. The head
is nicely cleaned. it's not any better than I would have done it myself, but
it saved me a lot of time. I do need to give
it a scrub and make sure each passage is open - I can see that the timing side exhaust
drain hole is plugged. The
second picture appears to show a crack but that's a casting flaw you'll
find on many RH10 heads - no crack.
November 13, 2018 the valves are cleaned and lapped in and the head is absolutely
clean. Big save! There was
a ball from the tumbling in the timing side exhaust drain that would have caused
major problems had I not found it.
All threads are cleaned and all passages are completely clear. I ran out of
time today so hopefully tomorrow I can
finish building the head and maybe even install it.
When I clean valves, I clean the stems, tape the stem to protect them, and then
bead blast them clean.
November 16, 2018 I was invaded yesterday by my grandson so no work done - even
when they're grown they require attention
:-).
The head is rebuilt and will probably go on tomorrow. It was just a few days
ago that it was too hot and humid to
comfortably work - today is was cold, snow, and sleet! Fortunately heat is
involved when installing the rockers in
a Norton head!
November 17, 2018 Super annoying day! I hoped to have the power unit in the
frame today but was busy with other things.
Once I got to the shop. I got everything ready and installed the head. A Norton
head is a PITA to torque due to the
multiple sized wrenches and because you can't use a torque wrench for most of
them. Once I got that done, I adjusted
the valves and before putting the covers on, checked to be sure that the oil drains
worked. The two exhaust drains
worked fine. The intake side did not work at all! I spent so much time
on the exhaust drains when I got the
head back, I must have forgotten to check the intake side drain. Now I have
to take the head off, correct the problem
and go through today again. Of course, everything will be an oily mess now. So, hopefully I can catch up tomorrow.
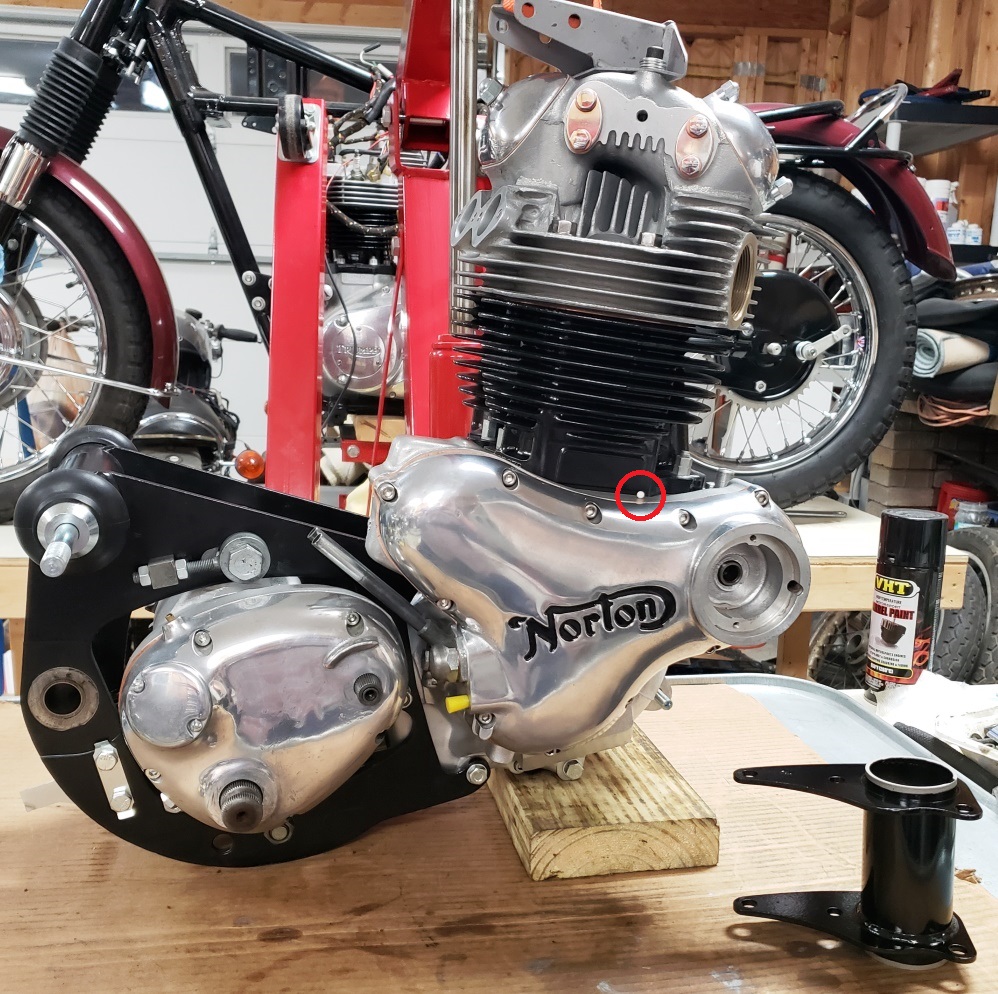
November 18, 2018 The engine is again together. Notice the red circle. That
white ball was in the intake side drain.
it's just like the one that was in the exhaust drain, but I could see the one
in the exhaust. This one was deep inside and
stuck. The power unit is together and the rocker covers are polished and installed.
The head steady is temporarily
installed so I can use my crank to support the engine.
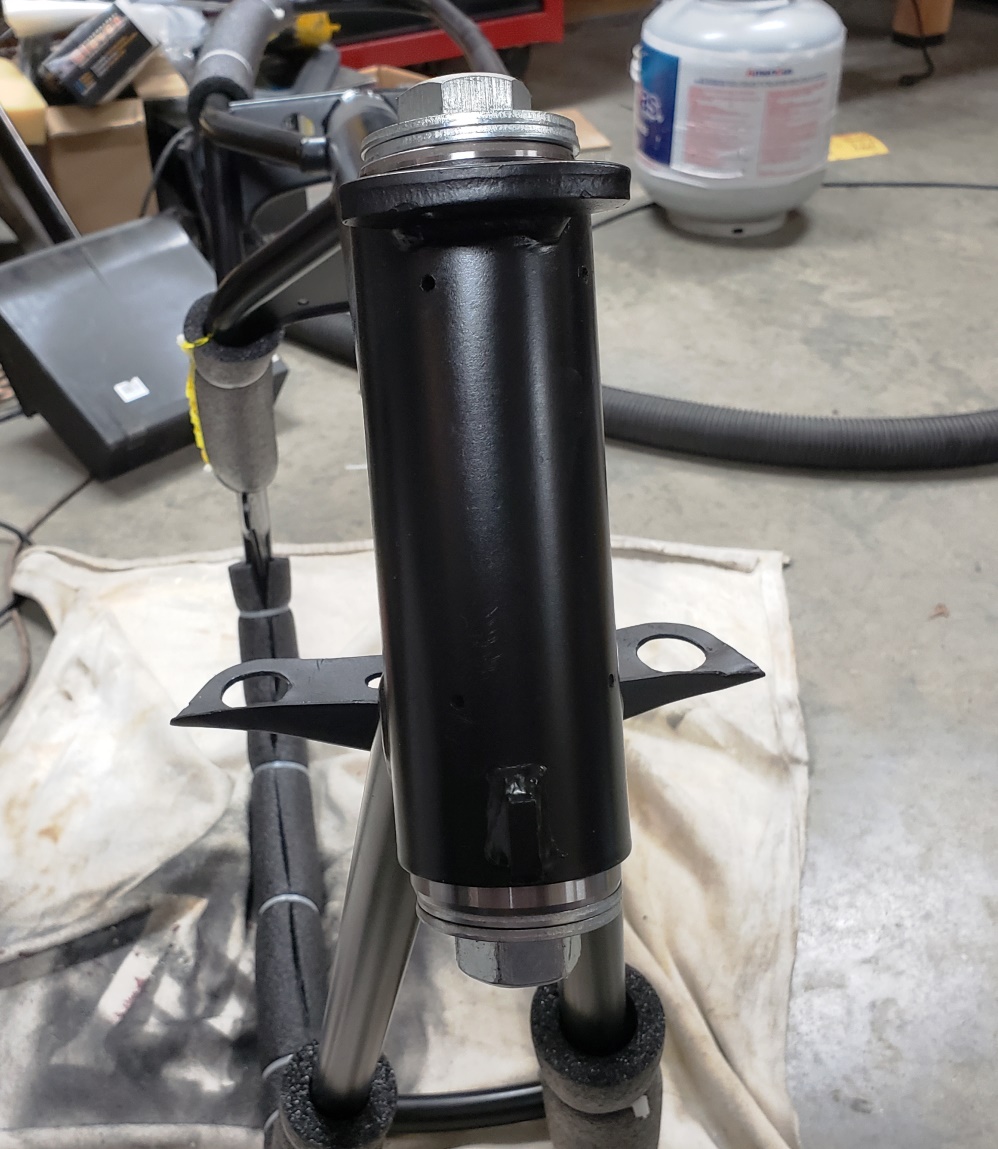
November 19, 2018 Made some real progress today! The first picture shows how
I install new bearings in the steering
head. I use a big bolt, four heavy duty washers and a nut. The washers are
just a little smaller than the outside
of the bearings. This is a lot better/easier than beating them in.
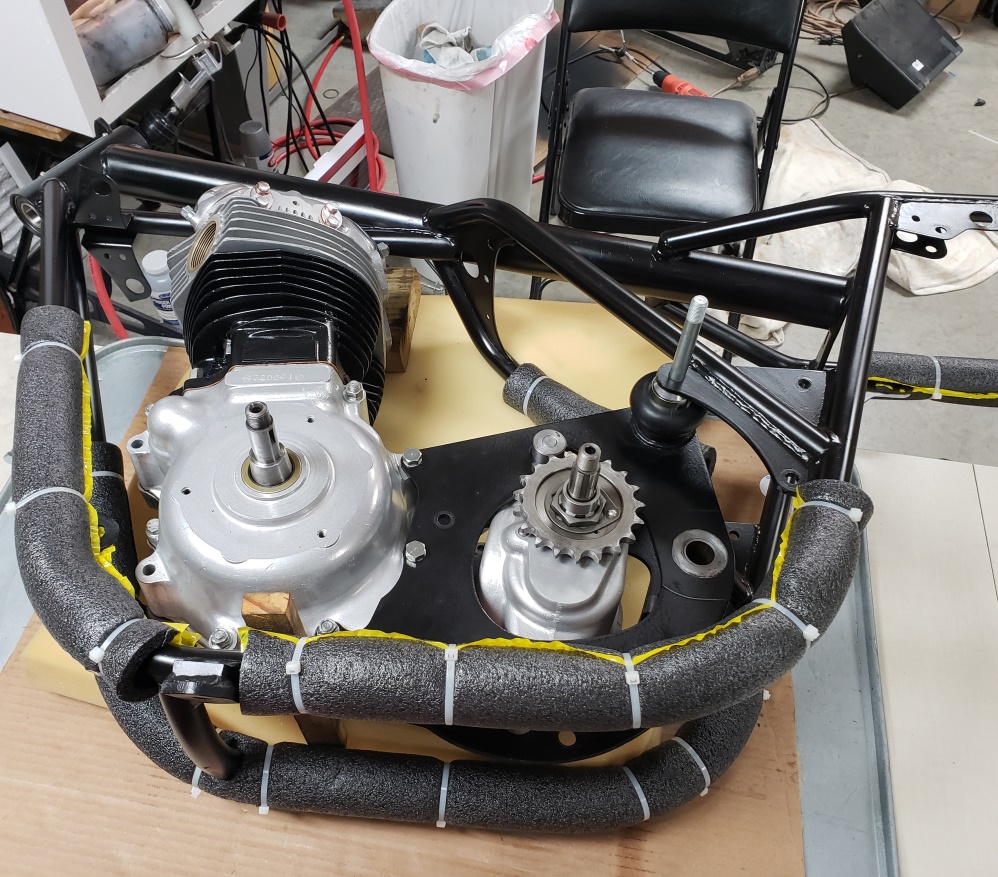
The second picture shows the power unit laying on the timing side on a thick piece
of foam rubber and the frame lowered
over it. The rear isolastic stud is in place and a piece of 1 by 2 is between
the engine and frame.
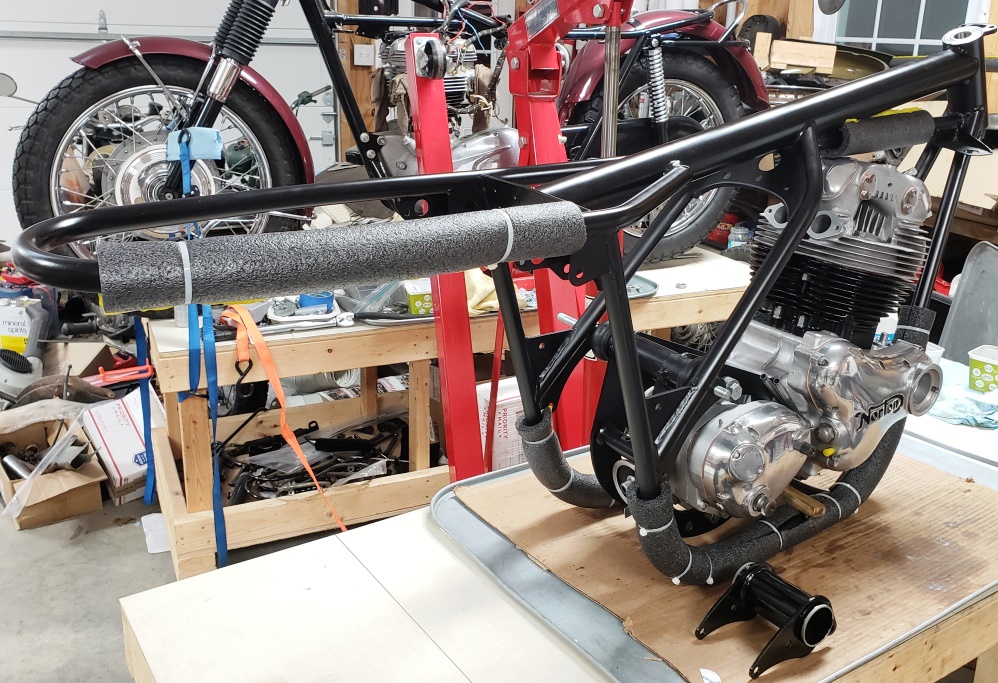
In the third picture the bike is upright. I ran out of steam. Next I'll
assemble and install the front isolastic
and I'll powder coat the head steady and install that.
November 22, 2018 The front isolastic mount and head steady are installed.
November 25, 2018 The swingarm has been cleaned, blasted, and partly primed.
Also, the triple tree has been
blasted and is nearly ready for powder coat.
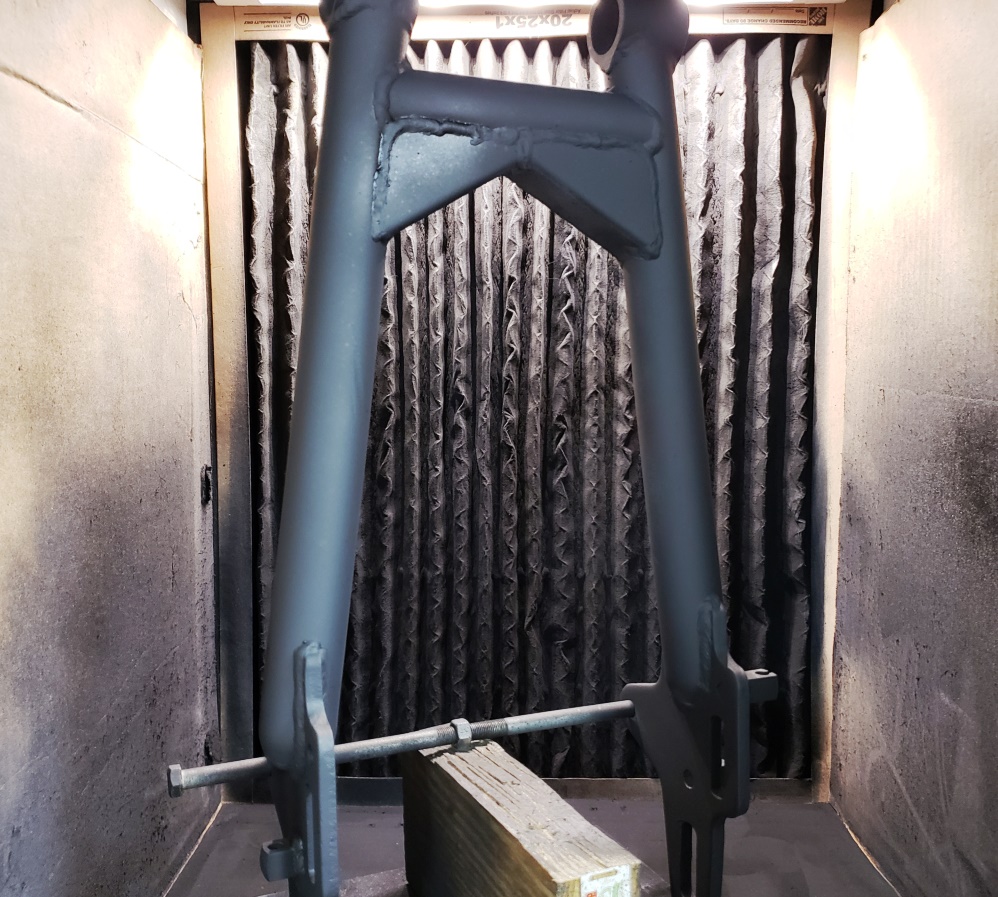
November 29, 2018 It has been really cold but I heated the shop enough today
to finish primering the swingarm.
The battery tray was slightly damaged - that has been fixed and it is blasted and
ready for power coat along with several
small parts and the triple tree. I need a warmer day to paint the swingarm since
it needs to be hung up so I can get to
it all at once and I can't do that in the power coat cabinet. I'm
starting to wish I had made the cabinet
much taller!
December 2, 2018 It was supposed to be sunny and 70 today - I would hate to be a
weather forecaster - I couldn't stand
being wrong all the time! It was cloudy, rainy, very humid, and only got to
54. I didn't accomplish anything
on this bike today.
December 16, 2018 I've been in the hospital again so not much has been done.
I did get the shop somewhat cleaned
up today, and some parts powder coated. Still stuck waiting for a decent day
to paint the swingarm. I think
I have everything needed to rebuild the front end so I may work that next.
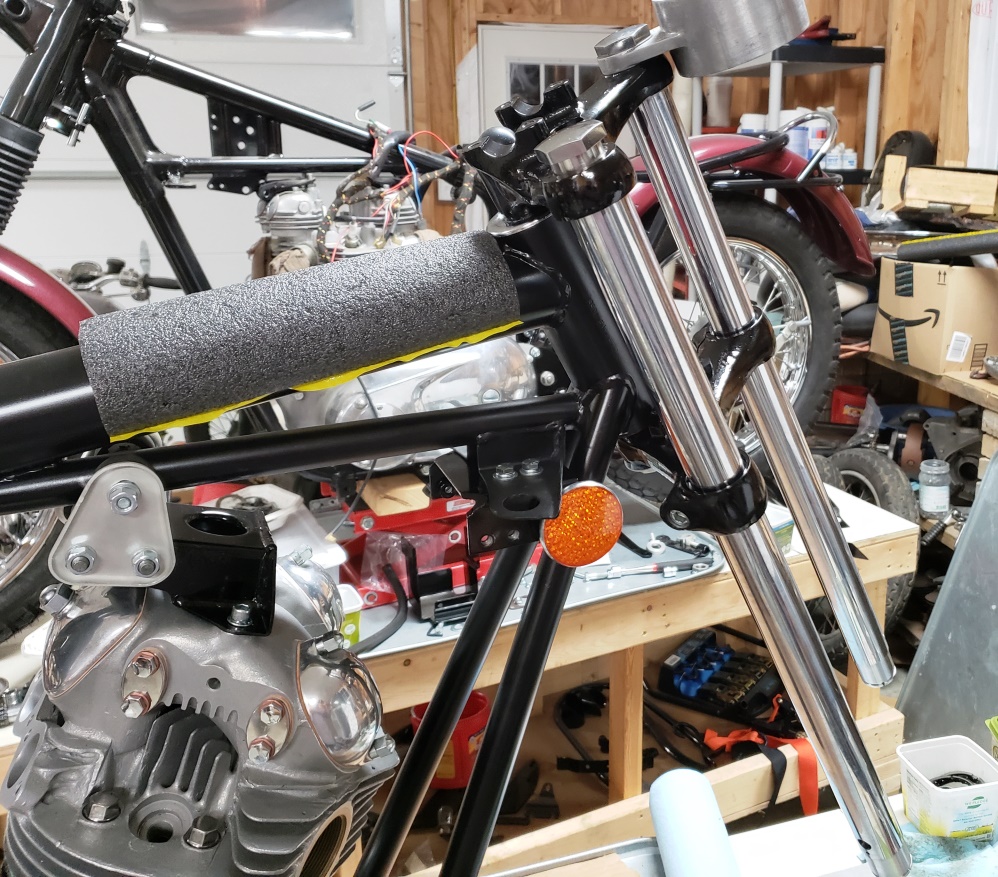
December 18, 2018 Started on the front end. When I built the 72, the bottom
yoke was bent and I didn't realize
it until a lot was together so this time I put enough together to check - the forks
are perfectly aligned so no problem
here.
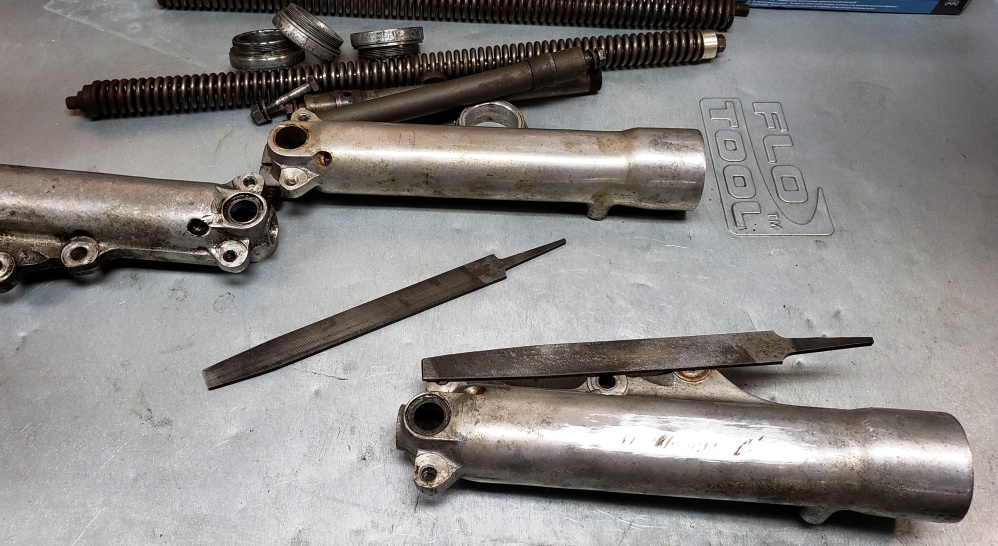
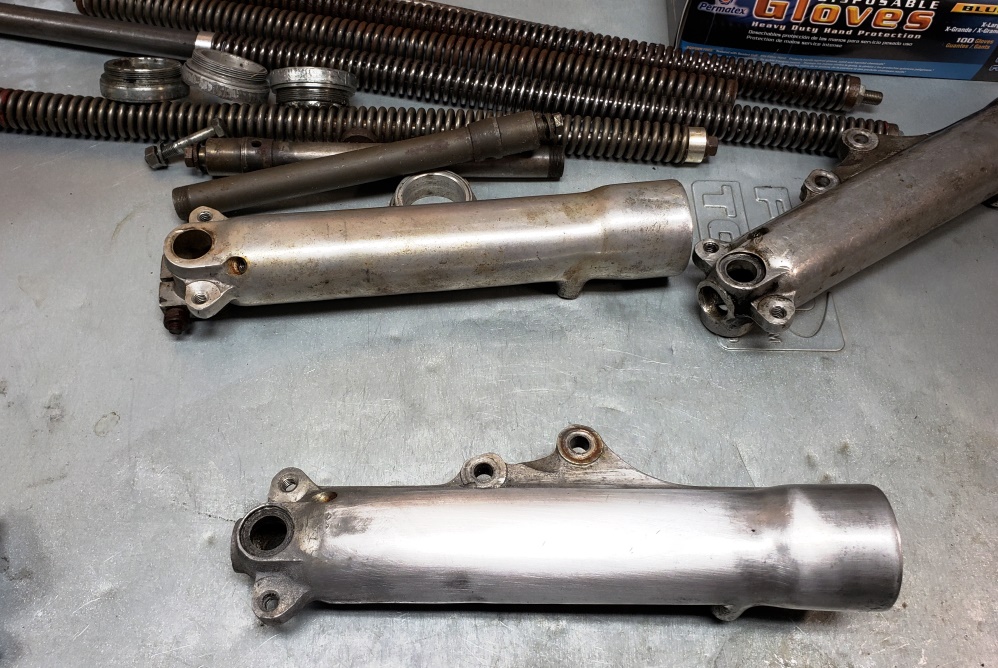
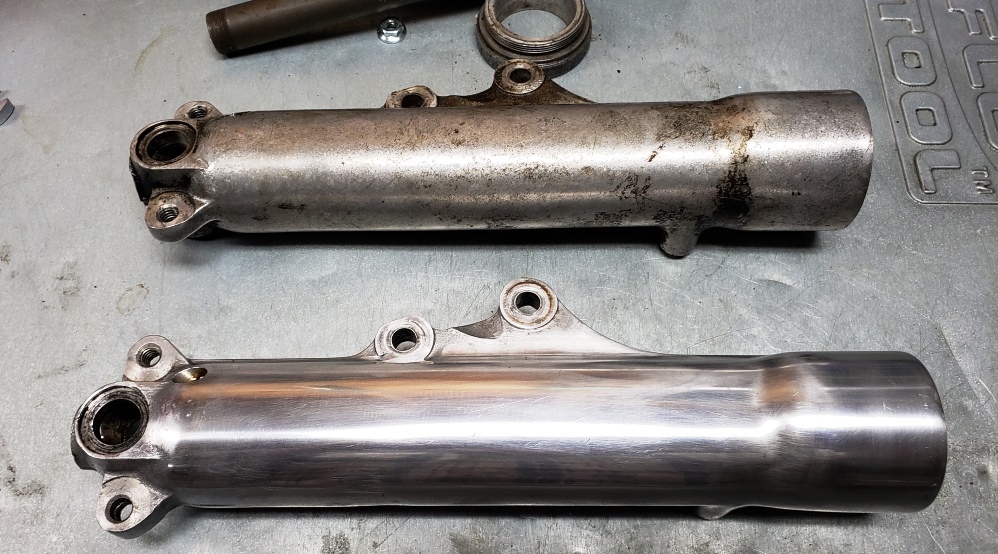
Going through my fork sliders and internals, I have the parts needed (with some
new). The better of the two caliper-side
sliders had some scratches right where they would really show (2nd picture).
Those have been sanded out (3rd picture)
and I'll do the buffing and polishing next. I have two sets of springs, one
rusty from each. Rather than use the
other of each set, I'll use new springs.
December 20, 2018 One leg almost done. It just needs a few minutes of fine
polishing. The other is dirty, but no major
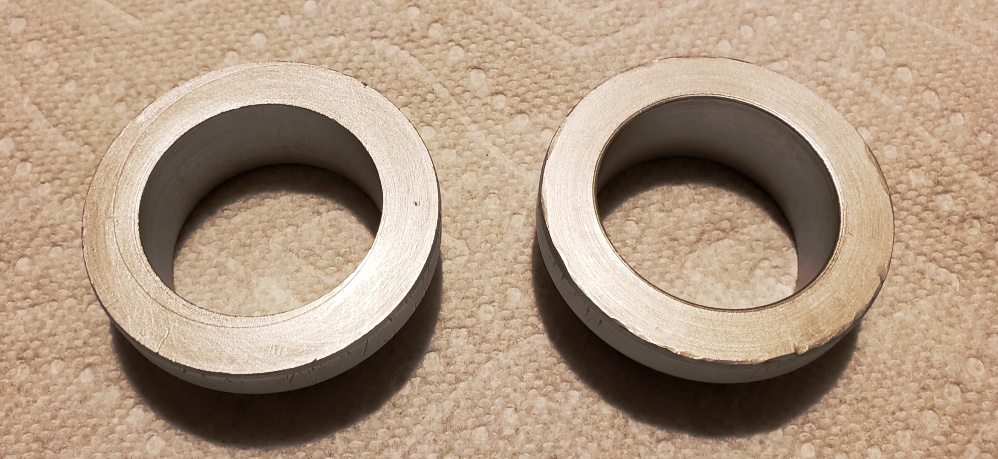
scratches so it will be easy to polish. The screw-in seal retainers for both
sets of forks were removed with the wrong
tools so I spent a lot of time filing and sanding. In the picture below, I have
re-plated them. A few parts I need
to finish the front end arrived today and the rest are coming from Andover Norton.
I still have to build the front
and rear wheels, but I have all the parts to do that (I think).
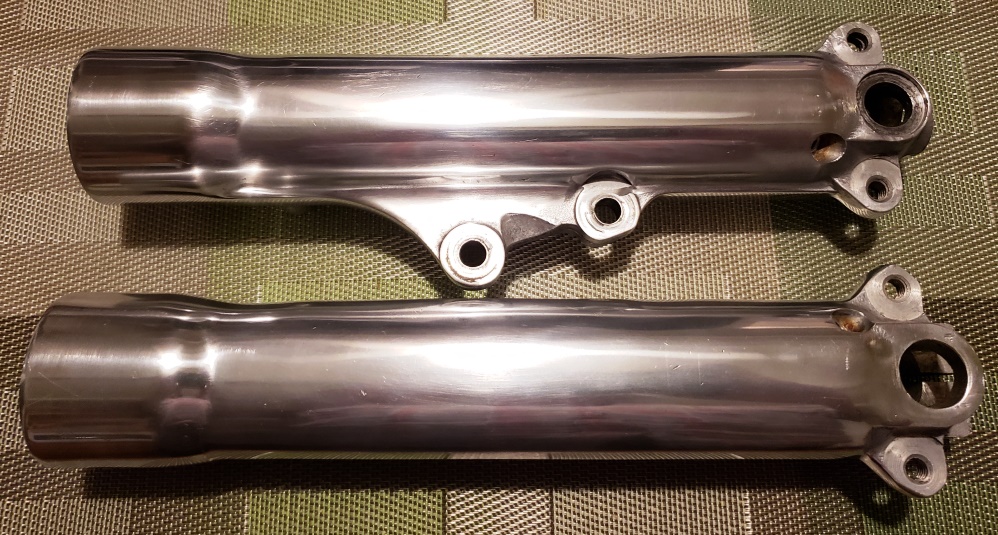
December 22, 2018 The fork legs are done and look great. It's a
little hard to tell in the picture because
the overhead light is reflecting off them. There are some fine scratches and
nicks, but they look better than they
would have coming off the assembly line so I am happy. The insides are spotless
but that took a long time to accomplish.
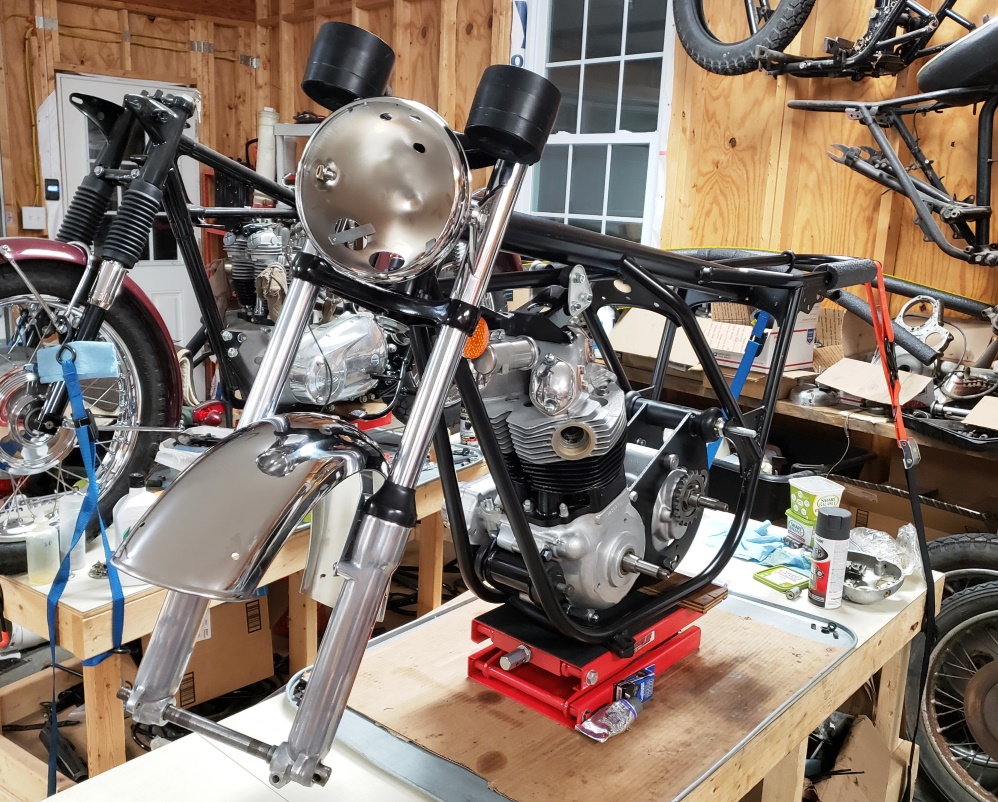
December 29, 2018 The holidays are almost over and I've finally made some
real progress. I did some work in the
past few day and was stuck because the o-rings I bought for the headlight ears were
one size smaller than they were supposed
to be so I couldn't get them installed. Once I got the right o-rings, it went
together just fine. I forgot to refresh
the speedo/tach holders so they are temporarily installed. I'll take them back
off and probably powder coat them. Also,
I have a new stainless axle I'll install when installing the front wheel.
I still have to paint the fender stays.
As with the 1972 Commando, I'll eliminate the jumble of wiring under the tank
so I used a 3-bottom grommet headlight
shell.

I would hate to be a weather person - always wrong! Yesterday was supposed
to be in the 60s and sunny - I was finally
going to be able to paint the swingarm. It was in the 40s and rained all day.
Today started out about 60 with humidity about 50 - good, except that the wind was
15-25, gusting to 40. Finally at
3pm, it was 58 degrees, 58% humidity, and no wind. I need 60+ degrees and
less than 60% humidity but figured that
this might be my last chance for 2-3 months so I painted it. It looked great
when I was done - if it still looks great
tomorrow (doesn't flash), I'll be in good shape.
January 9, 2019 The swingarm looks good and it's installed now.
I had some delay because the set of rear
shocks I had set aside for this bike weren't right so I had to order more.
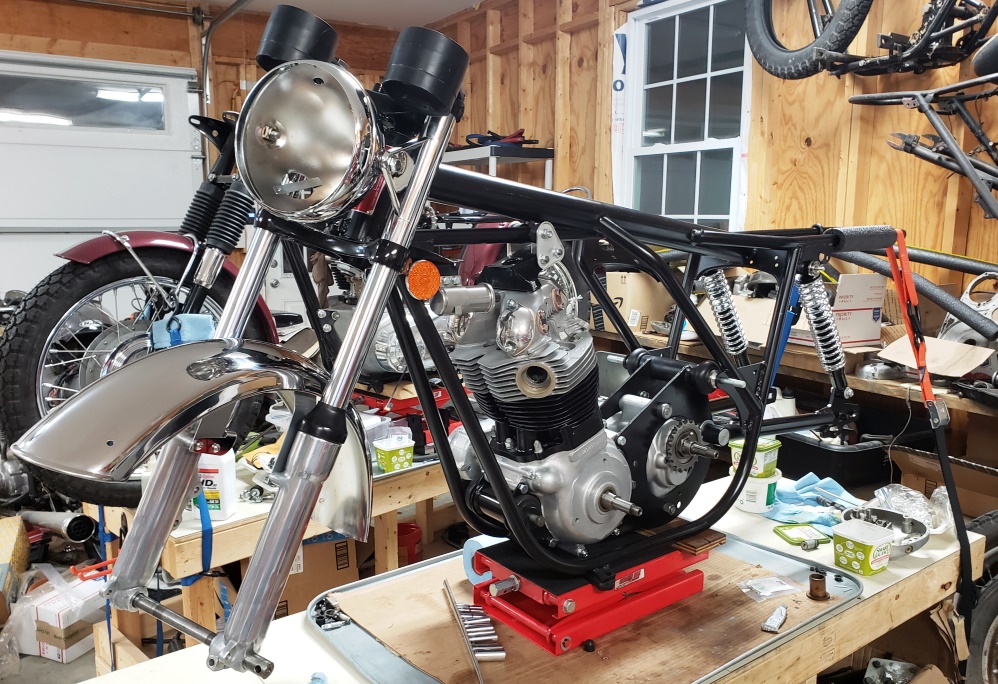
January 12, 2019 I've been working on the rear brake drum. As usual,
it was extremely difficult to get the
bearing spacer and grease seal washer out of the hub. Once that was accomplished,
I sand blasted the hub and brake
backing plate and powder coated the brake hub. Tomorrow I can do the brake
backing place and reassemble the rear brake.
I'm missing the felt seal cupped washer so I can't quite finish it.
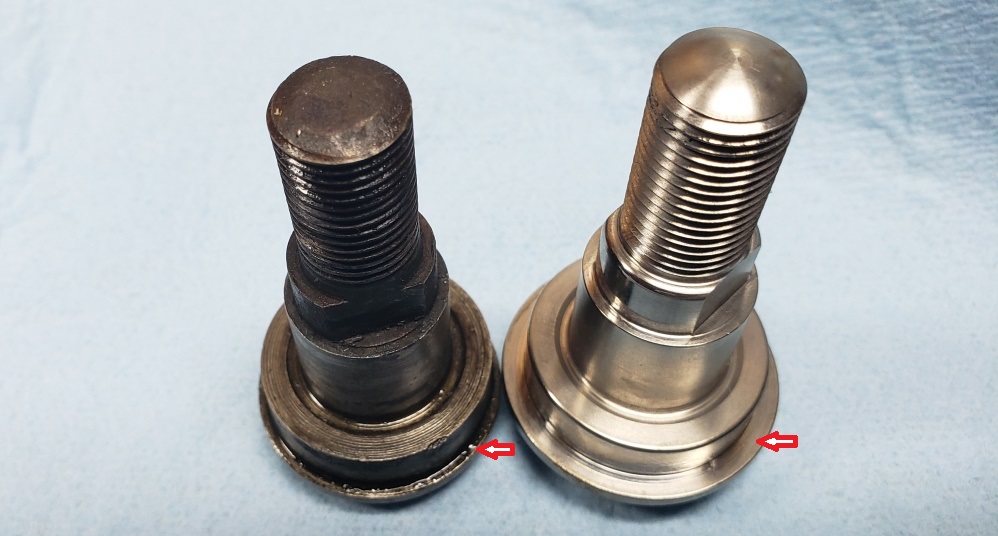
January 16, 2019 The cupped washers came in. Tried to put the rear hub
together - it's always something!
The beautiful polished stainless steel rear axle kit I bought doesn't work.
It is
supposedly for a 68-74 but really is for
68-70. If I had a lathe, I could fix it in 10 minutes. The original was over tightened
(like everything on the parts bike)
so the threads are not great. I'll probably buy a 9/16-18 tap and die and improve
the threads, then re-plate it all. It's
annoying because the complete new kit was not expensive and it will take me about
two hours to renew the old one good enough
to use.
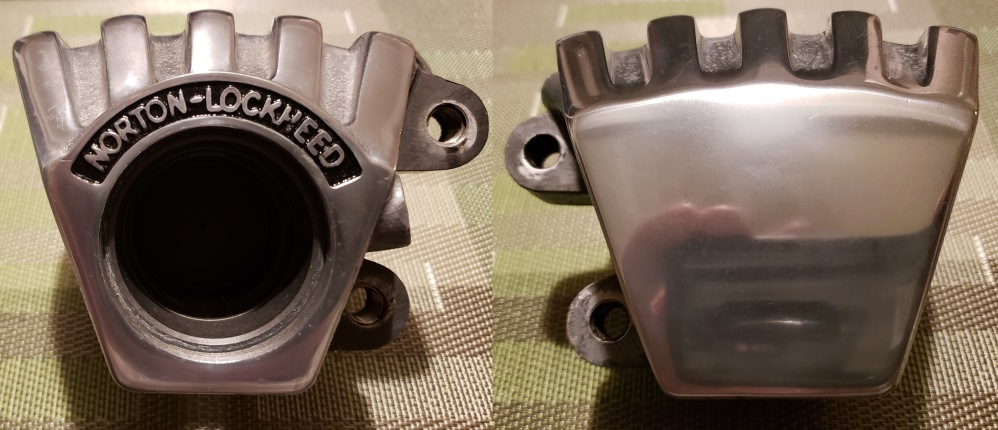
January 19, 2019 Got the caliper ready to go together. Lost the before
picture - shame - lots of scratches,
nicks, and dents. All gone now, but it took four hours. The "H"
in Lockheed is not great in the original
casting so there's nothing I can so about that. Also took the master cylinder
apart, blasted it, and it's
now powder coated so I'll build that now too.
Figured out what to do about the rear axle. I'll used the new stainless
kit parts but with the original dummy
axle. The threads on the dummy axle are OK but need to be cleaned up - I have
a tap and die on the way.
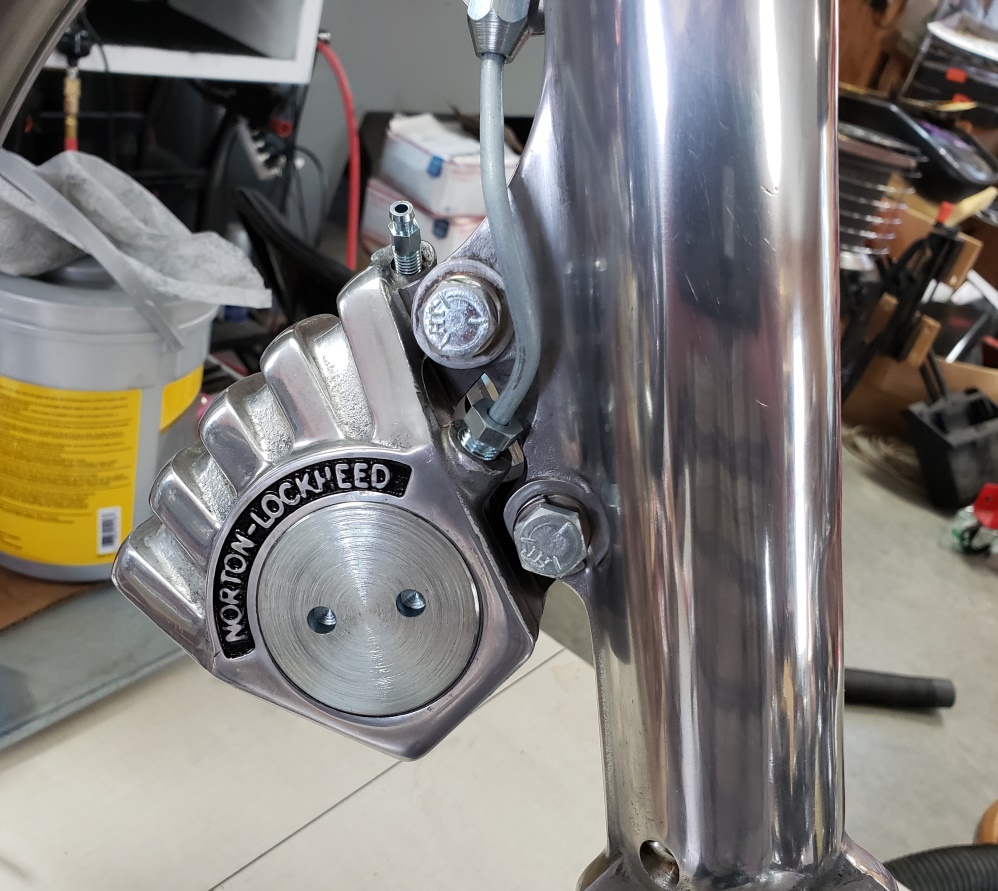
January 26, 2019 The caliper is finished an installed. I'm out of master
cylinder seal kits, so I had to place an
Andover Norton order - still waiting for that. I've powder coated a lot of little
parts. I'm working on rebuilding
the wheels now. Rather than document that here, I've made new pages.
Look here
for the rear wheel and here for the
front wheel.
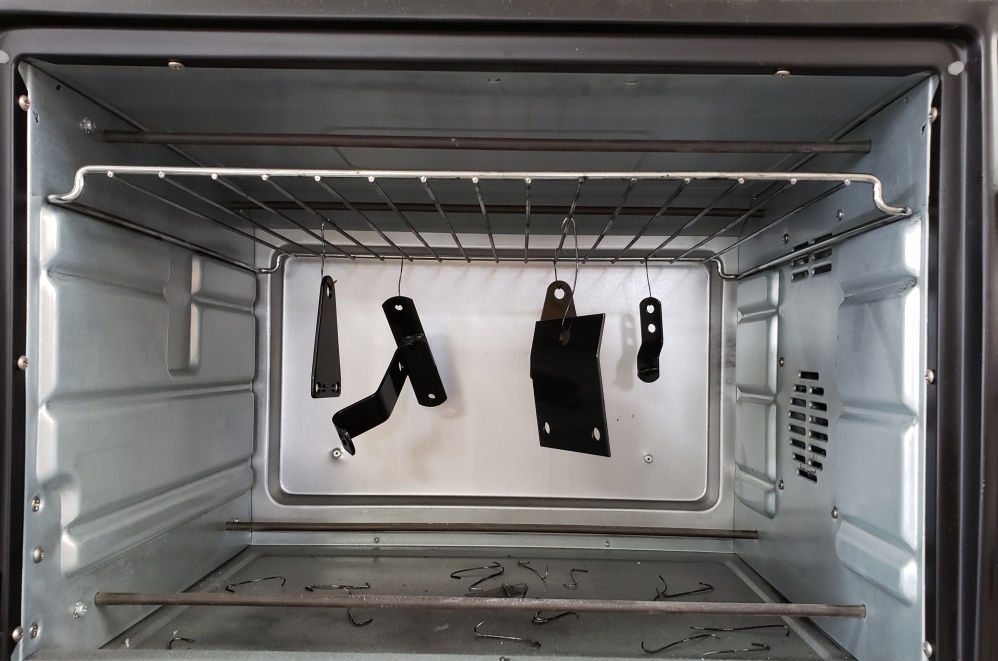
January 27, 2019 Grrrrrrrrrrrrr! If you haven't looked at the wheel building,
see my latest annoyance with the rear
wheel. Who knows how long I'm stuck now!
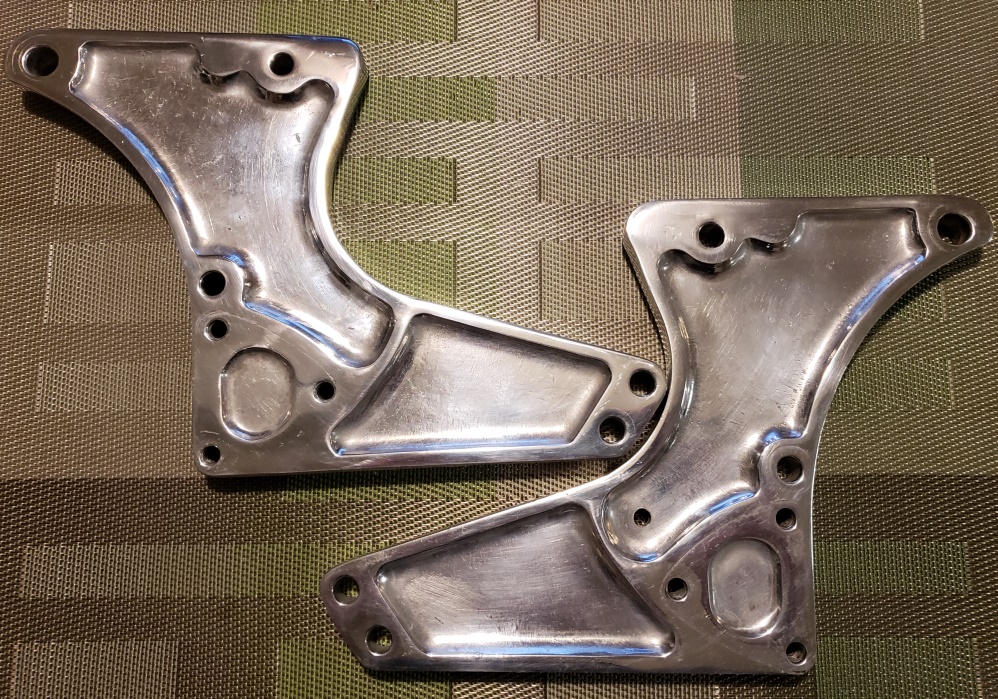
February 8, 2019. Cleaned up the Z-plates before buffing only to notice that
the left side had a chunk out of it.
I had others in a box but the only left-side also had a bad place. Looked
around and found another that was so dirty
that there was no aluminum showing. It came with the 72 and apparently laying
in the dirt. Expected little,
but once I got the grease and grime off it, it was perfect!
February 9, 2019. The front wheel lacing is done - still trying to sort out
the spokes on the rear wheel. To
do that, we've become a Central Wheel Components dealer and have spokes on order
from them. Also, I forgot all
about the disc and sent it off to be surfaced yesterday. Hopefully that will
be back by next weekend. Also it's
still been too cold to paint the fender stays and I would like to install them before
the wheel..
February 14, 2019 The disc is on it's way back
The rear brake is finished - forgot to take pictures while doing it. I power
coated the brake plate and drum and it's
installed enough to install the rear wheel if I ever get the spokes sorted out.
Took a long time going through my Z-Plate collection, selecting the best set, cleaning,
sanding, and polishing. The
picture doesn't do them justice - they look a lot better than the new ones you
can buy.
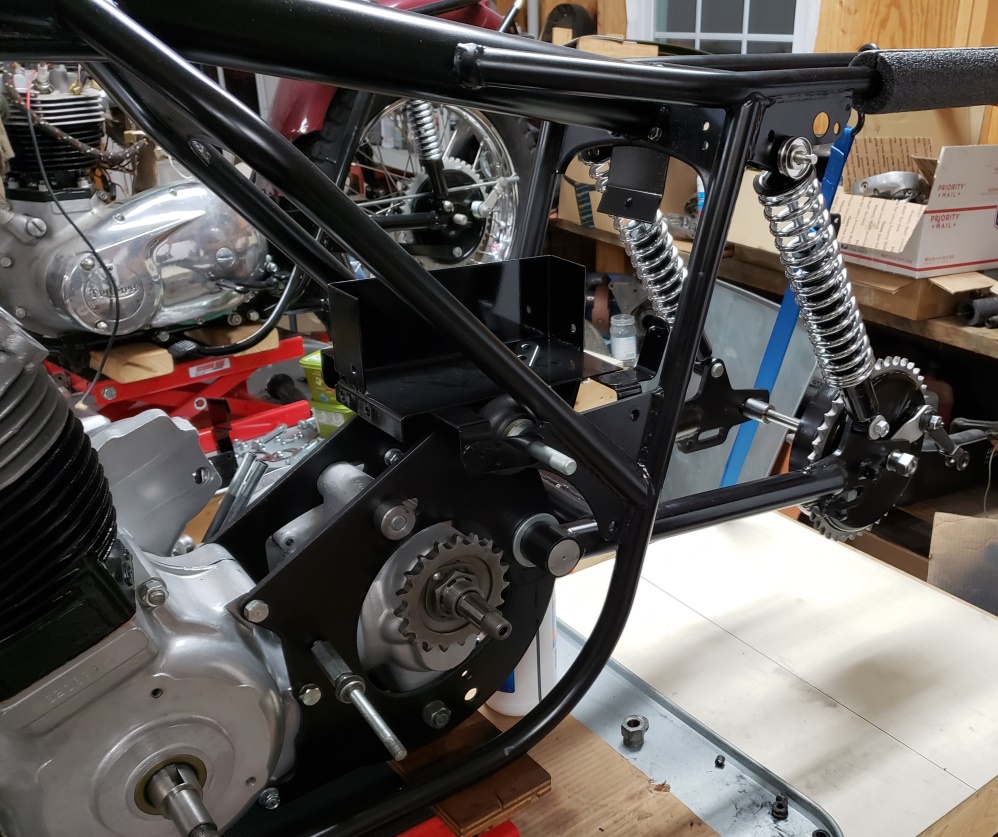
February 15, 2019 The disc is back and today was unusually warm - 66 degrees
so I was able to paint the center of
the disc and the front fender stays.
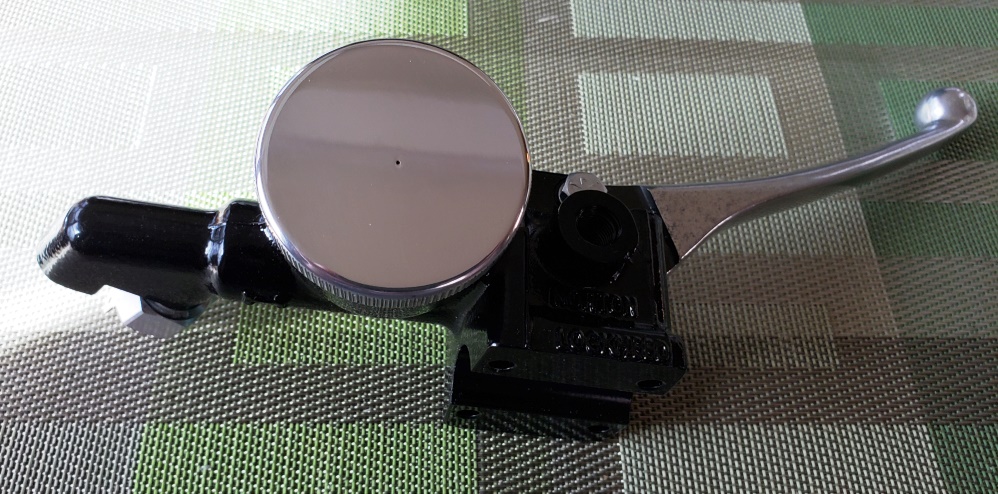
February 16, 2019 the master cylinder is rebuilt and ready to install.
This time I had to replace every internal
part but at least there was nothing wrong with the body.
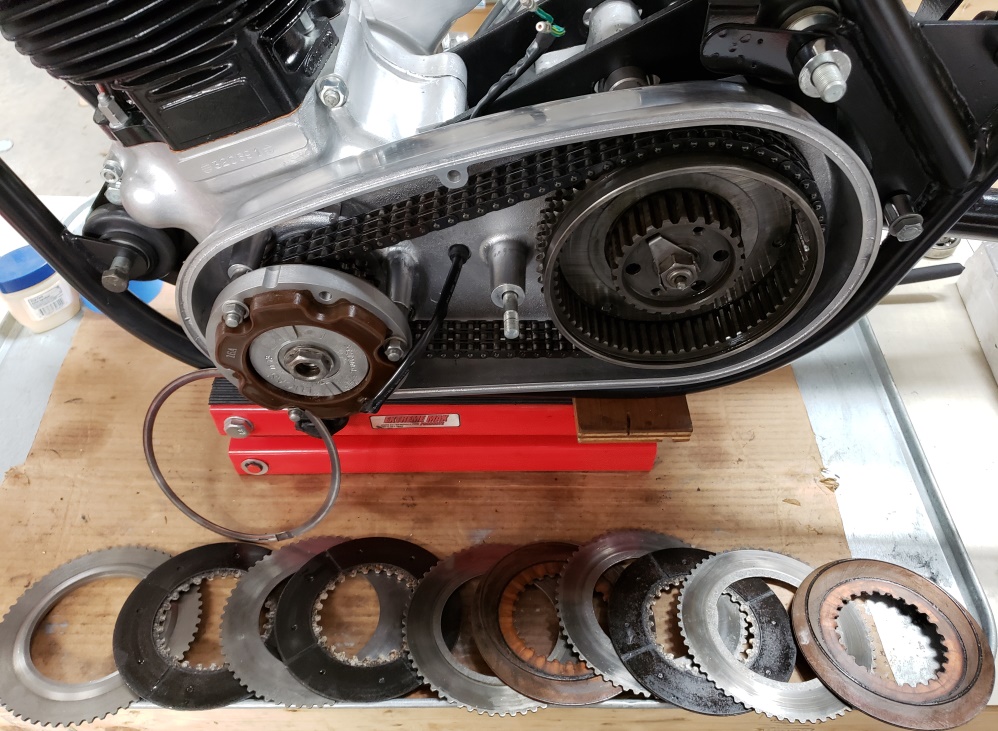
February 21, 2019 When I took the primary apart on August 26tth, I mentioned
that the clutch looked new. I'm sure
the entire clutch, primary chain and engine sprocket are new. The fact that the
gearbox mainshaft was bent on the timing
side and the inner chaincase was torn up makes it clear that the bike did almost
no miles since the primary components were
changed. But there's always something with this bike! Look at the
clutch plate on the right - a sintered
bronze - as is the 5th one. The rest are meant for an 850, but are fiber on
metal. I'm guessing that they
are Barnett plates. All of the plates are the correct thickness - no wear.
But I can't imagine putting different
plates in and having the new owner think I cut corners. So, I'll put in
a set of new sintered bronze plates.
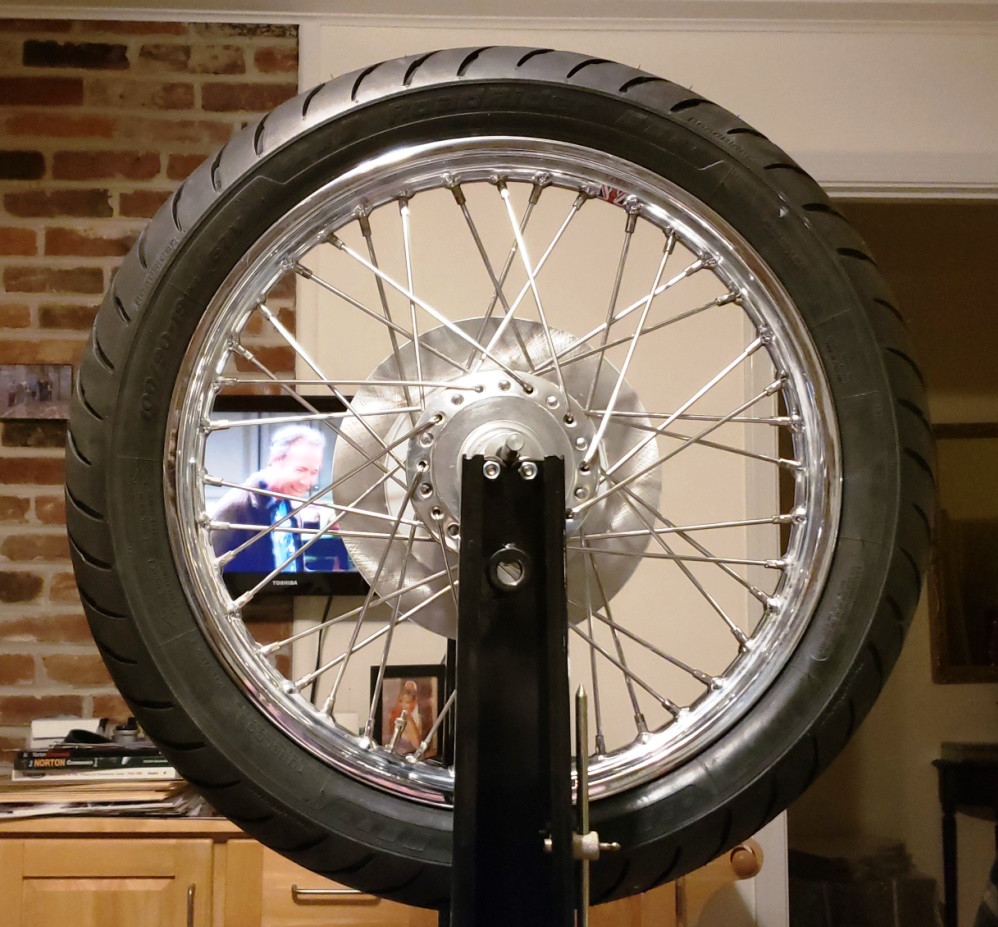
There are not many things good about being a widower, but building and balancing
wheels on the kitchen table is one of them.
That's done but I can't install the wheel yet. The new front fender
from Andover Norton is not exactly the
correct radius and a slightly different profile. I had to reform the fender
stays and then repaint them. Still
trying to figure out what to do about the radius being larger which effectively
makes the stays too short. I'll
attempt spacers between the fender and stays - 3/16" should do it.
February 22, 2019 Well the set if sintered bronze plates I have that are supposedly
for a 850 are not! They are 750
thickness, not 850 thickness and I don't have a thick pressure plate to go with
them so I'm on the look for a set
of correct plates or three that match the ones I have.
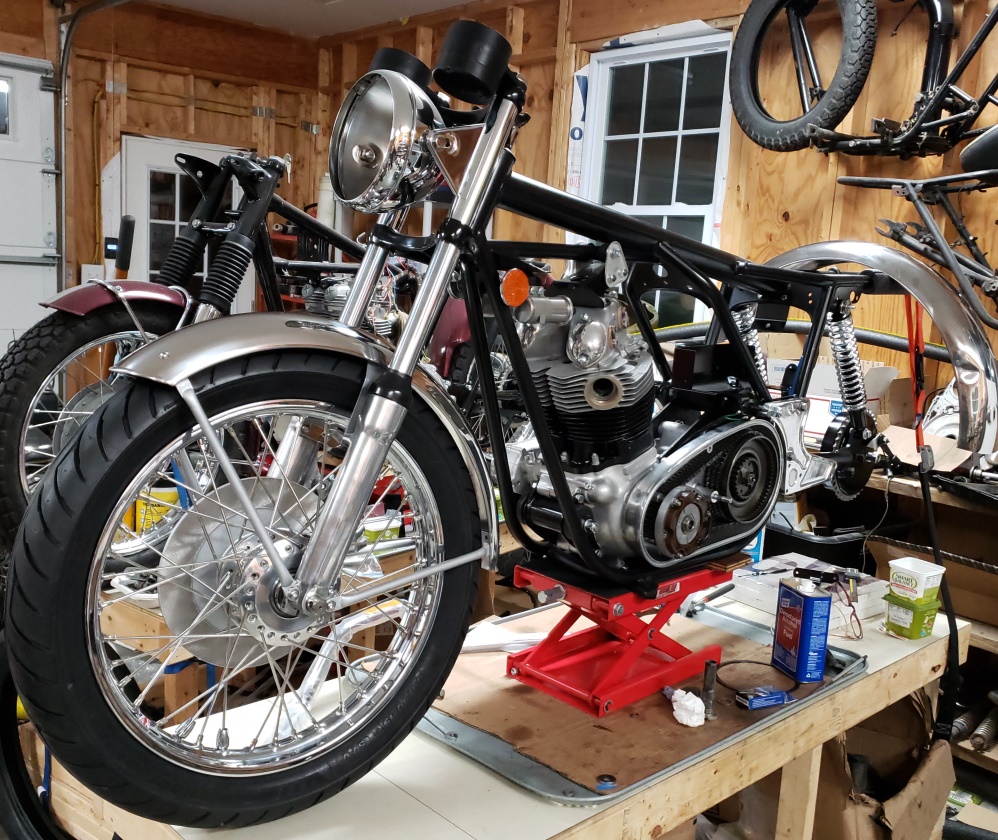
February 23, 2019 Got the front fender sorted out and mounted the front wheel.
Still need to put in the pinch bolt. Hopefully I can make ground on the rear end tomorrow. I'm still waiting on spokes but I have everything else needed for the rear. I've made several offers for the clutch plate I need, but no one has accepted - they want too much. I've got to find exhaust pipes too and see if I have a speedo and tach already
restored. I have the ones that came with the parts bike, but they will have to be restored and that a bunch more money.
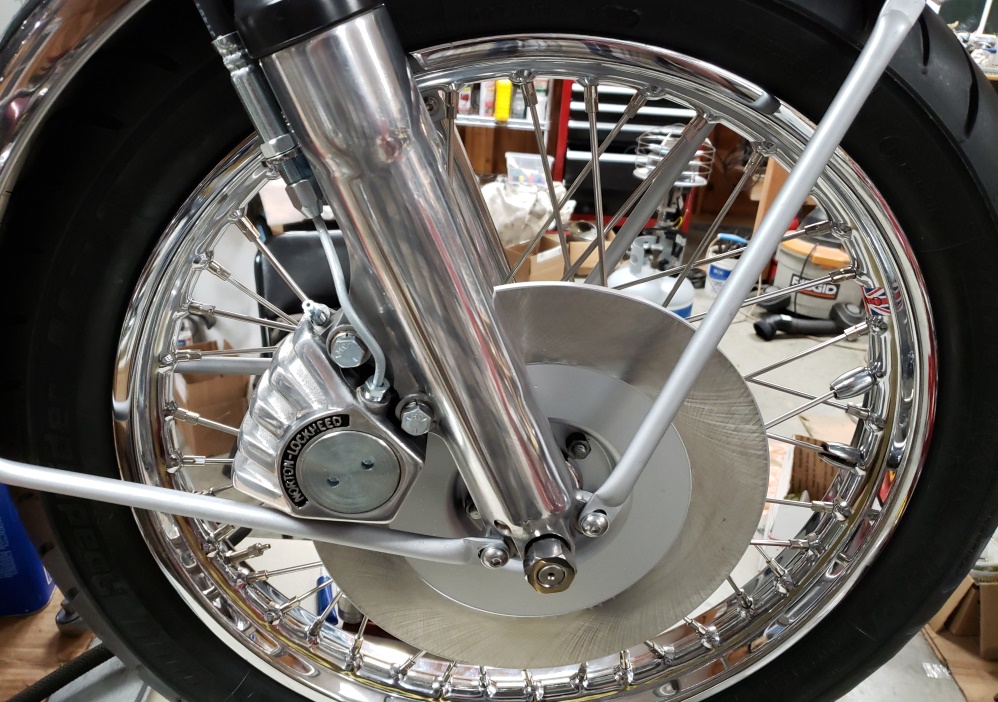
February 24, 2019 Power coated several more small parts needed to install the the
handlebars, horn and rear fender.
Then fought the Bundy for the front brake. These are never shaped exactly
right and are always too short so they have
to be straightened some and lined up to the hose to the master cylinder. I
still have to take it back off and put
the lock washer and nut on the hose - I didn't have one today.
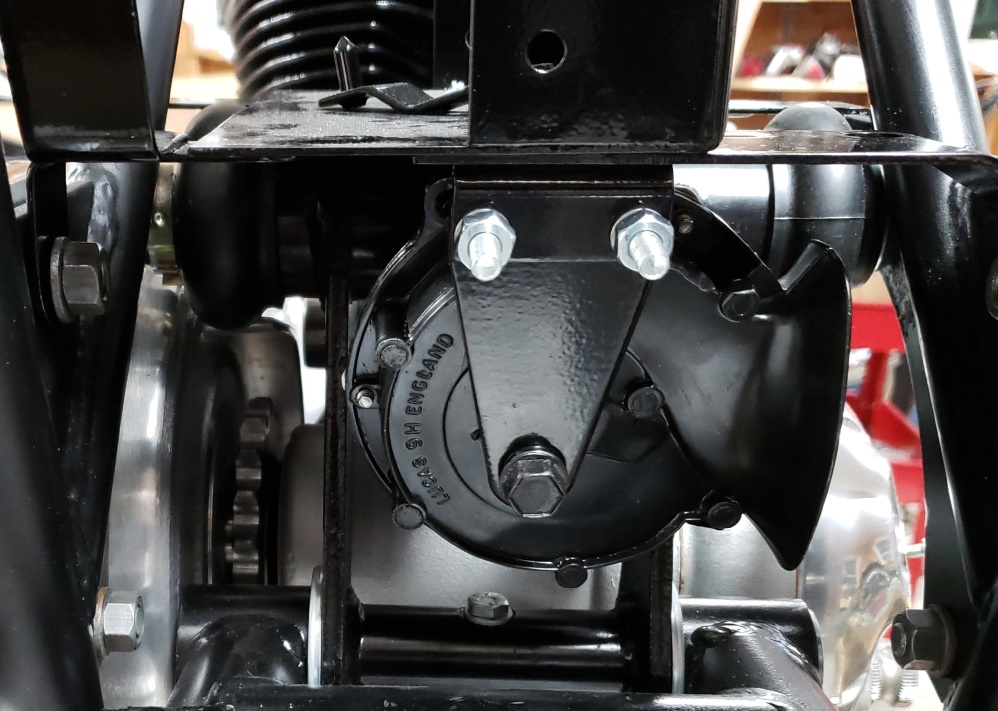
Then came the real struggle! The horn that came with the parts bike works
but most of the paint is off. I had
another that I restored, but it never worked right so I decided to take the one
from the parts bike apart and use its internal
with the restored covers. Guess what - now that didn't work right.
That's when I realized that when
I restored the first one I had to make gaskets for it and that I make them too wide
and that the tiny air hole in the diaphragm
was being blocked by the gaskets. Once that was corrected, the horn worked
fine. I'll restore the second
one now. The second picture shows the horn temporarily installed. I
need to make the wiring harness for it before
I permanently install and installing the oil lines before the horn makes installing
them easier.
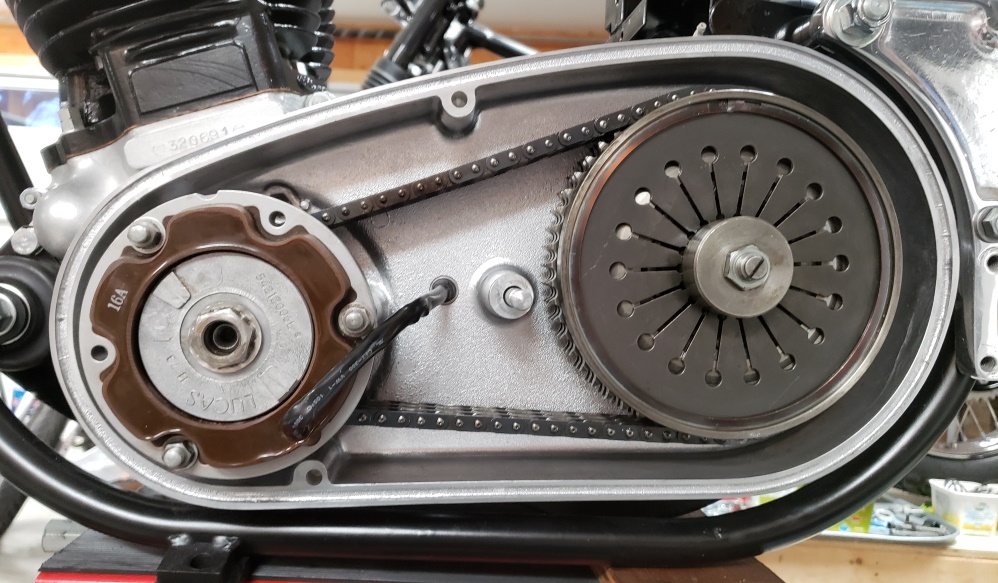
March 7, 2019 The rear wheel is finally built. Waiting for a WM2 security
bolt to arrive so I can mount the tire.
Received a set of Barnett clutch plates today and finished the primary except for
the cover. The primary cover was filthy
and I've been keeping my eye out for one. Today I cleaned it and to my surprise,
it's pretty nice. It has some small
scratches and some black corrosion but I can make it beautiful. Spent about
30 minutes on it and it's already
better than the one on my rider.
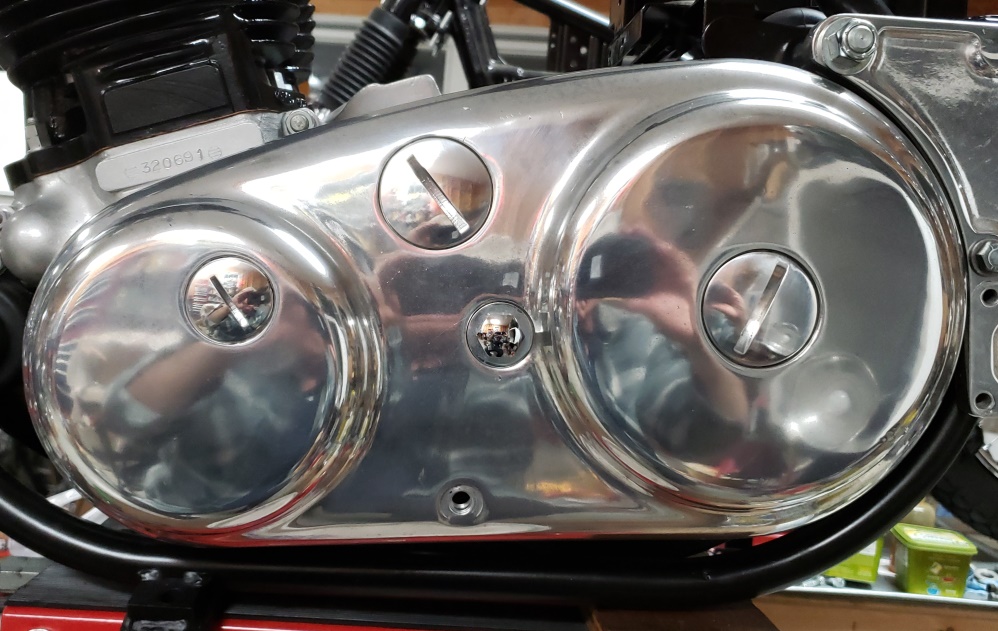
March 9, 2019 After three hours of sanding and buffing, the outer primary
cover is done. I didn't go for
a mirror finish but as you can see it's nice. The level plug I have is
a disaster - have to order a new one.
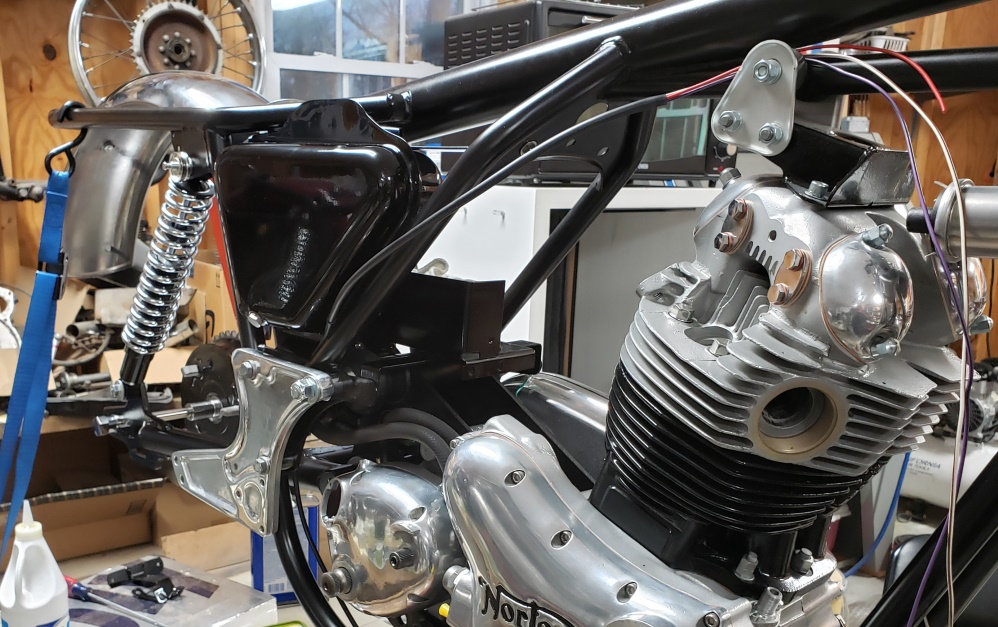
March 10, 2019 The oil tank and hoses are installed, the horn is installed,
and the rear fender is in place but not
tightened yet. I needed to make sure it was all going to fit right.
Although I like to reduce the number of
connectors wherever possible, I may add one to the horn/oil pressure cable.
If I hard wire it into the harness cable,
I won't be able to get the main harness off the bike for the final wrapping.
March 14, 2019 The rear tire is mounted and the rear fender is on as well. That
was a bit of a struggle as the bolt slots
were not in the perfect locations, but it did finally all go together without having
to re-drill anything.
March 16, 2019 The rear wheel is on and the chain is cut to length and installed.
I'll try to get some help
and install the center stand tomorrow - need a third hand.
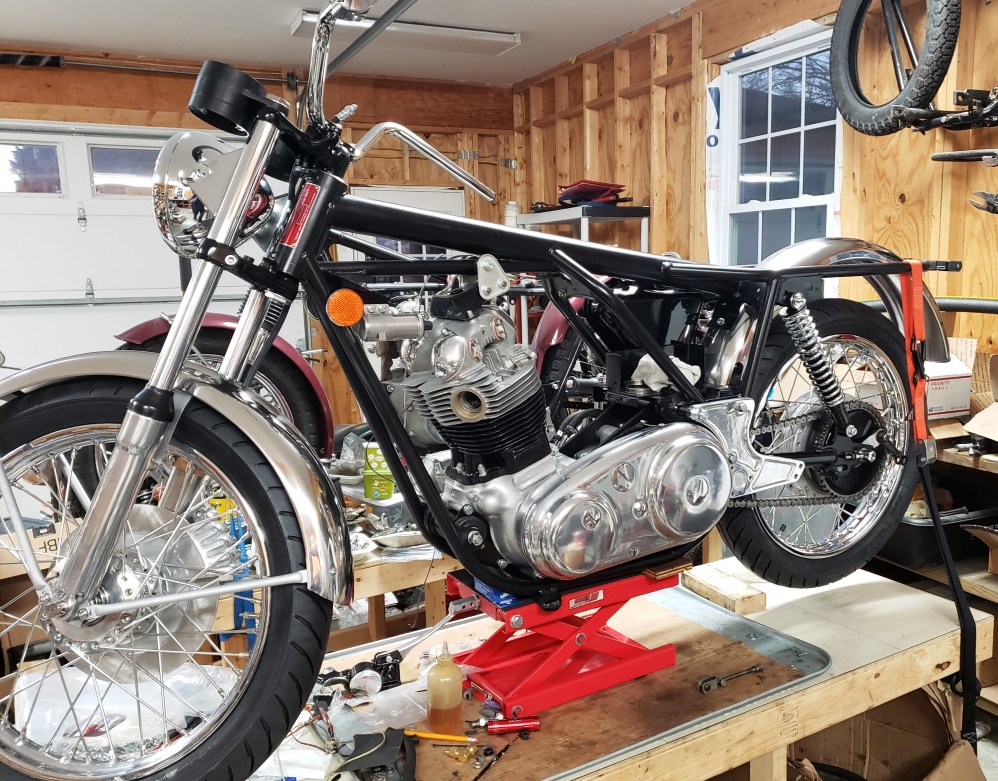
March 17, 2019 I got some help and the center stand is installed - not a minute
too soon! Keep reading...
March 18, 2019 A customer got a really good deal on a 1970 Triumph Daytona
(500cc, T100R). It was being restored when
its owner died. Initially, it appeared to only need wiring and a few bits and pieces
but it has turned out to be a little
more so this bike lost its place in line and had to give up its table. It shouldn't
take too long to finish the Triumph
and get this bike back up on the table. If you want to follow along with that,
go here.
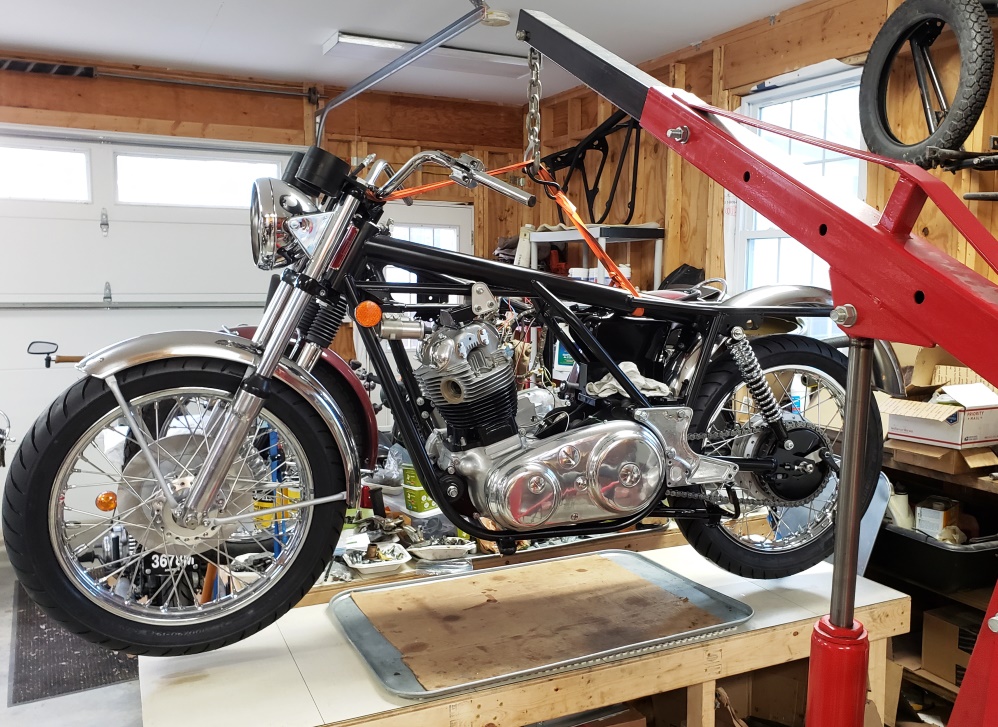
May 12, 2019 Look at the picture above and think in reverse - it's finally back
on the table because the Triumph T100R
is finally done. With a little luck, the Triumph and the Norton Commando will both
be gone by next week, and I can focus
on this one.
June 4, 2019 Over the past two weeks, I've done a little on this, but Memorial
Day and a new medical problem got in
the day. I did make some good progress yesterday and today.
The switch console for the clutch side is restored as is the clutch lever mount
and clutch lever. The clutch cable
is installed as well.
The rocker oil feed lines are installed as is the oil pressure switch.
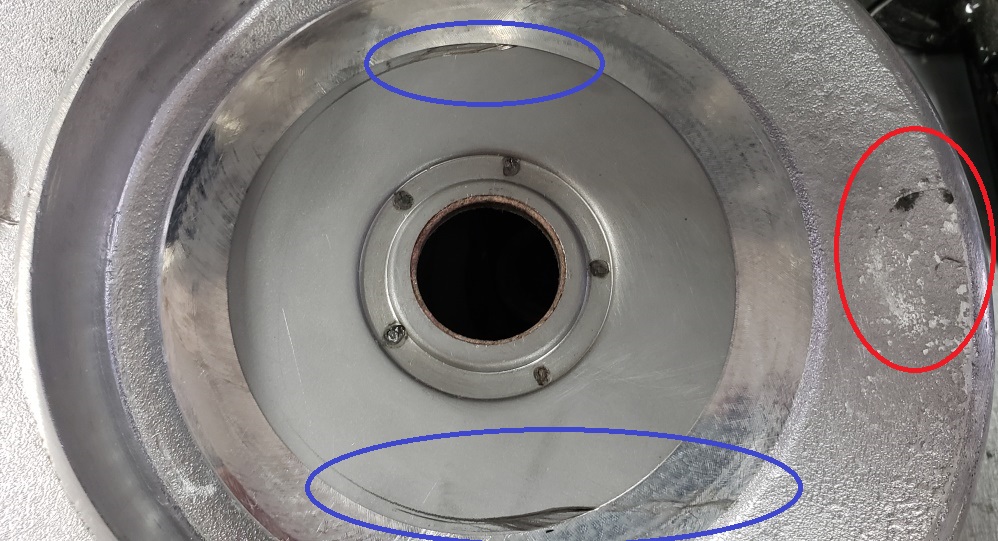
I noticed a while back that the inner chaincase was touching the swingarm and the
chain master link was hitting the inner
chaincase seal plates. Apparently, this is a known problem with 850s that
I never encountered before. Today I investigated.
I loosened the engine mounts to see if the engine was not square in the cradle -
no problem found. So, I took the primary
all back apart and on recommendation of many will put it back together with two
gaskets between the inner chaincase and
engine. In the picture, the red oval shows where the swingarm was touching
and the blue ovals show where the
master link was hitting the seal plate.
July 18, 2019 Somehow, I've lost the last couple of updates to this page
so I'll summarize.
- I found and bought 50' of 10B-1 chain - look here
for more info on that.
- I took the primary back apart, installed two gaskets, re-figured the shim size
for the inner primary chaincase, and reinstalled.
- Cut and installed the chain - no more problems.
- I restored the right-hand switch cluster and tail light mount so it's time
to do the wiring. Go here for that.
September 10, 2019 The wiring was completed in late August, but my main business
has gotten in the way of continuing with
this bike. I did do some work that actually put me further behind! I
noticed a very small leak coming from the
drive side of the swing arm so I tried to tighten the swingarm through bolt slightly
- POP - it broke. So, what little
time I had today was about taking the primary apart - AGAIN! Of course I don't
have a new swingarm through bolt so
I made
an Andover Norton order for that and a bunch of other things.
September 16, 2019 The parts I needed to resolved the swingarm problem are here
as well as a complete exhaust system. The
primary is apart.
September 17, 2019 The swingarm problem is resolved and the primary is back together.
September 19, 2019 Dry fit the exhaust system, that when fine so I took it back
apart and painted the inside of the headers
and crossover pipe. I don't know for sure that it helps but my pipes don't seem
to blue as bad or as much. I've been doing
it since 1971 when the chromer told me to. Back then, it was just silver paint.
Now I used VHT Manifold Silver paint.
The can says 1300-2000 degrees. Then, I started on the mounts. The parts bike
came with chromed mounts and they cleaned
up OK, but the pitting meant that the rust would return. It would have been good
enough until sold, but I don't work that
way. I briefly thought about another plain set I have - I could blast and re-plate
them, but they are pitted and that would
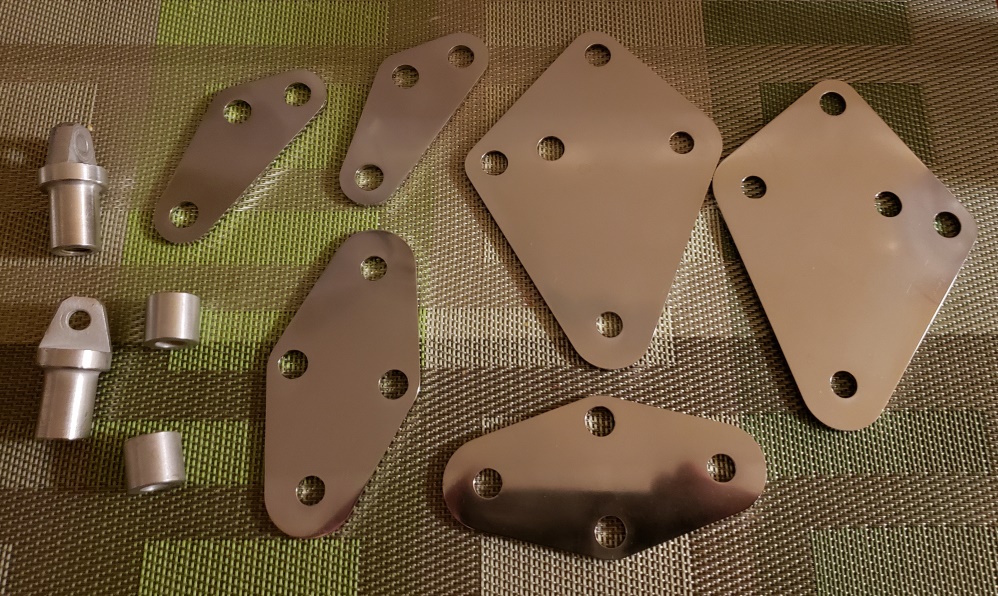
show through. So, I started buffing a stainless steel set I had. The
were very dull and had lots of fine scratches.
After two hours at the buffer, I quit for the day.
September 20, 2019 Spent a while buffing, blasting, cleaning, and re-plating the
spacers and passenger peg mounts.
I'm considering powder coating those black - might look better than combining
zinc plating with stainless. Then,
I spent two more hours at the buffer working on the stainless. It would take
anther two hours to make them like mirrors,
but they are good enough. You can't tell from the picture, but you can
see yourself in them, just not like chrome.
September 25, 2019 Getting there! The exhaust is done, the foot peg rubbers are
on and it's time for carbs
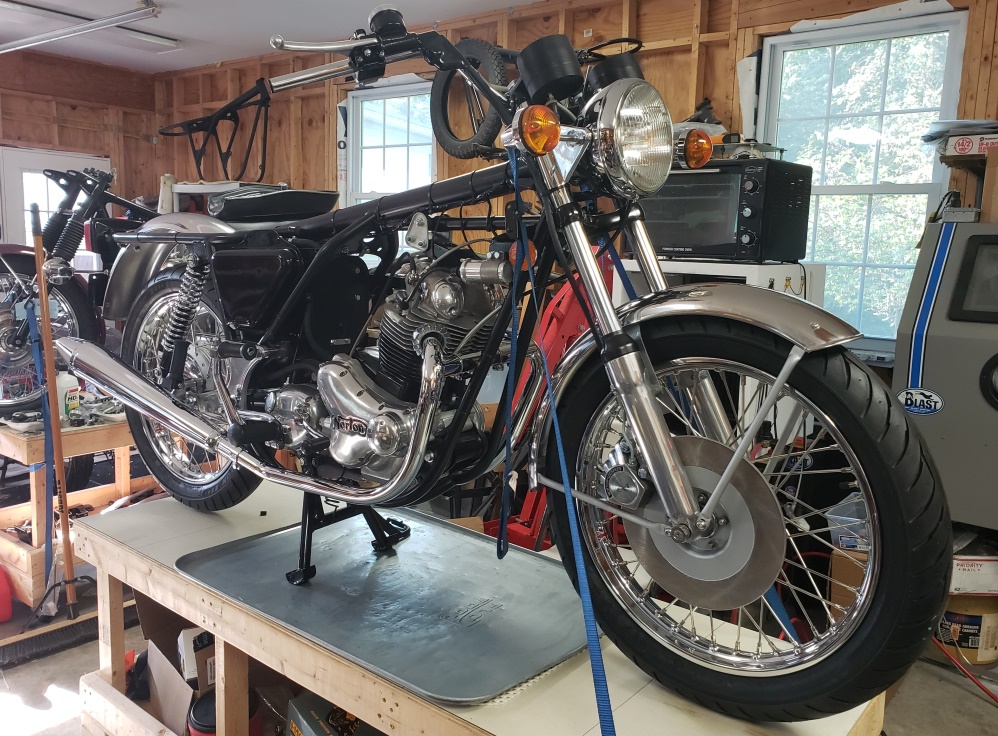
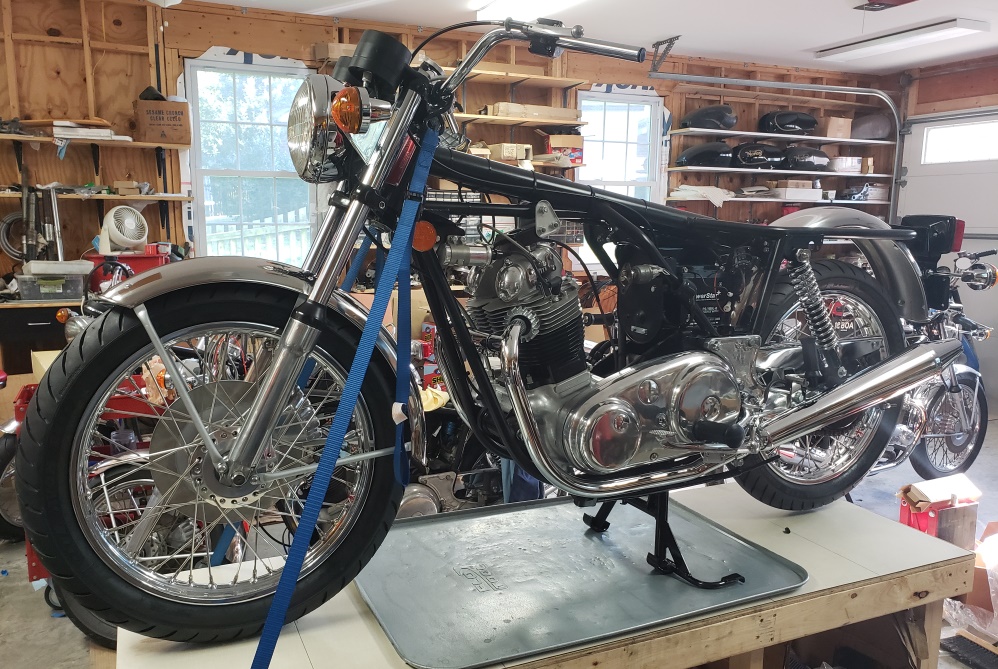
September 26, 2019 This bike is getting a set of new Amal Premier carbs. Inspected
them today and mounted them to the manifolds.
I like to sync the carbs before I mount them, so I'll make the cables next. I have
two sets of original cables plus I have
my measurements from making the cables for the 1972 Combat
I finished earlier this year.
So, I decided to make a page detailing the cables - look
here.
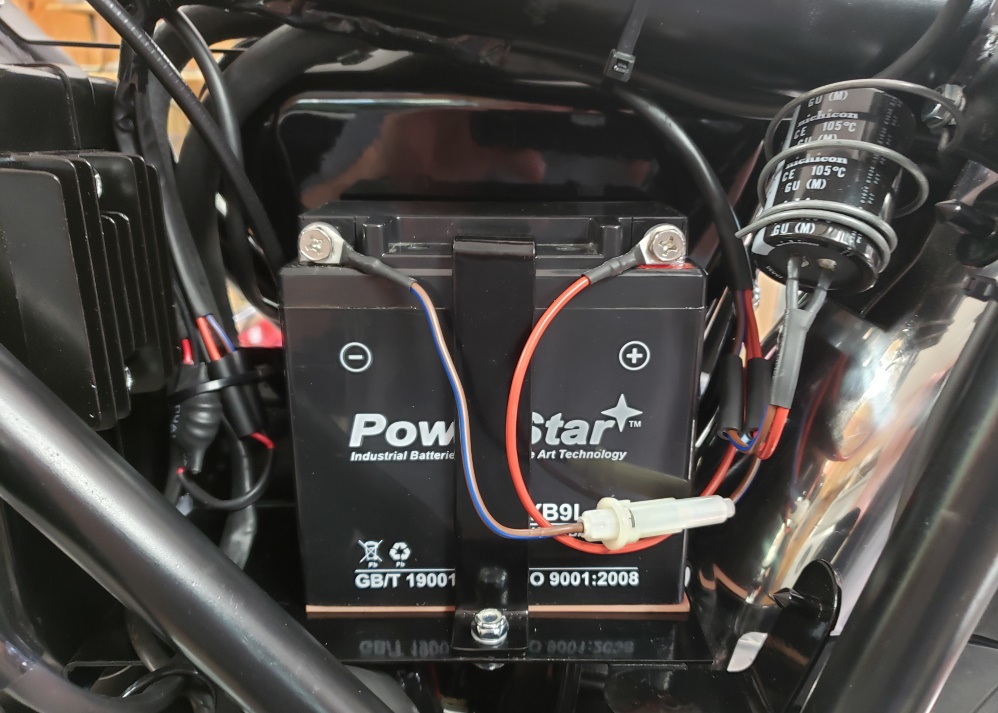
September 29, 2019 I don't like the silly standard battery hold down and straps,
so like with the 72 I finished earlier
this year, I made one. The battery is sitting on rubber and the right side
and back are protected by 1/8" high-density
stick on foam. That same foam lines the hold down bracket. This all
protects the battery and firmly holds it
in place. I meant to weld the bolt in but forgot before I powder coated so
this one is a very tight fit and epoxied
in place.
October 6, 2019. The cables are made, the carbs are statically synced, and they
are installed - what a PITA a Norton is
when it comes to installing carbs. Gave the twist grip a few twists and could hear
the slides bottoming at different times!
How annoying. That means that one of the nipples in the junction box or more likely
in the slide is not seating. They were
in prefect sync so I can't imagine what happened. It's hard to get the slides
out on a Norton with the carbs mounted
and especially hard with chokes installed.
October 8, 2019. The throttle cable was a stuck nipple in the time-side slide
- a little too much solder. That's
fixed and the carbs and a brand new Amal 364 type twistgrip is installed.
While at it, I decided to sell the choke
parts and cables with the bike, but not installed. Amal chokes are silly,
especially with Premier carbs and a Tri-Spark
ignition.
October 10, 2019. Except for installing the speedometer cable, everything
than can be done on the table is done.
Once it's down from the table, this is left:
- Install the restored speedo and tach
- Install the grips and a mirror
- Install the air cleaner. It was installed, but I had to take if off to fix
the carbs. I've had it.
I'm working on a thinner air cleaner that will look original.
- Install the beautiful new seat I bought for this bike
- Install the beautiful new tank and side covers
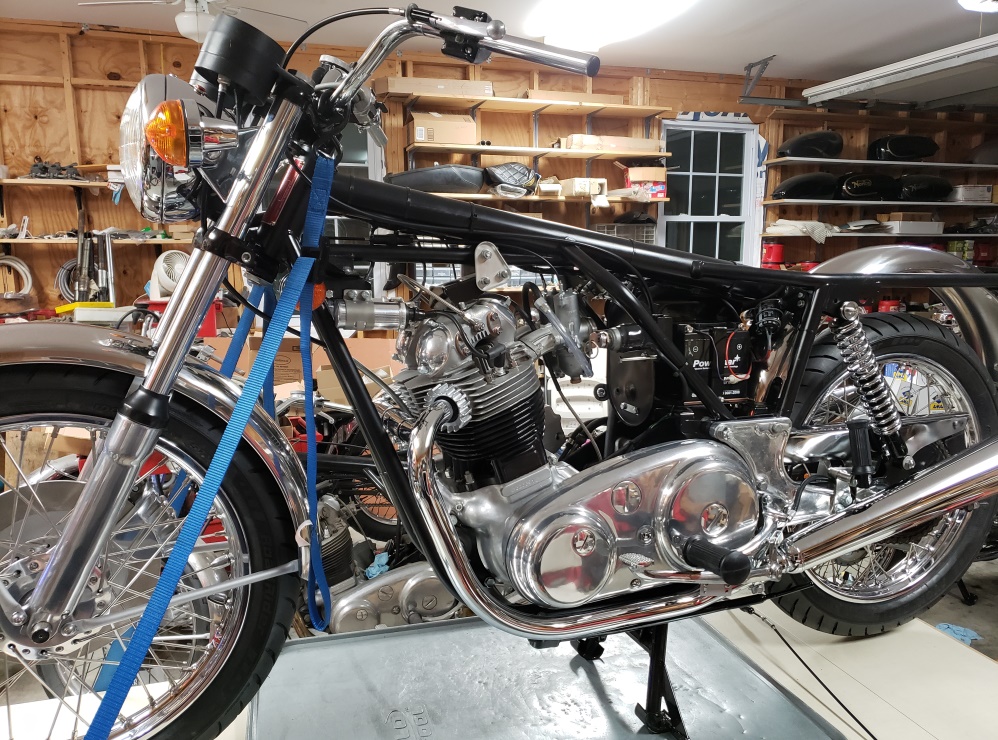
These are brand new EMGO tanks and side covers. I don't always like EMGO products,
but these are VERY high quality.
The tanks are baffled like the originals and are a little heavier steel. The
side covers are also a little heavier
steel. The painting was done by Blake Conway in CA. They are hand pinstriped
- much better than the factory
did. Both sets use modern paint and are clear coated after being pinstriped
and decals applied. The red set
is metallic but the flakes are tiny so the look great.

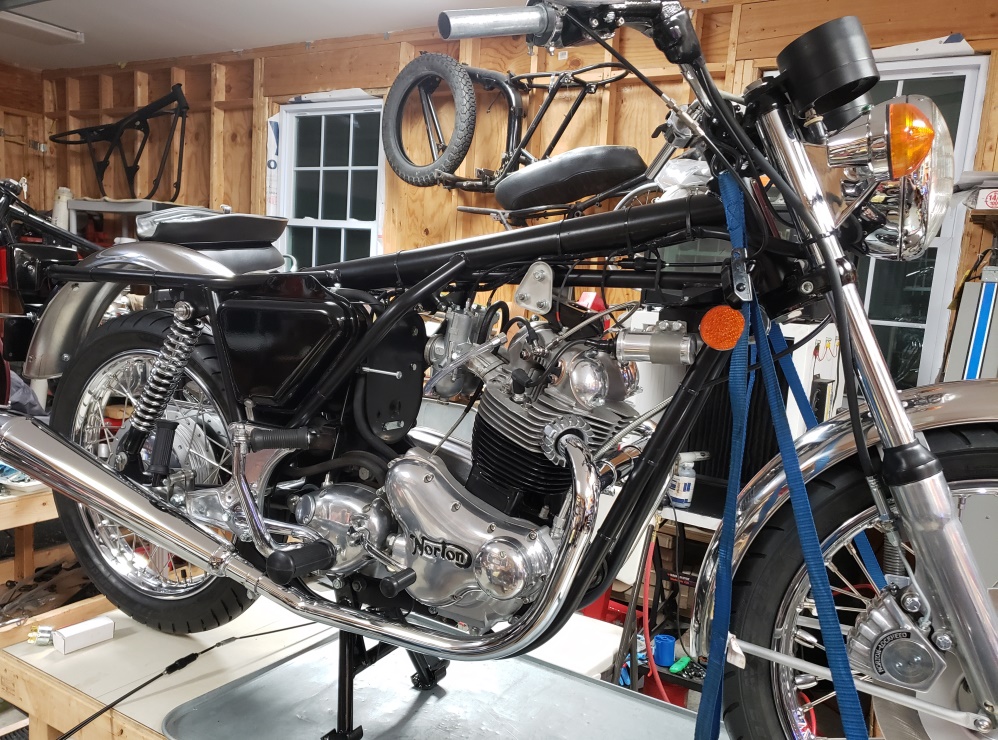
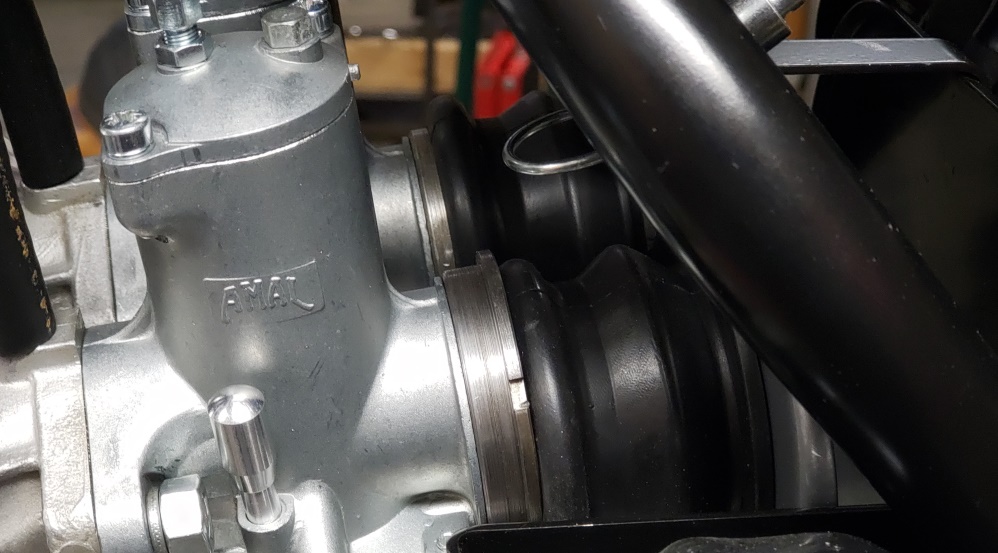
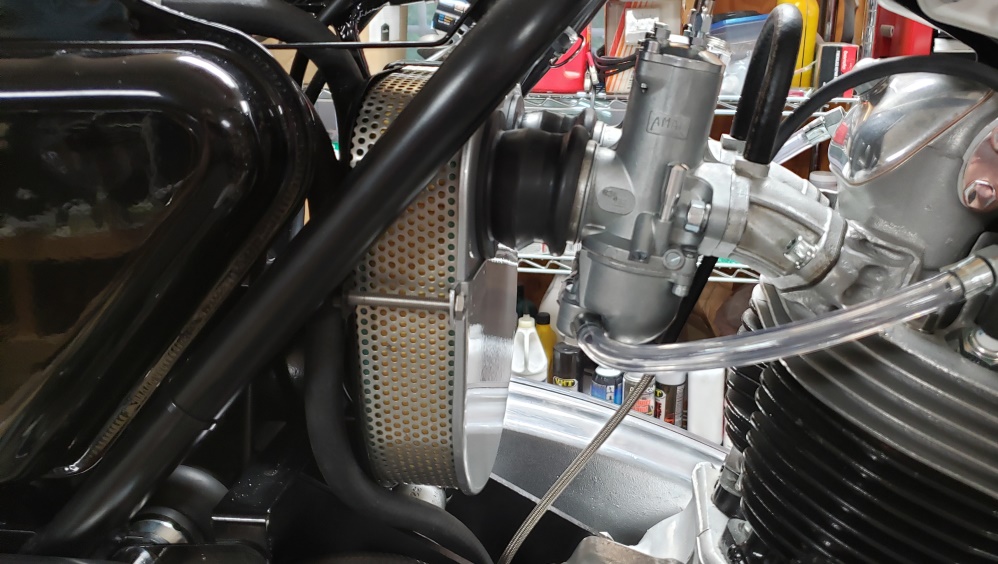
October 22, 2019 Been sick again but made a little progress. I ordered a narrow
air filter set from RGM Norton.
Here's my take on it:
- Works
- The supplied bolts are too short - you need 2-1/4" bolts. I barely got the 2"
ones supplied without washers so I could
take the picture. They are only caught by about two threads.
- The filter element is slightly too large a diameter. It is difficult to get into
the metal gauze but with effort and care
you can get it in.
- The metal gauze is OK. The quality could be a little better and it's not shiny.
It is the right shape.
- The standard Andover Norton carb connector hoses (06.2537) work (just) but you
must install the carb adapter rings (03.3027)
backwards - see the first picture.
- Installing/removing the air cleaner element is easy and access to the carb banjo
bolts and drain plugs is much easier.
- The extra room will make it possible to use 150 degree 5/16" Amal banjos and 5/16"
fuel line like some other British Bikes
use.
I plan to space the back mounting plate (06.4894) out 3/16" using 2 spacers (06.2170)
at the bottom and add another at the
top bracket (two at the top instead of the standard one). The filter will still
be easily removable but the connector hoses
will fit a little better.
October 23, 2019 I don't remember if I said it, but the brand new speedo cable
I planned to use is too short and the
tach cable I installed is too long. So, I ordered the correct ones from Vintage British Cables
and they arrived today. Once they are installed, the bike is basically done.
I'll take it down from the table, install a temporary tank and test. I
don't want to install the new tank
and side covers until I'm ready to take pictures.
November 7, 2019 I've been side tracked lately - had an infection which laid
me up a few days, and then I got a 1972
bottom end to rebuild. In the last couple of days, I've done a bunch of
little things on this bike and today,
I took it off the table. Then I did things like installing the hand grips,
adjusting and tightening the handlebars
and controls, adjusting the location of the speedo and tach and tightening the fork
top nuts, etc.
So, it's ready for a temp tank, tuning and testing. Once that's done,
I wait for a nice day for pictures and
take them with both the black set and red set. I also have to decide on a
seat. I have a beautiful new seat
and I have a refurbed seat in good condition.
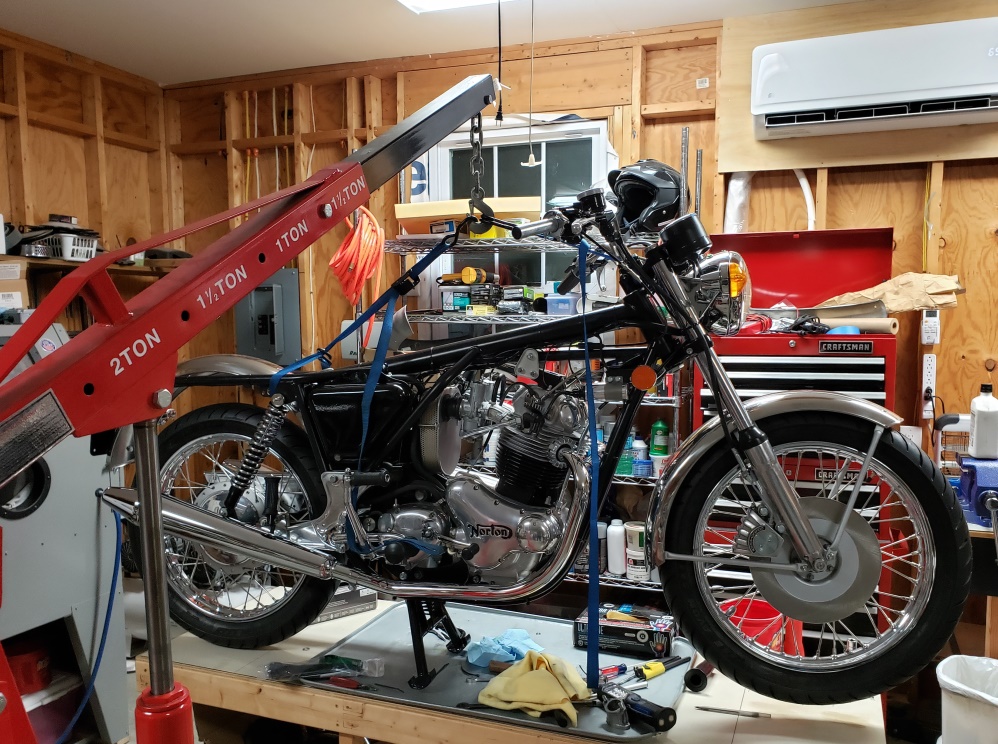
July 10, 2020
Wow! I haven't looked at this page for a while since I've been sidetracked
on customer's bikes. Apparently,
I lost a
bunch of what I had written here.
Back on Jan 1, 2020 a guy came to buy either this bike or the
72 Combat. He thought he would
choose this and asked that
I put the black tank and side covers on which I did. Once he was here, he decided
on the Combat. The Combat has a lot
more original parts � this one has LOTS of new parts and he thought that the Combat
was better for shows. All the new
parts are from Andover Norton, so whether or not he is right, I don't know.
This bike has new rims, fenders, tank, side
covers, seat and much more. Either bike was $11,500 for a direct cash sale.
Since it was the middle of winter, I had not taken the bike out for final tuning
and to take pictures. One thing lead to
another and I finally took it out in June. Long story short � It had problems which
ended up being a bad coil and a bad
PODtronics. It now has new Tri-Spark coils and MOSFET Rectified/Regulator. It runs
well, but when I get a chance, I'll
raise the needles one notch to get rid of a small flat spot.
The bike could still be red if someone preferred that.
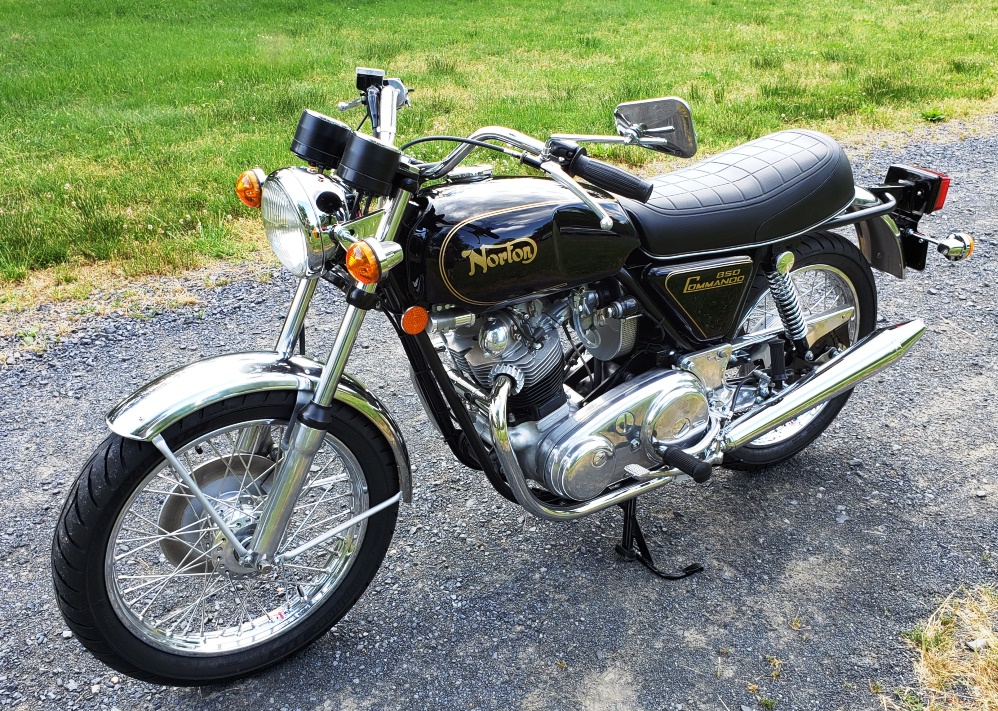
July 26, 2020 Finally finished everything and the bike is now for sale. It
would be hard to find a nicer rebuilt
74 850 Commando if I do say so myself. In fact, if I ever get time to finish
the wiring on my rider, I might sell
that and keep this one so if you're on the fence, don't wait long!
September 5, 2020 Stole the narrow air filter from this bike to finish the
Customer Combat
so this one is off the market until I can replace it.
Oct 18, 2020 I was using the narrow air filter from RGM but they are a little too
narrow, when shipping is included they
are too expensive for what they are, and I finally found a K&N filter that works:
E-3410. It is about 1/2"
thinner
that standard and is a very snug fit in the surround. I use a cut-off disc
in an angle grinder to cut down the
standard surround - quite easy to do.
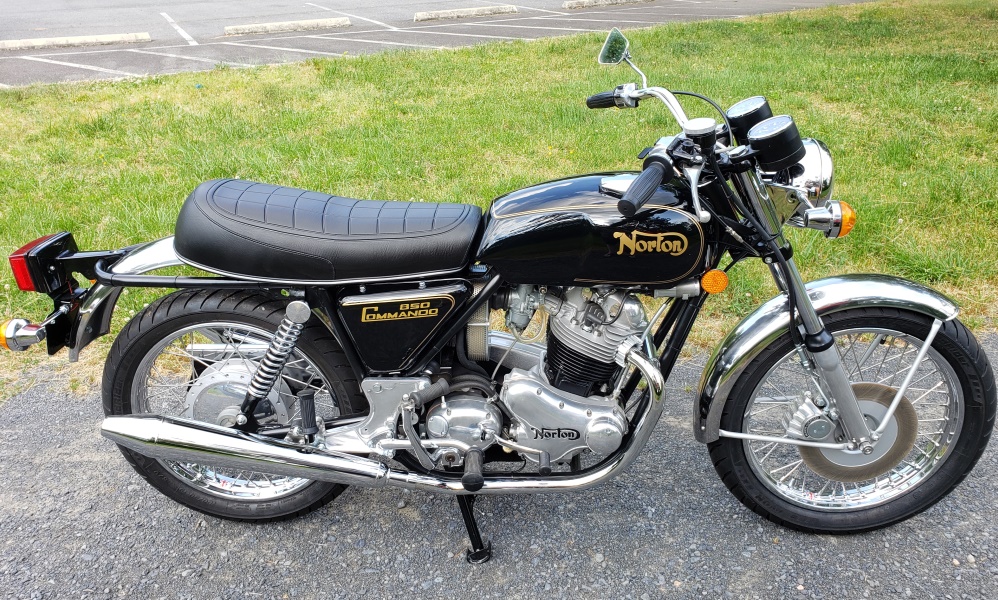
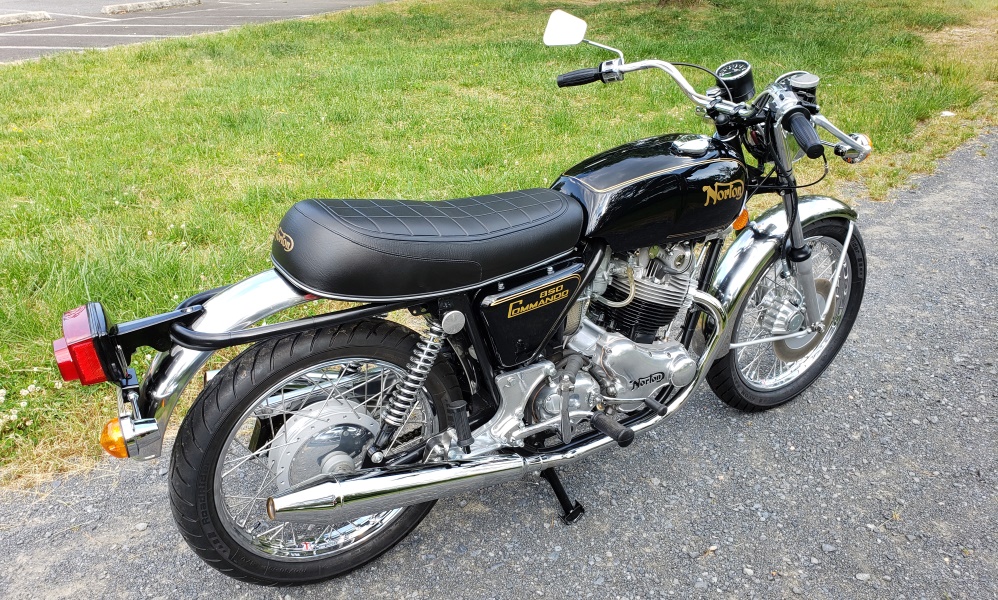
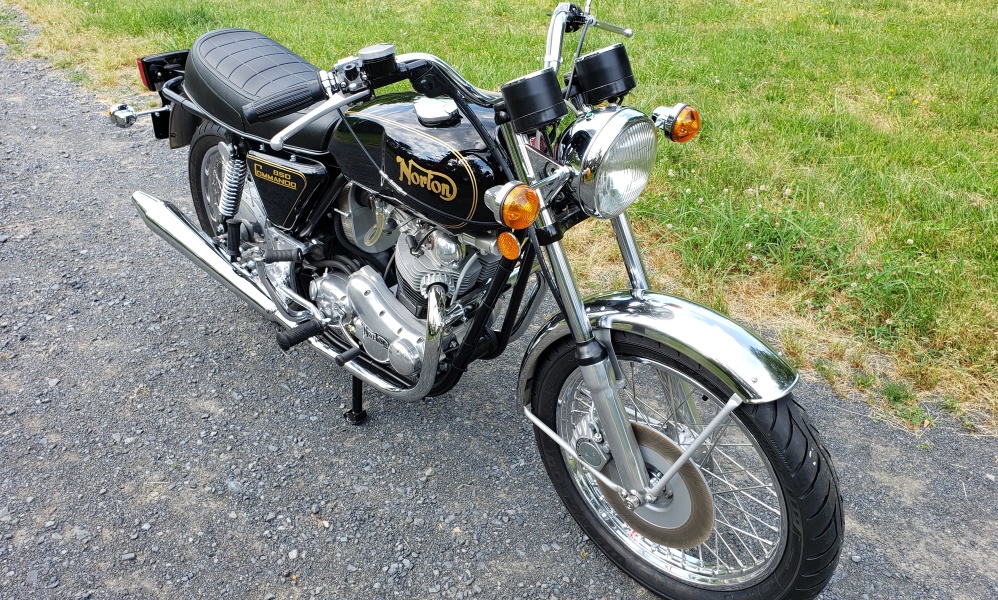
I took this bike out today for a test ride - it runs and rides great.
This bike has 340 new parts, mostly from Andover Norton and the total parts cost
is $10675 at my dealer discounts - at
retail, the parts cost would be well over $13,000. The first $13,000 takes
it.
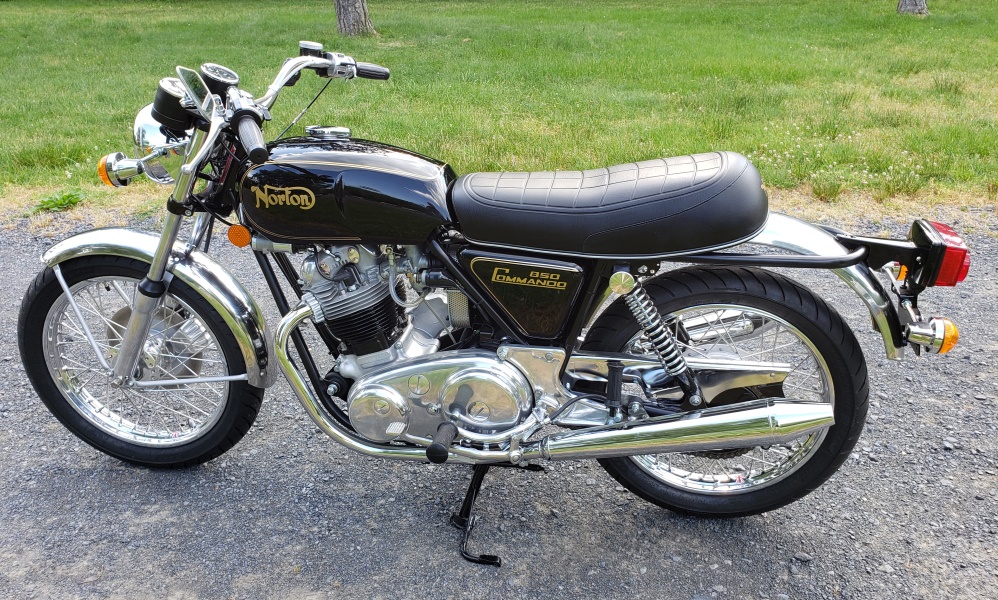
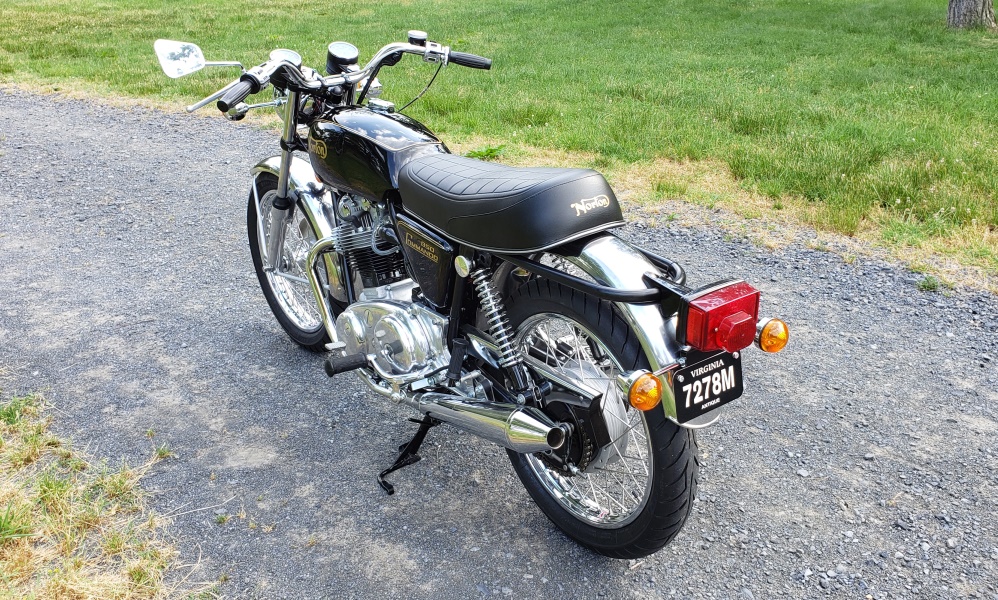
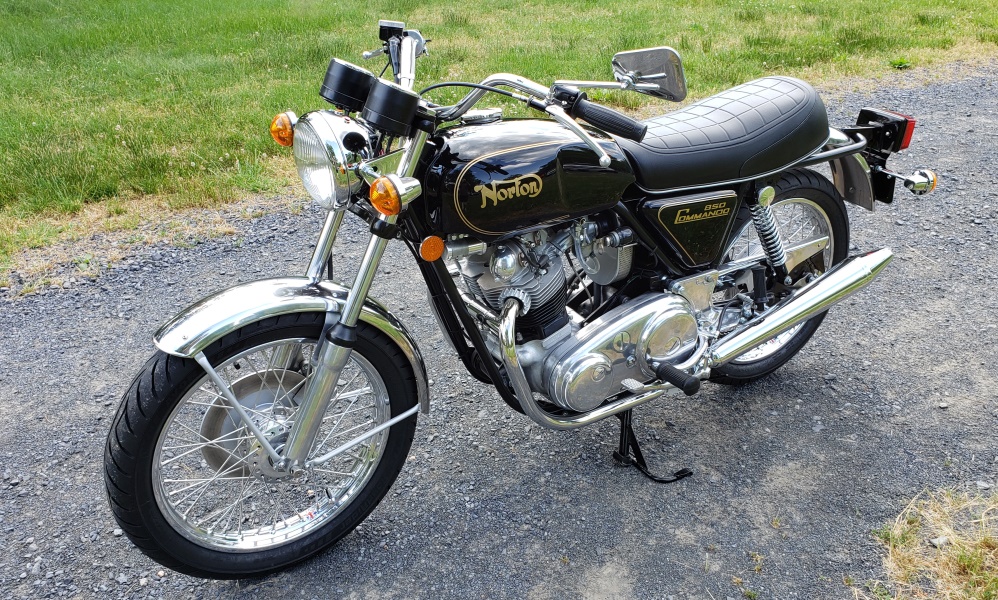
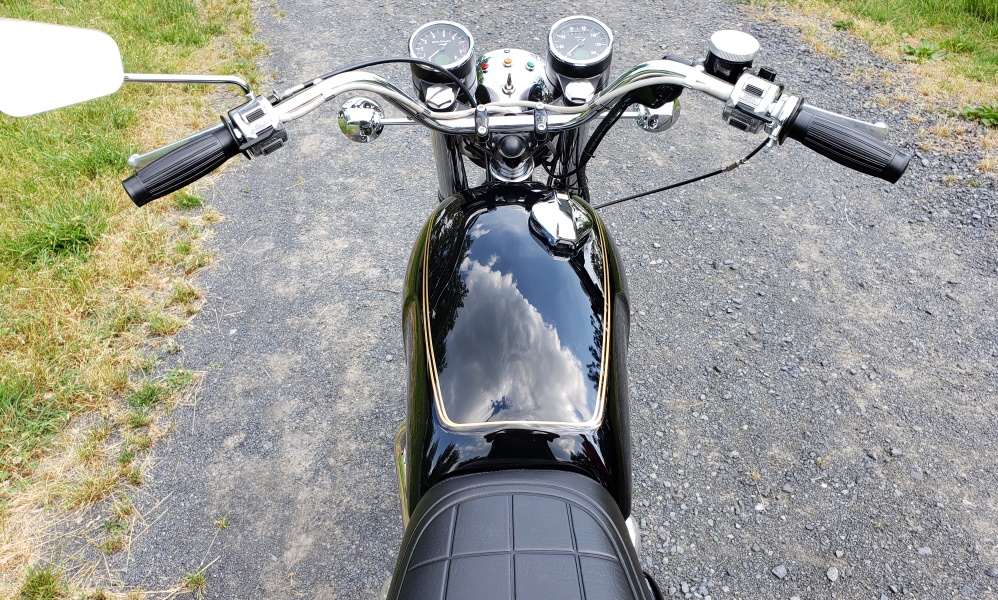
November 5, 2020 I've been starting this bike and taking it for short rides
about once a week. I noticed that
the
battery was very low a couple of times. Last time, it was too low to start.
Took the battery out and
investigated. It appears to charge fine, but doesn't hold a charge for
long, and even though it seems fully
charged, it drops to about 8 volts with just the ignition on. I tried another
battery and it had no problem.
Since this is a new battery with a two-year warranty, I'm trying to get it replaced.
I've used several of
these
AGM batteries without trouble so I don't know what is wrong with this one.
November 11, 2020 The replacement battery arrived and that problem is resolved.

January 11, 2021 Took the bike out today for a few quick videos
January 12, 2021 Sold! The buyer wants several upgrades before picking the bike
up, so I'll document them as I go.
January 18, 2021 All orders for the upgrade parts are in.
January 30, 2021
Except the electric start kit and brake hose, the parts for the buyer's desired
upgrades/changes are here now. Here's what
we'll
do:
- Replace the standard final drive with the cNw 520 x-ring chain conversion.
- Replace the handlebars with European style bars (lower and narrower)
- Replace the stock master cylinder with the 13mm version from Andover Norton
- Replace the rubber front brake hose with braided stainless steel.
- Replace the crossover exhaust with non-crossover pipes.
- Swap sides on the speedo and tach.
- Install the cNw electric start conversion. The install is simple enough
but it causes these issues:
- Cannot use the stock "hamcan" air filter - will use the K&N filter
- Must install a larger AGM battery or a Lithium Iron battery. This causes
several issues which must be worked out:
- The current battery hold down won't work.
- A larger AGM battery will interfere with the current voltage regulator location
- may have to go with Lithium.
- Not having the "hamcan" air filter means that the current mounting of
the voltage regulator must move and the
battery will be visible.
- All wiring is the right length now - moving/changing things will require unwrapping
the harness, changing wires, and re-wrapping.
It took most of the day but all the bikes are moved around, the Trident I was working
on is back on the floor, and this
bike is again on the table and coming apart.
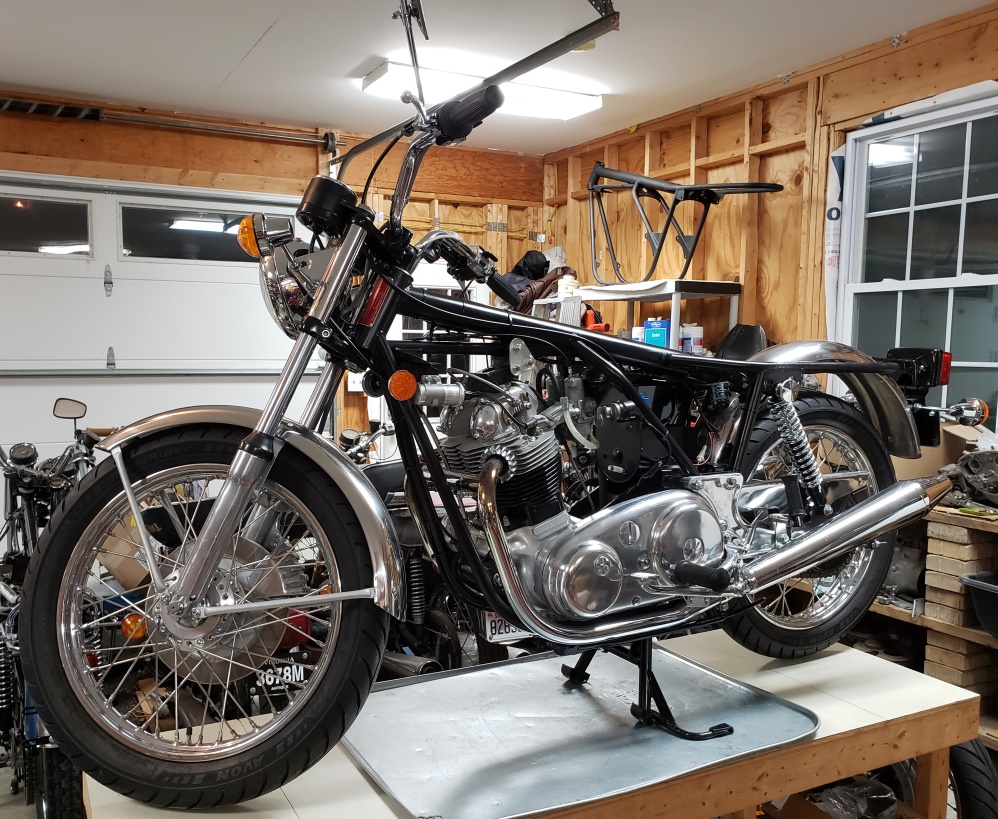
February 1, 2021 The bike is apart waiting for the electric start kit to arrive.
I had to order a socket to get
the nut off the front sprocket - I normally have the mainshaft out when changing
the front sprocket and my current
1-1/2" socket is not deep enough.
The European handlebars are installed along with the new master cylinder - now I'm
trying to work out what to do with
the hose interference with the triple tree and handlebar. Once I'm sure
I'll order the right hose - I'm
working
with a shorter temp hose right now.
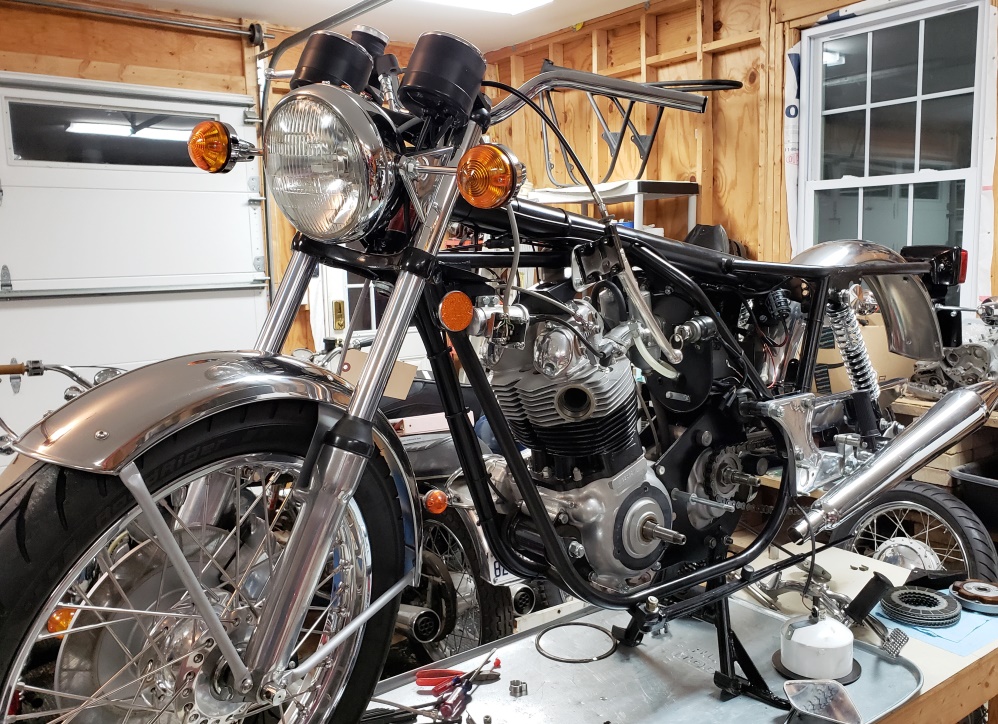
February 8. 2021 Those European bars did not work to and installed another set that
are wider, lower and less pull-back.
They work fine for the master cylinder and still give the new owner what he wants.
February 21, 2021 Still waiting for the cNw electric start kit and brake hose to
arrive. The 520 chain final drive
is installed and so is the timing-side exhaust and the new battery hold-down is
made.
February 22, 2021 The custom brake hose arrived today. It's installed and the
brake is bled. The new owner wants
the speedo and tach positions swapped and the console switches wires run differently.
Took all that apart today.
Have to shorten the console wires since they will be underneath the handlebars and
the handlebars are lower and narrower
- ridiculous amount of work for a finished bike Also, the custom speedo cable
I had made is now too short so I
have to find a longer one.
February 28, 2021 Still waiting the electric start kit to arrive. The new
owner didn't like the routing of the
cables on the handlebars and the European bars and lower and narrower so I had to
shorten and rewire the handlebar
cables. Big job that hurt my id. The Lucas consoles are easy to find as are
rebuild kits for them. The
cables are no longer produced so I treat them with great care when I restore them.
This is the first time I ever
shortened a set :-(.
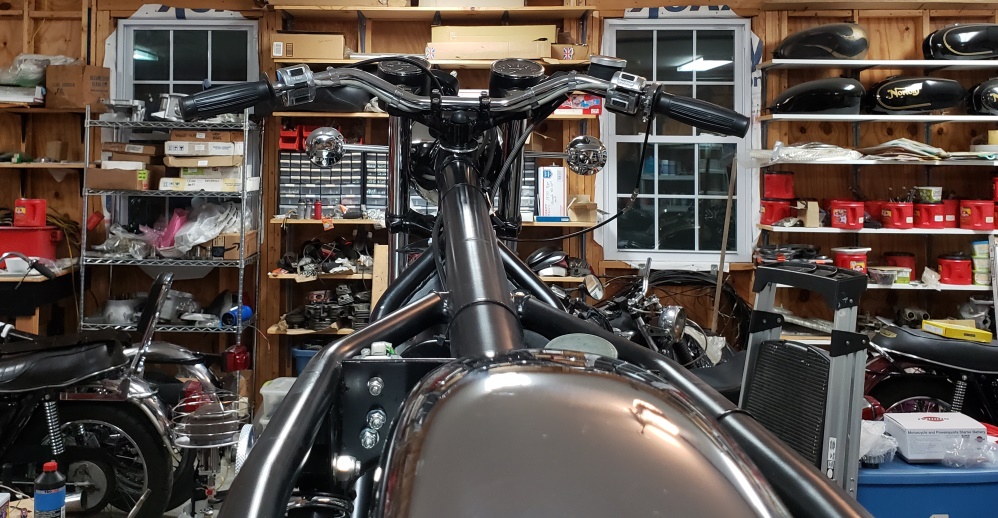
March 12, 2021 Happy 71st birthday to me! The cNw parts arrived today. Installed
the 520 drive chain and started looking
over the instructions. I'll have company this weekend so probably will be a few
days before I get back to it.
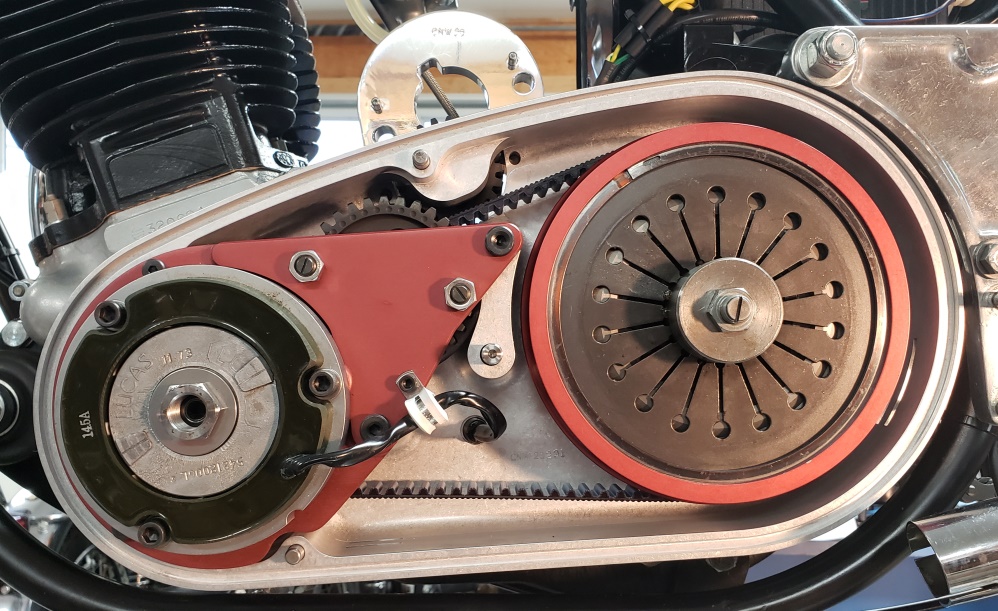
March 15, 2021 Here's the bike ready to start the actual cNw e-start installation.
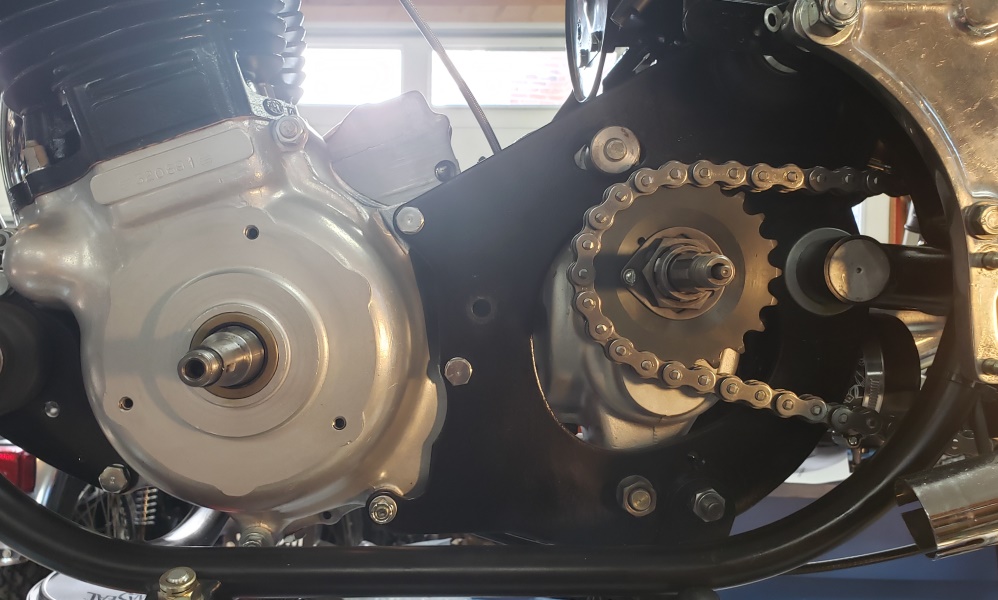
March 16, 2021 The first step of the installation is to install the cNw version
of the inner primary standoff. This
is how Norton should have made it to start with.
Rather than putting the inner primary on, measuring the gap, finding a spacer, taking
the inner primary back off to
install the spacer and so on, you simply install this loosely, fully install the
inner primary and then adjust this to
properly support the inner primary.
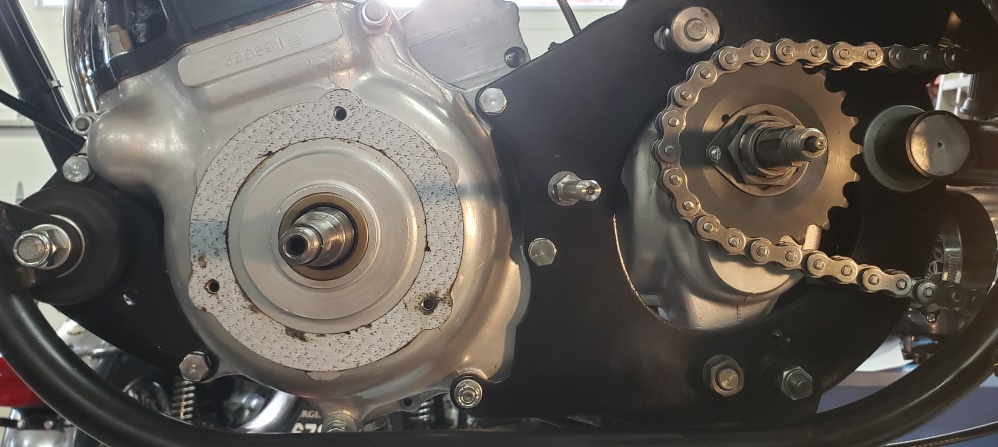
Here the primary area is ready forvthe inner primary install. I usually stick the
crankcase to inner primary gasket on
with grease but this time I used Permatex #3 to help ensure no oil gets into the
primary.
The clutch location circlip has been changed even though I used a new one when I
built the bike, but sinc ehte kit
included a new one, I changed it.
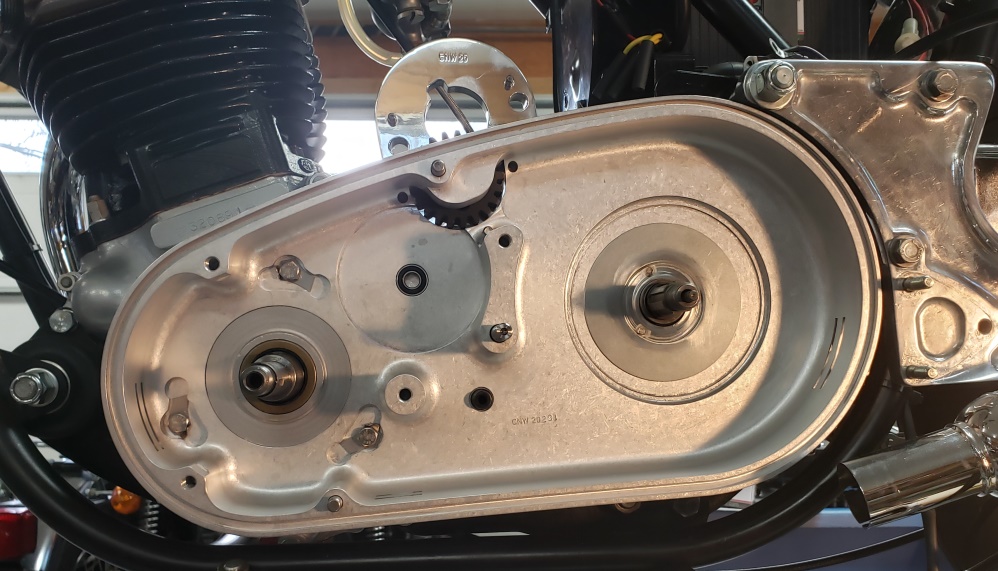
Getting to this stage was so easy I forgot to take a picture with just the front
pulley, belt, and clutch basket in place.
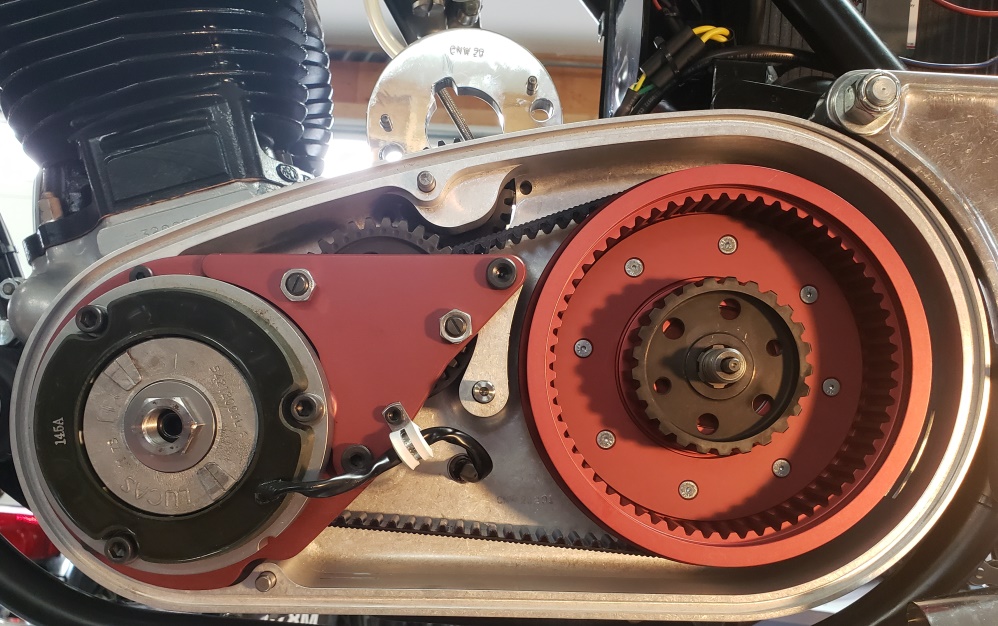
Here he clutch installed and adjusted. This was the only thing that gave me
trouble. I installed a brand new
Barnett clutch pack when I built the bike and had no trouble putting the clutch
together. This time I couldn't
get
the big circlip in - I've done it many times and never had a problem.
It turns out that the clutch stack is
effectively slightly taller in this clutch basket. Once I knew what was going
on, I simply tightened down on the
clutch spring tool and it went right in. Unfortunately, I didn't have
my brain in gear because it took about 30
minutes for me to realize what was wrong! The good thing is that what I thought
was an easy clutch pull got even
easier.
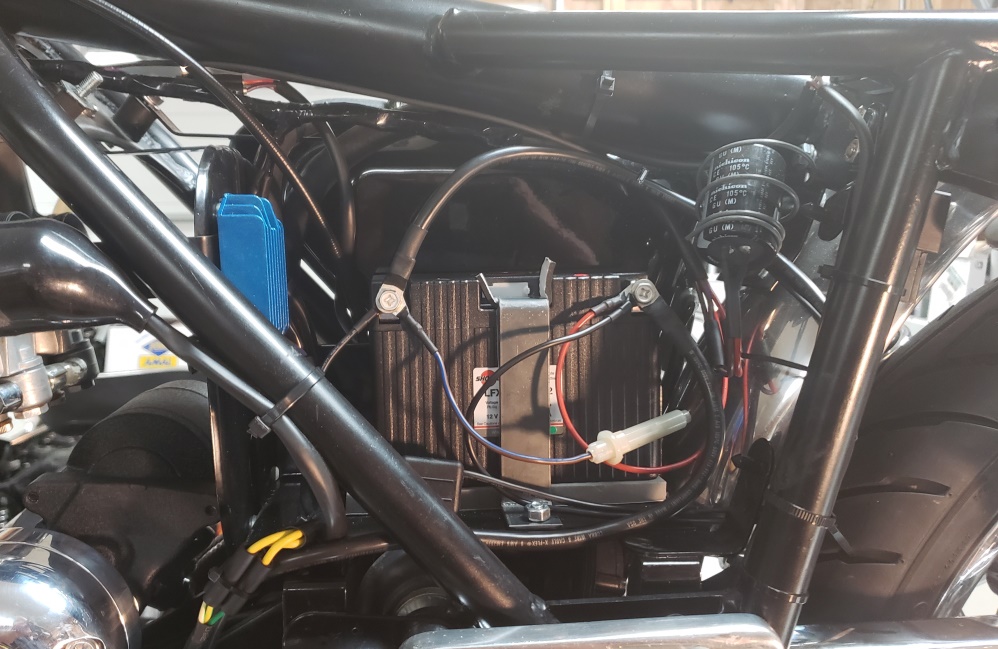
Here's the battery are wiring done. I still have to powder coat the battery
hold down and install a few zip ties.
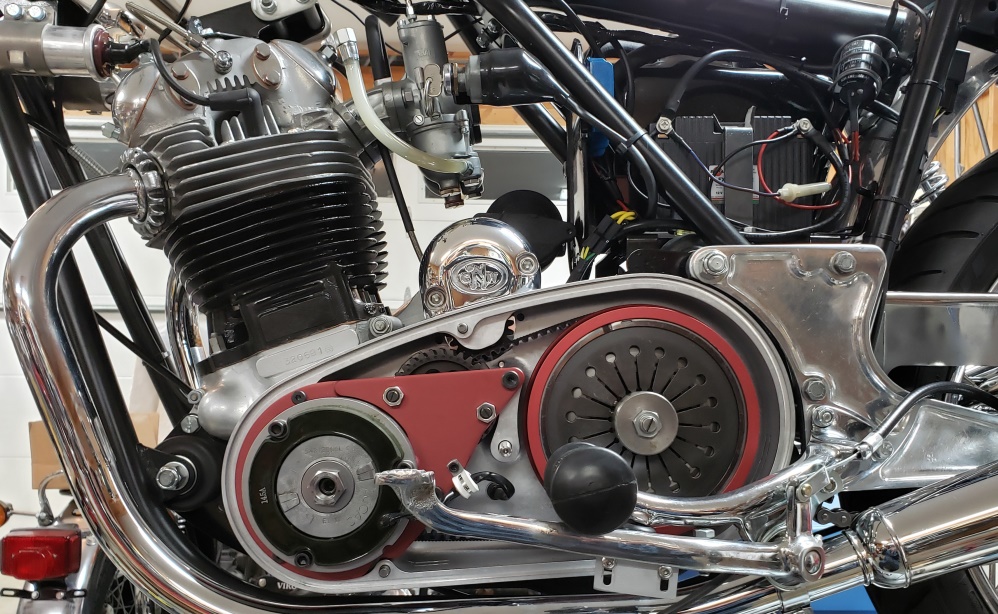
Here it's all together. The belt and drive chain are adjusted and the
foot rest is loosely installed. Once
it's off the table, it needs to be started and the two screws adjusted that
prevent the intermediate gear from turning
while the engine is running. It has been tested and turns the engine over
easily, but I don't run bikes inside
and
definitely not while up on a table.
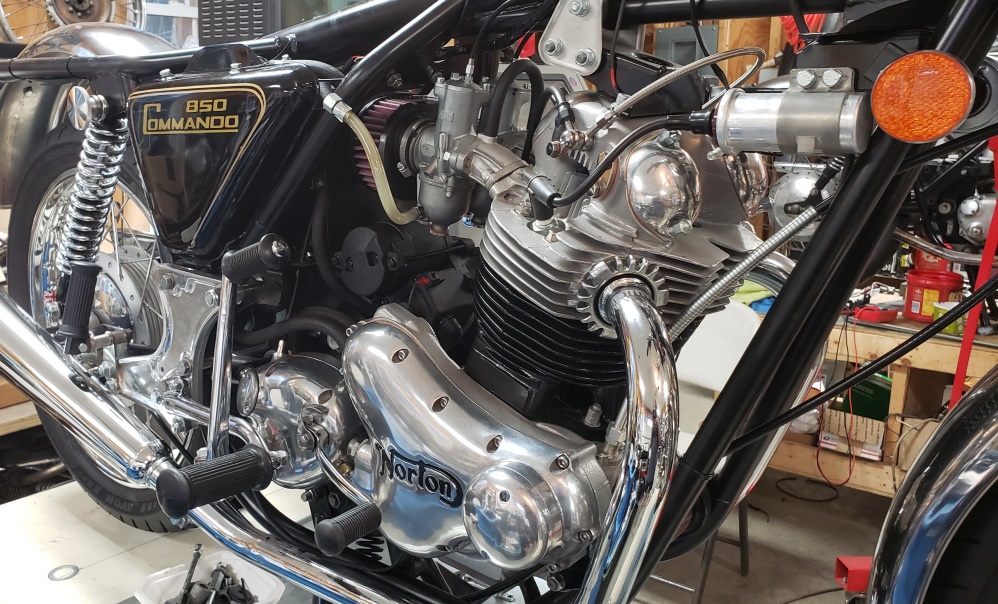
March 19, 2021 Installed the RGM folding kick start lever. IT does tuck away nicely.
It' about 1" longer and gives nice
clearance for the muffler. Quite expensive but if a new lever is needed it's
not much more than stock. Also installed the cNw special narrow K&N filter
and tidied up te wiring. If is
warms up tomorrow, I should be able to finish this bike!
March 20, 2021 Took it off the table, did the final e-start adjustments, installed
the primary cover. Reinstalled the real brake cable and did the final handlebar,
rear wheel, rear brake cable and other small adjustments. It was too cold to ride
today - hopefully tomorrow. Unless something turns up during the ride, the only
things left are powder coating the battery hold down and installed the left side
panel. The e-start works very well, here's a quick video:
April 19, 2021 Everything is done and the buyer contacted with Haulbikes.com to
ship the bike. They are spposed ot pickup between April 30 and May 15.
June 10, 2021 After months of waiting, the bike was finally picked up today. I
DO NOT recommend Haulbikes.com - feel free to call me for an anti-reference!
|


|
Copyright © 2003-2026
Greg Marsh Enterprises
8116 Arlington Blvd. #171, Falls Church, VA 22042
(703) 200-4025 marshg@gregmarsh.com
|
|