|
|
 | Tuesday, July 21, 2026 |
Early in 2017 I got a call from a man in Michigan wanting an opinion on the value of his 1972 Norton 750 Commando and parts.
See the Norton Home page for some history on the bike.
Once I bought the bike and had it shipped, I ran into a big problem. The title showed a lien that had been paid off over
40 years ago but that notation made the title worthless in Virginia. Fortunately, the former owner was able to work with
the MI DMV and get a clear title and transfer it to me. It took a long time but I was finally able to title the bike in
Virginia in early Sep 2017 so it is safe to get started on it.
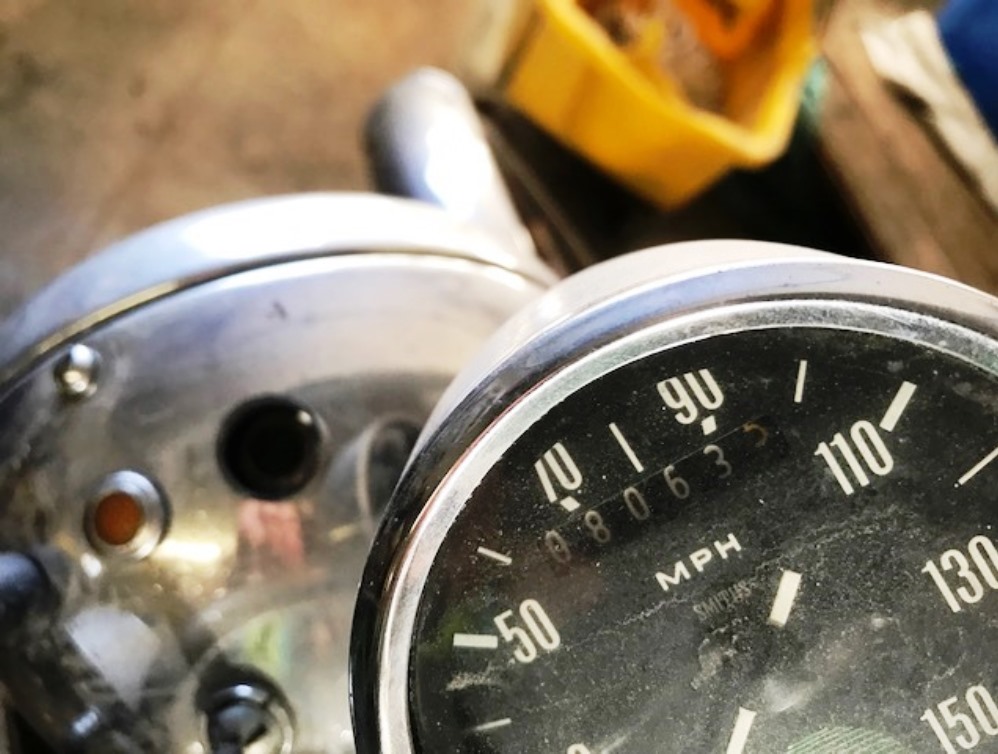
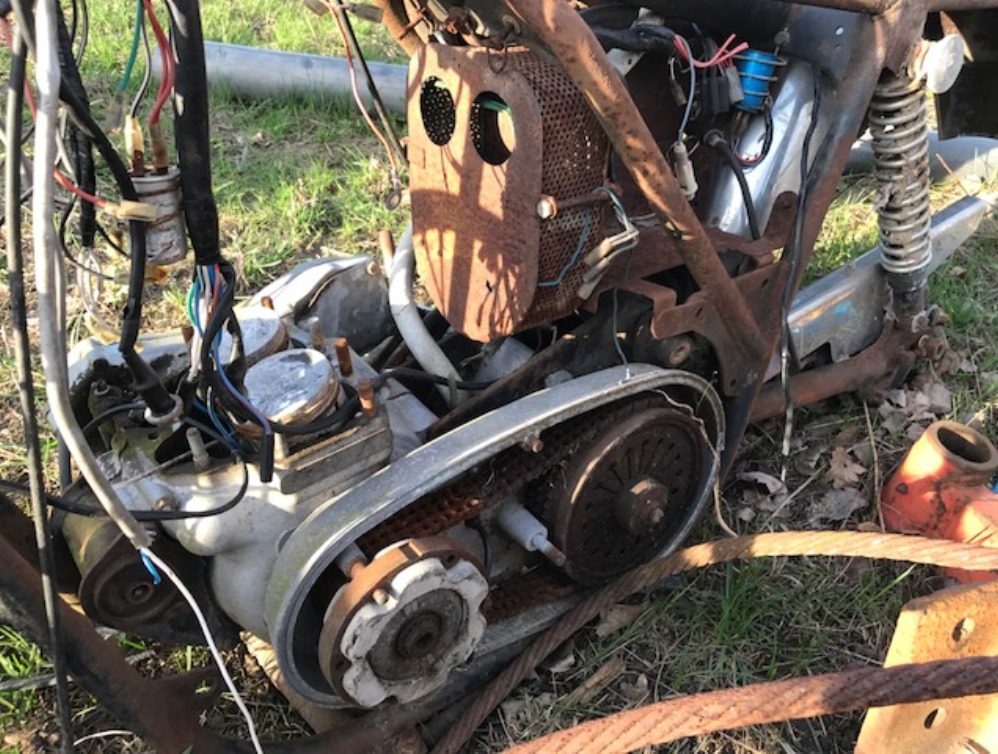
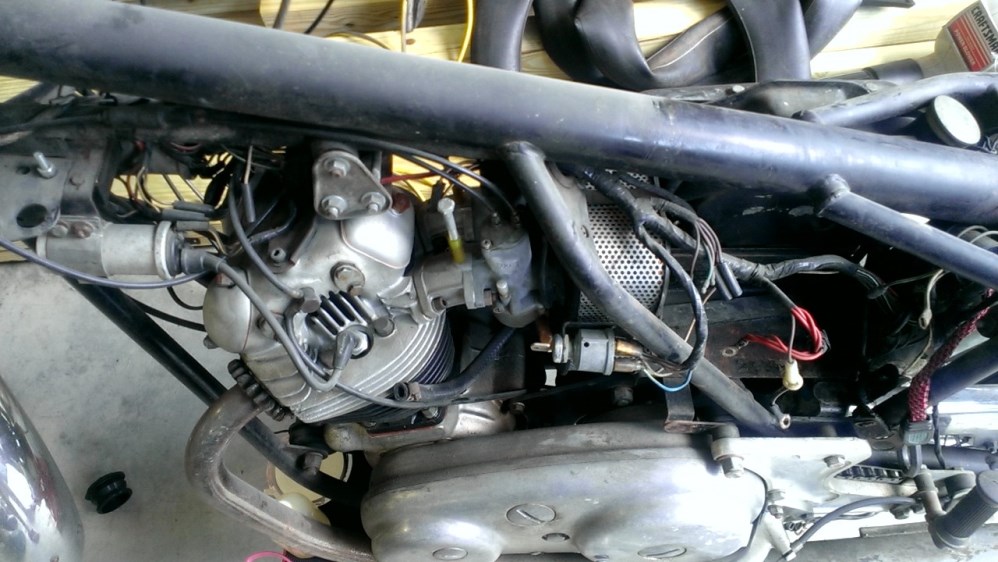
Here are some pictures I used to value and eventually buy the bike and parts:
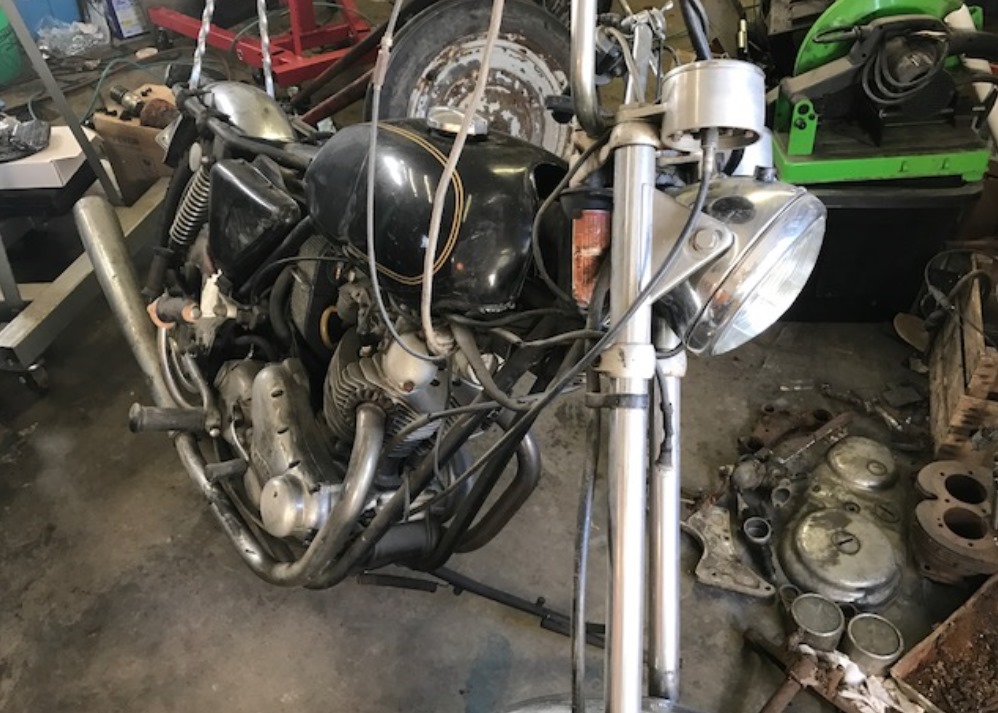
The leftovers from the donor bike - sat outside since 1976!
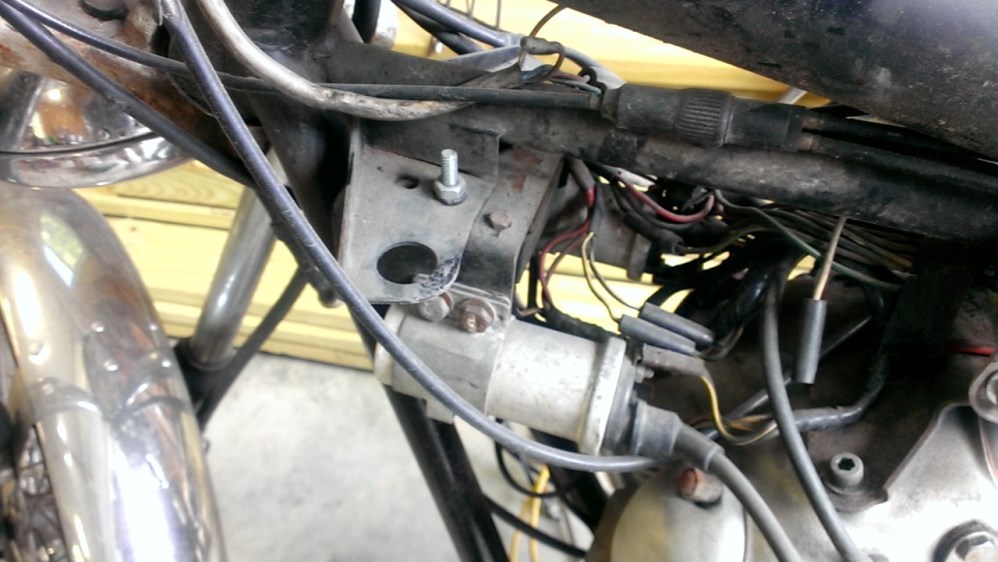
A couple of pictures with the tank off. I was considering seeing if I could start it, but when I saw the wiring and hoses,
decided to rebuild everything and not waste time trying to start it.
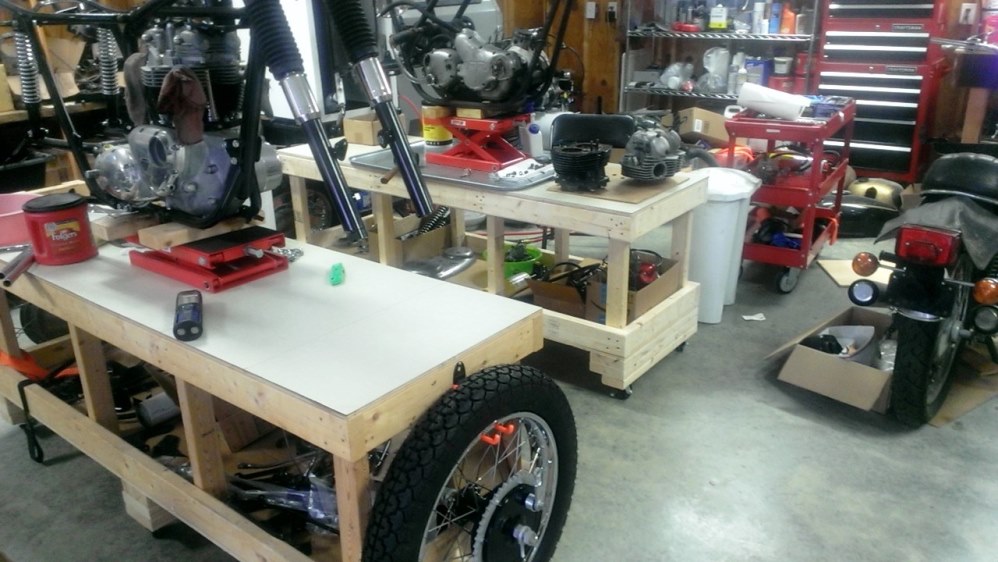
September 14, 2017. Finally getting started. Actually, just need to get it up on a movable table to get it out of the way!
Look here for the Mobile Motorcycle Tables I build.
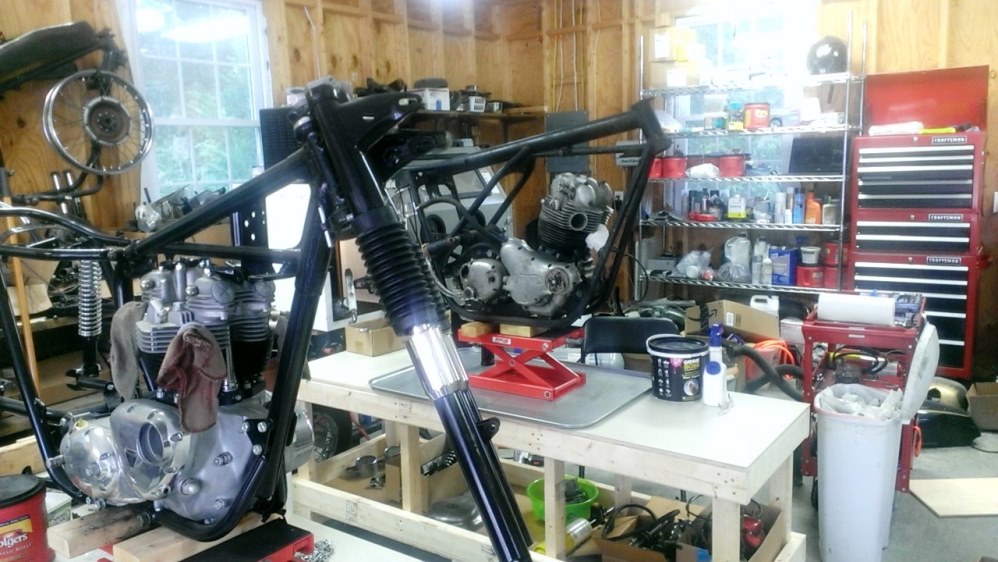
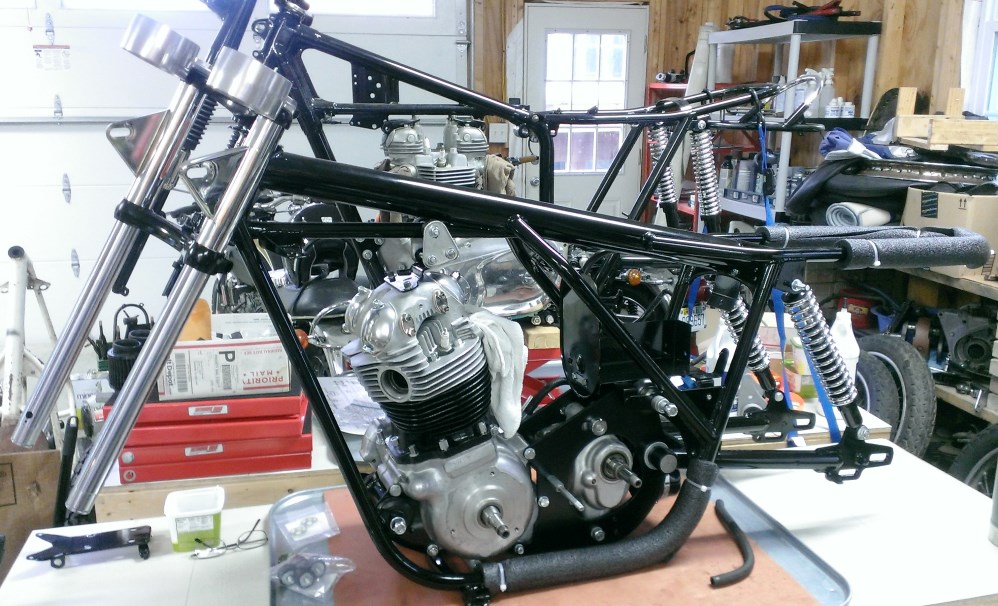
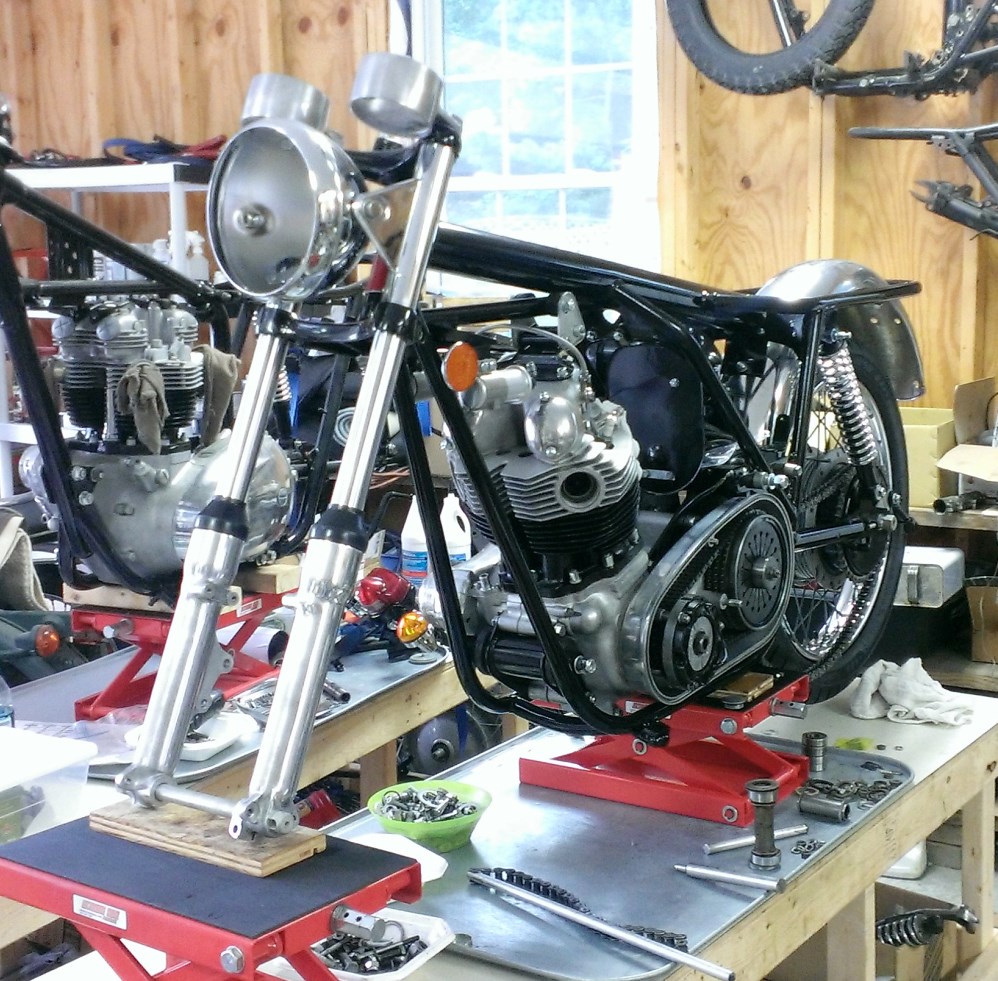
September 23, 2017. After removing the exhaust and front end it was time to put it on the table. The first picture shows
it up in the air ready to set down on the table. it's a little rear heavy on purpose - the rear end will come apart next.
The second picture shows it in place and moved out of the way. It was real pain moving the bike around on its own wheels
since the bearings are bad, it had those ridicules extended forks, and it has no kickstand.
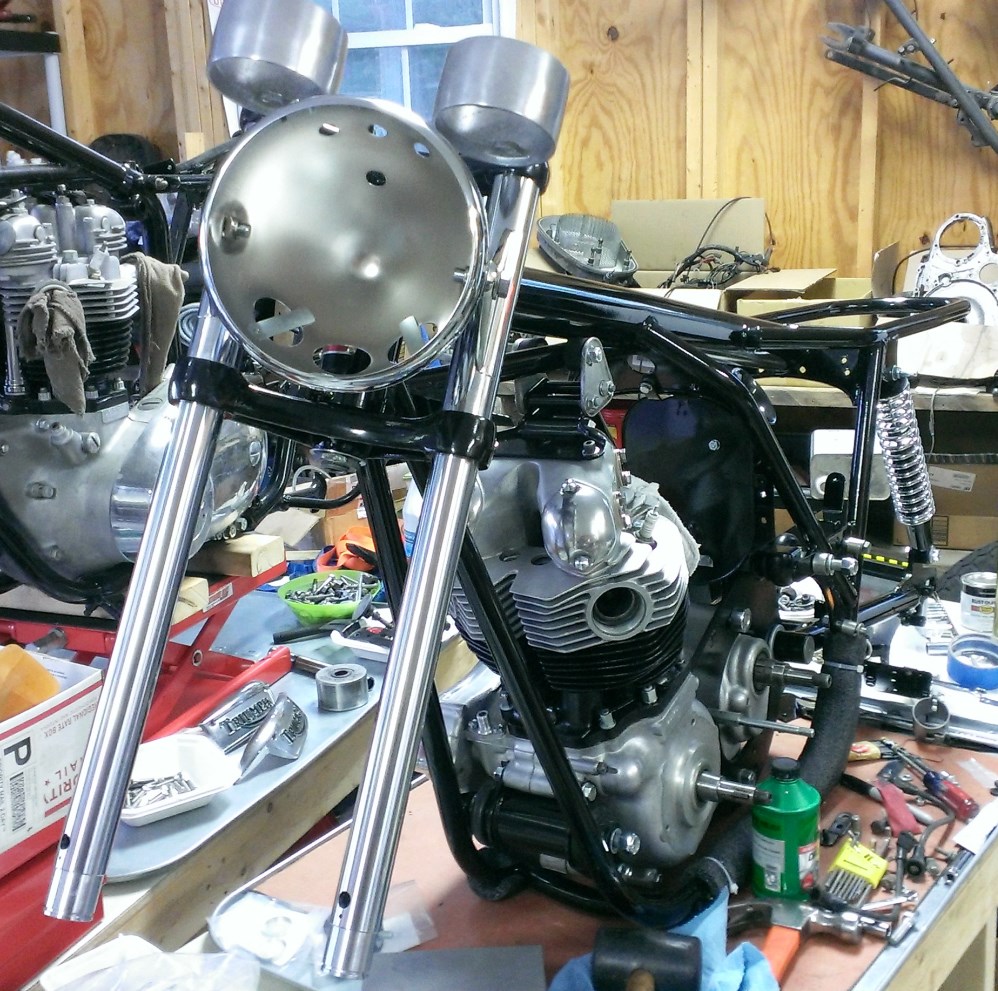
The extra ridicules part about those extended forks is that it used the standard damper rod and springs with a tubular extension
that can't be taken out without removing the sliders from the damper. The forks were truly a pain to get off the bike.
I figured they would be - that's why I wanted to work on them first on the ground.


October 3, 2017. Continuing disassembly and inspection. The fork components are good - if you want extended forks,
call me.
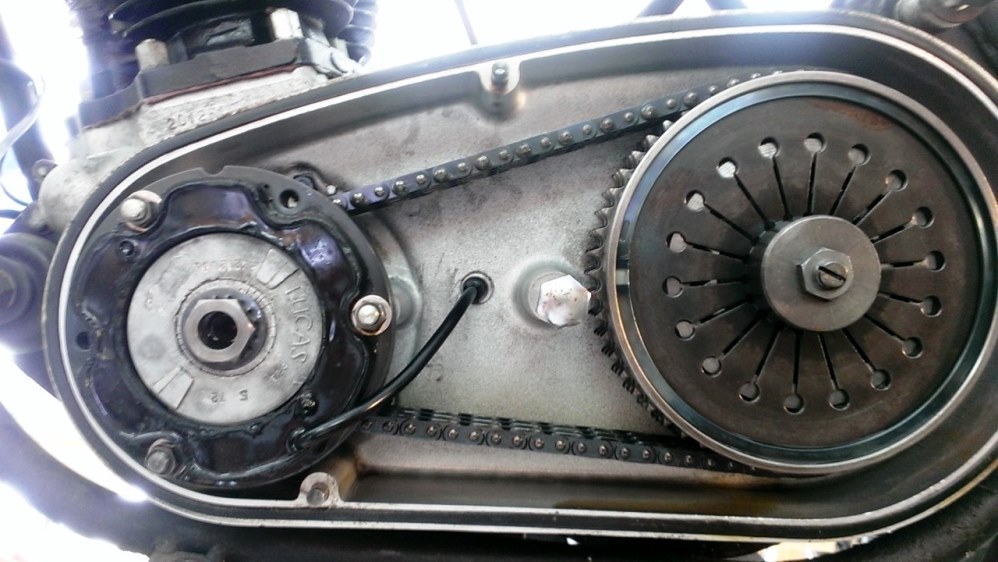
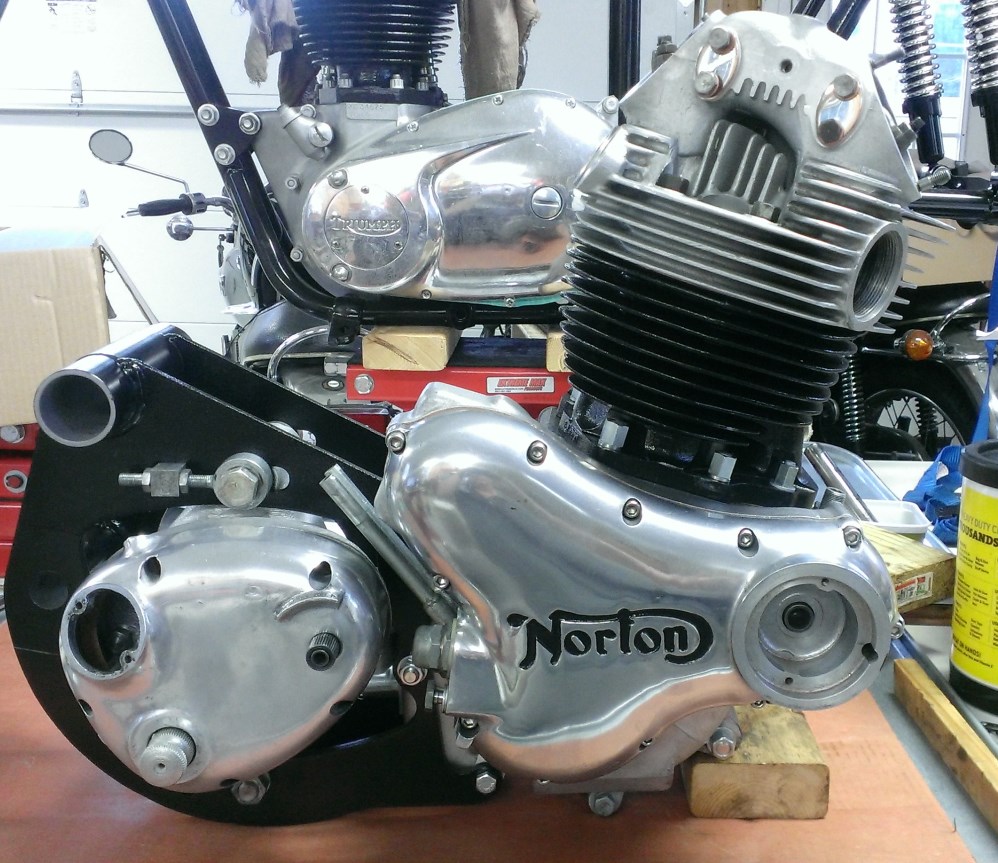
October 5, 2017 Starting on the engine. I was surprised when I took the primary cover off. Usually a bike sitting
for 40+ years will have condensation and rust. This engine has none. There was way too much oil in the primary. I thought
it was overfilled, but later realized that the engine was completely wet sump'ed and engine oil had leaked into the primary.
October 7, 2017 Here the head is unbolted but did not want to come off. The last person who worked on the bike used
gasket sealer and Loctite everywhere. Every nut and bolt has been a struggle. After a lot of work and heat,
I finally got the head steady off and realized that I have a Combat head. Then swinging a rubber hammer for a long
time I finally got the head loose.
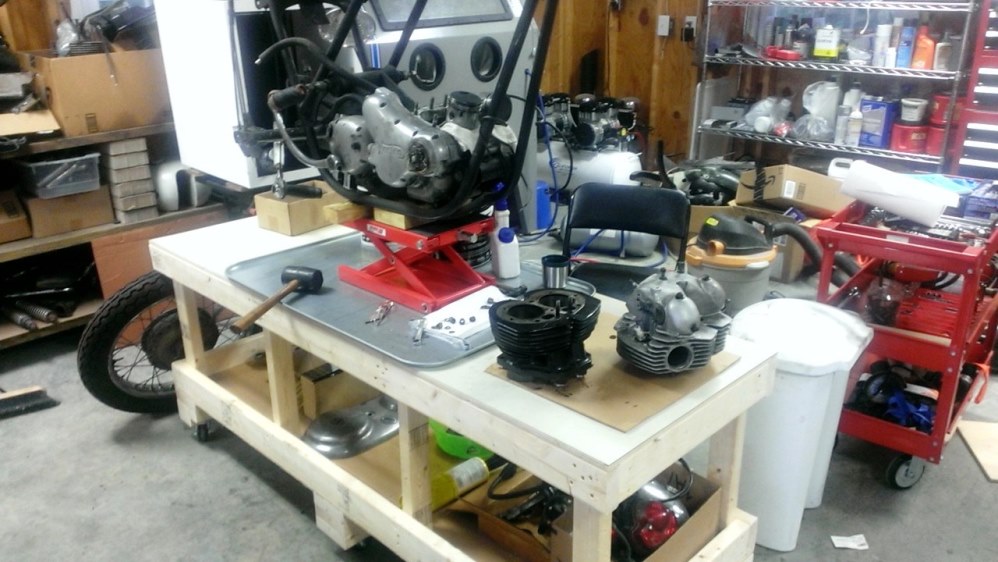
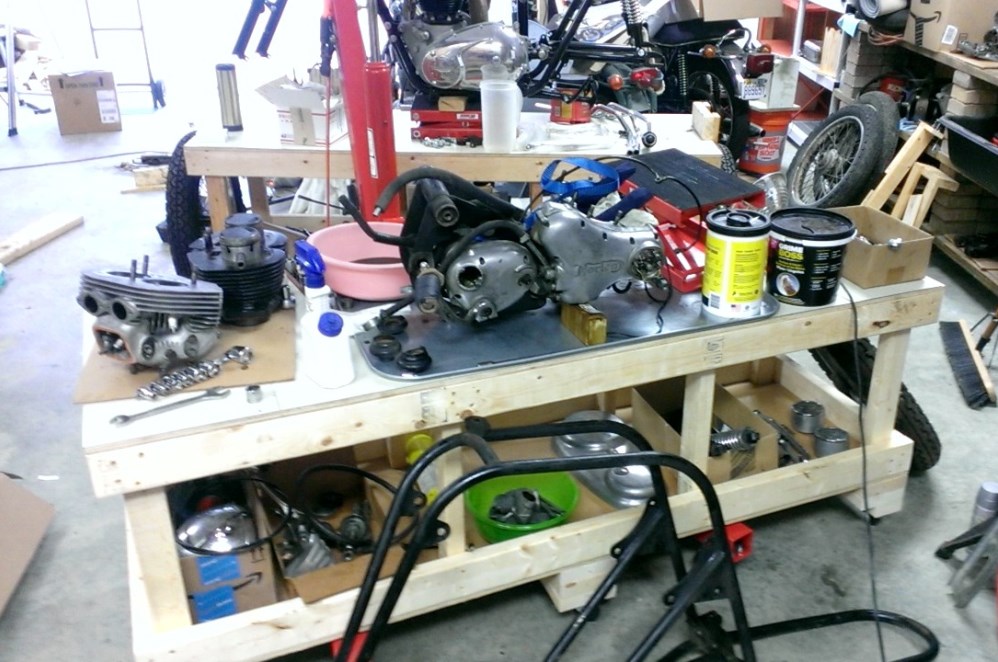
October 8, 2017 The head and cylinders are off. Once I got the head off, I hated to go farther since the bores looked
perfect but since the last person did several things wrong and since I need to switch cases, it needs to come completely
apart.
In the second picture you can see rear wheel that's ready to go on the 1970 Bonneville I'm working on at the same time.
The front wheel is ready too and hanging on the other end of the table. You can also see the rear end of my 1974 850
Commando rider.
October 13, 2017 Almost all apart, time to take the engines and gearboxes apart and inspect them.
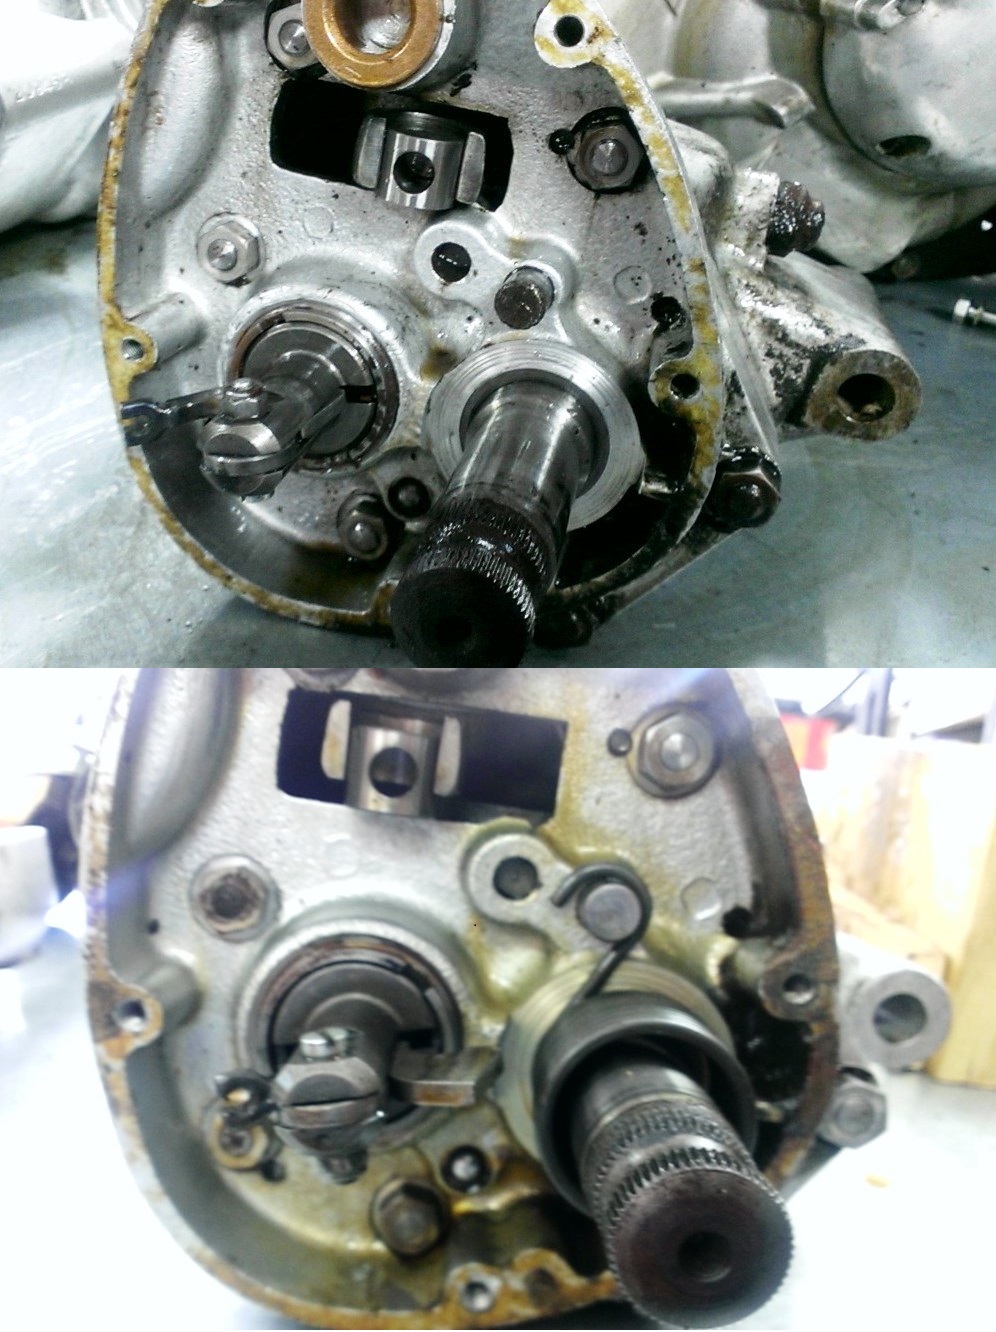
October 21, 2017 Both gearboxes are apart and they look great. The only problem I had was that the outside one (top picture)
had two cover screw heads that were rusted almost off. By the time I got them out, I had done some damage to the outer
cover. I won a good one on eBay for $20 so that's no big deal.
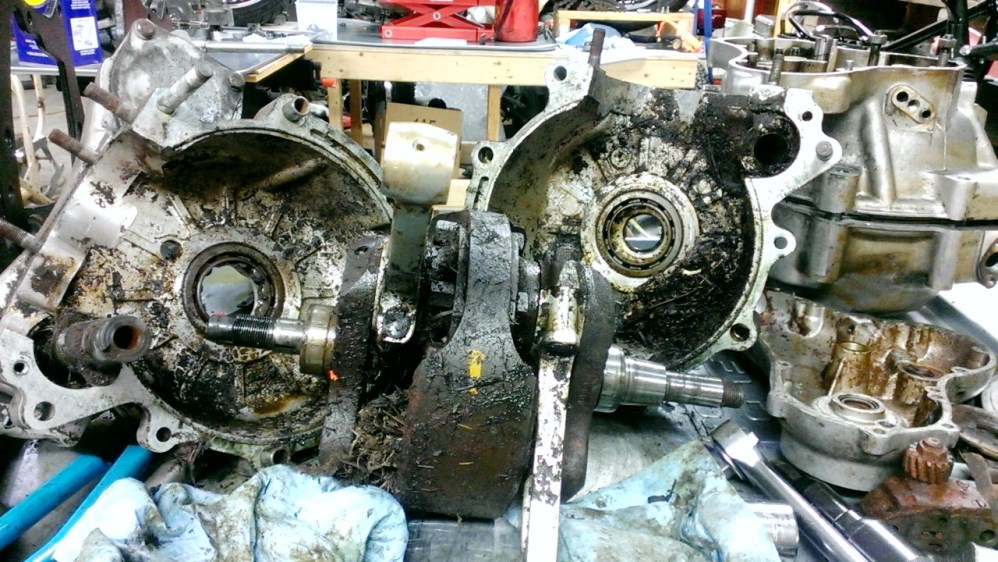
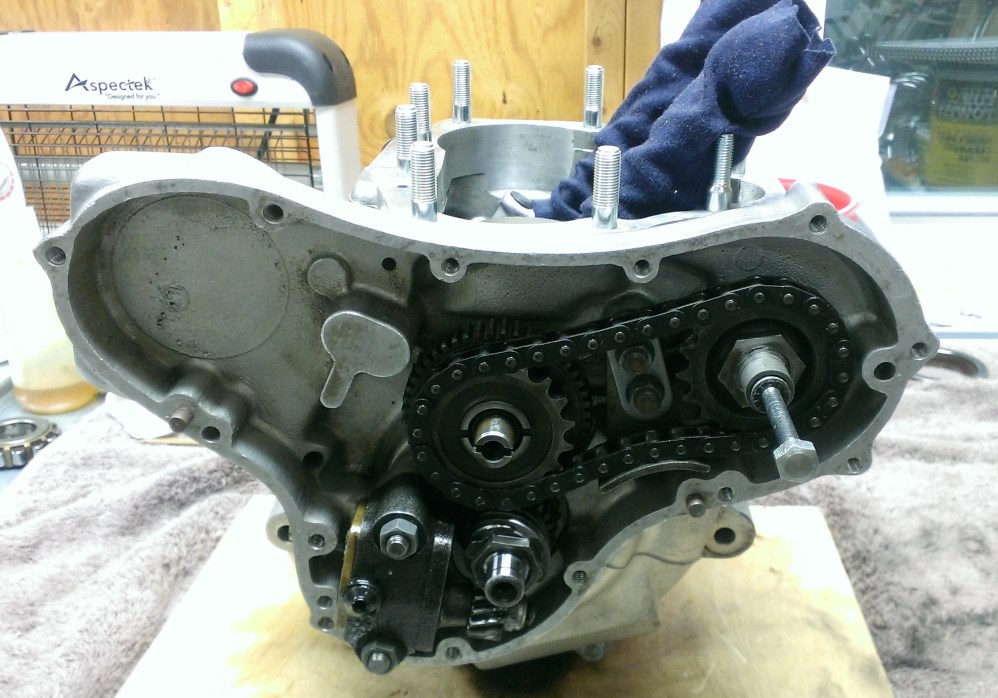
November 1, 2017 Both engines are apart. The one that was in the bike is a Combat engine from the factory and needs
very little. The one that laid outside all those years is shockingly good even though it was home to mice. The
big ends feel fine. The crank will clean up. The conrods are good. The cases are fine.
It was hell getting it apart and I still can't get the nut off the cam! The pictures show the cases and crank right
after I got the crank out. Although I wouldn't do it, the main bearings could probably still be used! The oil
pump and timing chain are trash, but that's it.
November 19, 2017 I've decided to use the cases from the donor engine and when I eventually sell the bike I'll give
the original cases to the new owner. The cases are cleaned and almost ready to go back together. I received over $2000 worth
of parts from Andover Norton this week which was part of what was holding me up. The factory record I got from Andover
Norton says that this bike was yellow and the left side cover I have is yellow with a black vinyl wrap. The tank is a black
steel tank so I guess it came from the donor. I'll probably buy the factory record for the donor so I know more.
Also holding me up is that I am in the middle of repairing a customer's 1969 BSA B25 whose oil pump gear failed. Fortunately
the engine didn't explode but the crank and rod are heavily damaged. I've bought three crankshafts and all three were beat
out of the case on the timing side - stupid people - none of the three are usable!
December 31, 2017 The BSA B25 is done and gone. I had shoulder surgery earlier this month and have not been able to do much
since. I have cleaned the frame and I've done a little sanding on it.
January 23, 2018 It�s been hard working with one arm, but the front motor mount is powder coated, the engine/gearbox/rear
motor mount is blasted and ready for power coating, the swing arm is blasted and ready for paint, and the frame is nearly
ready for paint too (my blast cabinet is not big enough for a Norton frame and my powder coat cabinet is not big enough
for a swing arm).
February 10, 2018 Still working mostly with one arm. I finished getting the frame ready for paint and was supposed to give
it to the painter today, but he canceled on me. I hate needing anyone to help with anything - I really need to build a
paint booth!
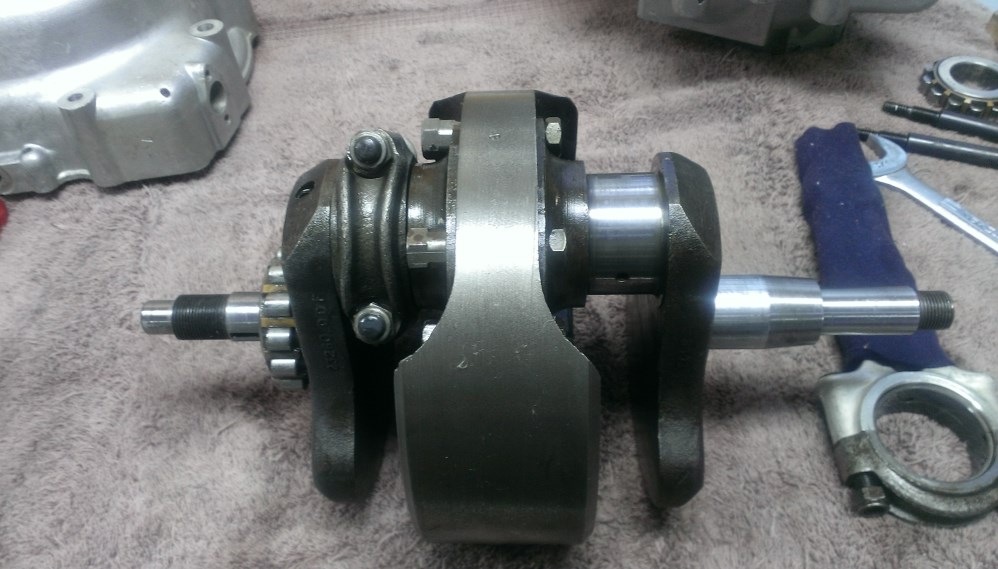
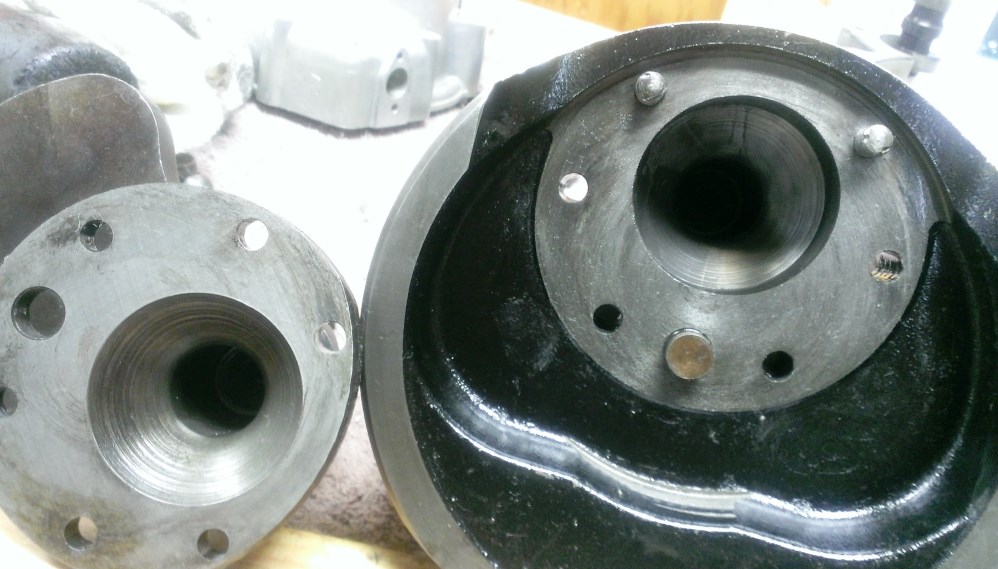
February 11, 2018 Powering through pain, I got the crankshaft apart. X-Ray vision would have been nice! The big end journals
look and measure perfect, the bearing shells look new, and there was nothing in the sludge trap. The old bearings were very
hard to get off, but the Superblend inners went on without much trouble. Next, I'll check/correct the crank end play.
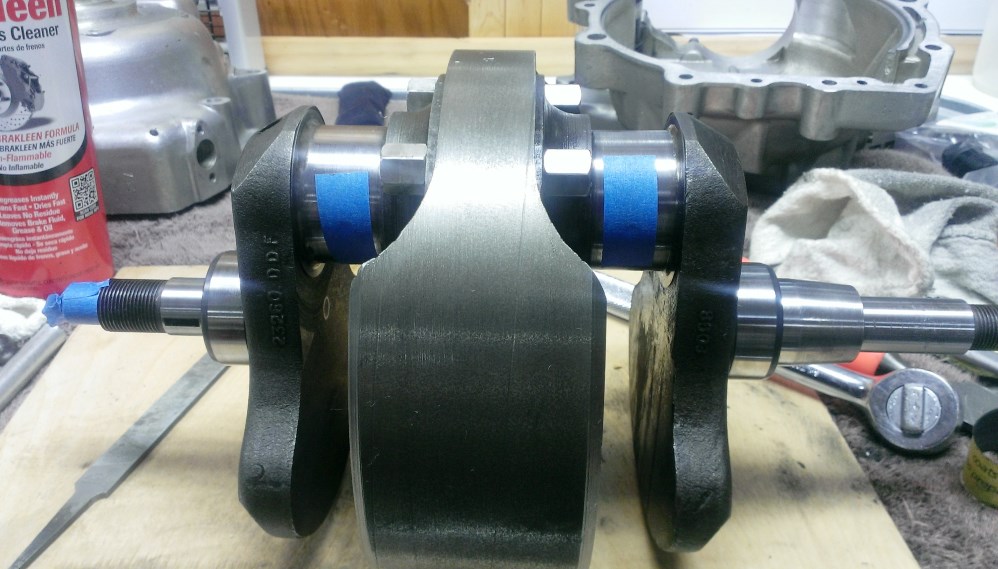
February 18, 2018 Here's the bottom end going back together. Ran out of steam polishing the timing cover - will get that
done soon and the bottom-end will be done.
February 27, 2018 The timing cover is polished and installed. Ran into a problem with the piston rings - the envelope they
came in was wrong for the rings and I spent a lot of time figuring out which way was up. Finally talked to Hastins tech
support and they confirmed that their web site is wrong and my inside bevels both go up.
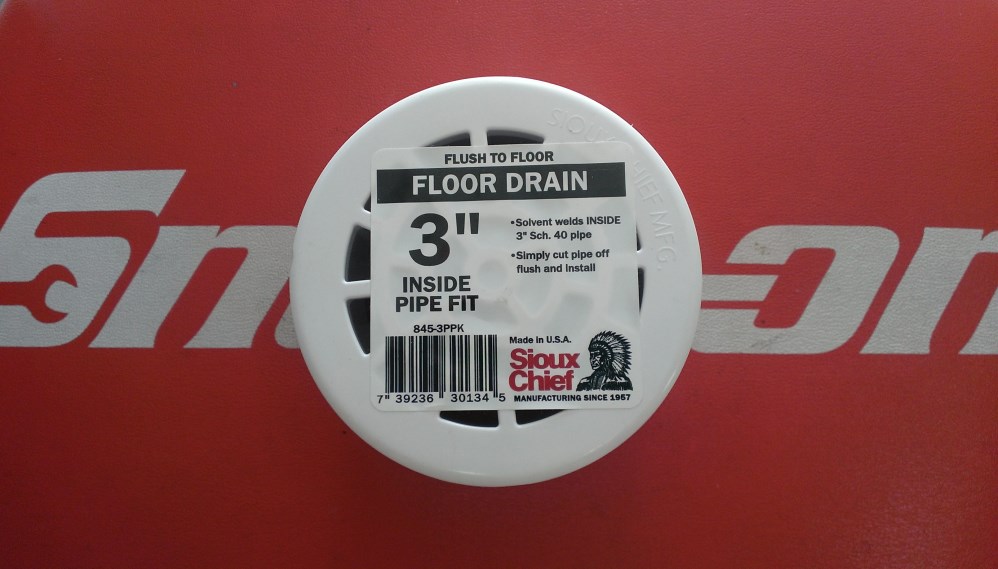
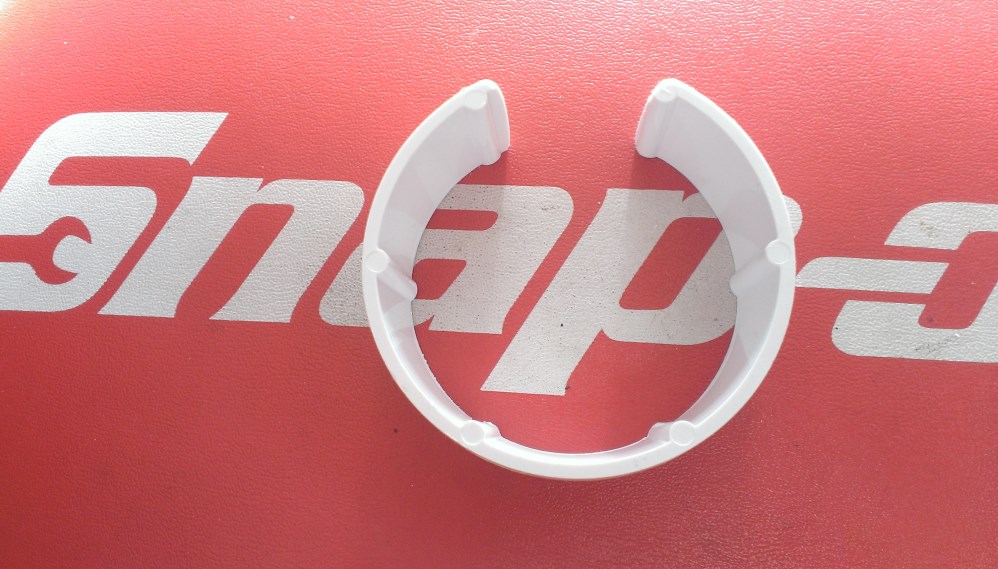
With my shoulder problems and arthritis, I knew I couldn�t put the cylinders on without ring compressors. Over the years,
I�ve tried many and have never been happy. So, a few years ago, I made some that work well. Unfortunately, I mislaid one
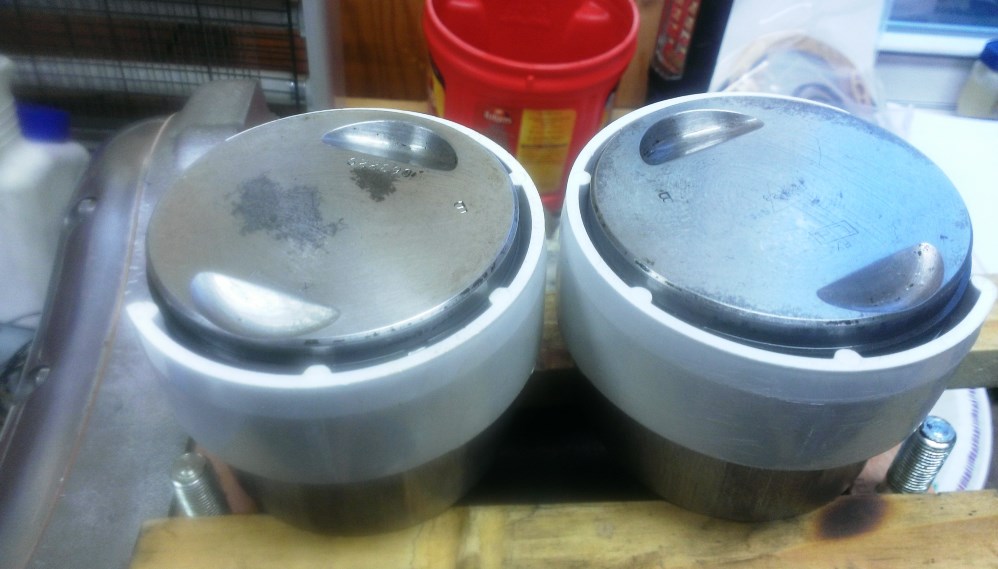
of them so I had to make another. The pictures show the process. Make sure to sand off any loose bits before using! Also,
notice in the 4th picture that the compressor on the left piston is installed right and the one on the right piston is two
low on the right. Make sure they are just above the top ring and that everything is well oiled before lowering the cylinders.
I�ve used these on 500 & 650cc Triumphs, Triumph Triples as well and this 750 Norton. I haven�t tried an 850 Norton or a
750 Triumph Twin yet.

March 3, 2018 The cylinders are on and I took the head apart for inspection and cleaning. The drive-side rocker spindle
was installed wrong and is heavily worn.
Fortunately, I have the original head so I took the rockers out of that. While at it, I had a shock - it is Combat too!
So, I thought the original bike was not combat and the donor was, but it turns out that both were.
The donor head cleaned up nice but I wish the original head had not been screwed up by someone trying to fix the spark plug
hole - the fins are nicer on the original. Nothing is broken on the donor head, but the casting was not great on a couple
of the fins. I re-shaped them a little so they look good.
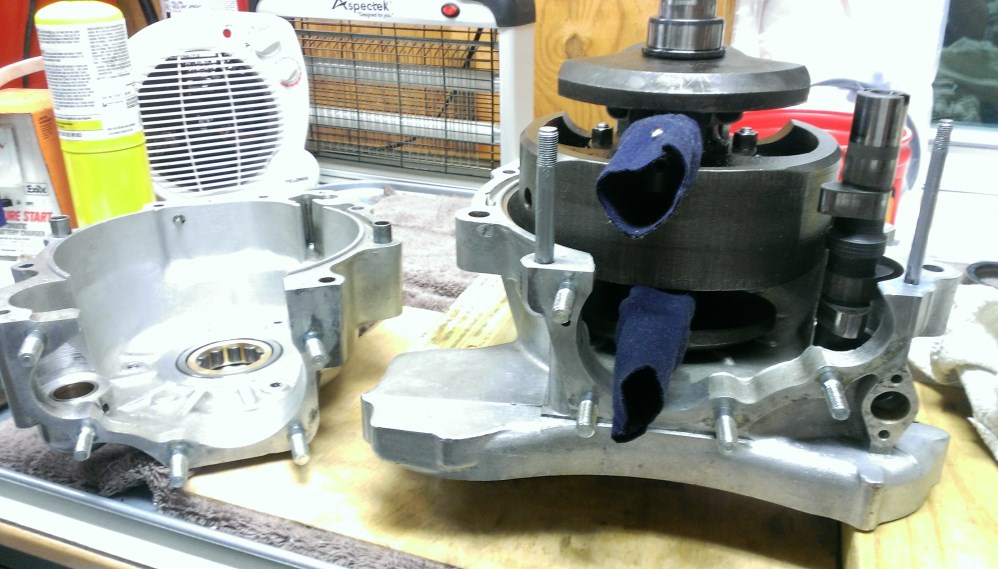
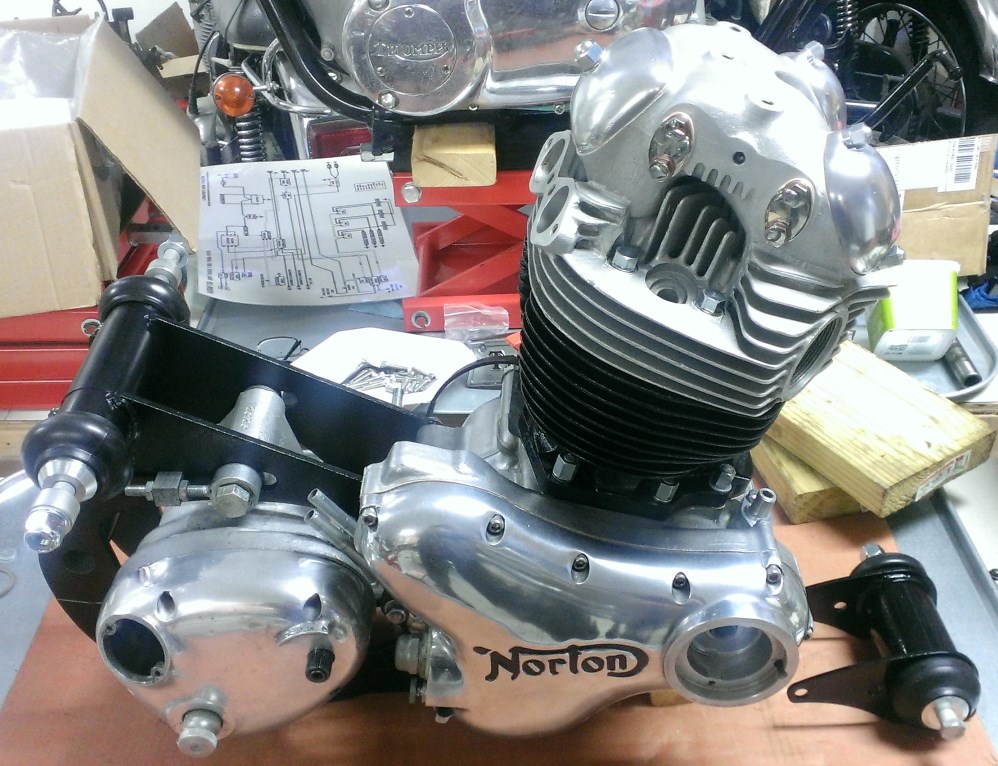
March 18, 2018 The gearbox is rebuilt and the power unit is back together. The outer gearbox cover laid outside for over
40 years so it was difficult to make look nice - it's not perfect but as you can see, quite good. The frame was supposed
to be finished at the painter yesterday but wasn't.
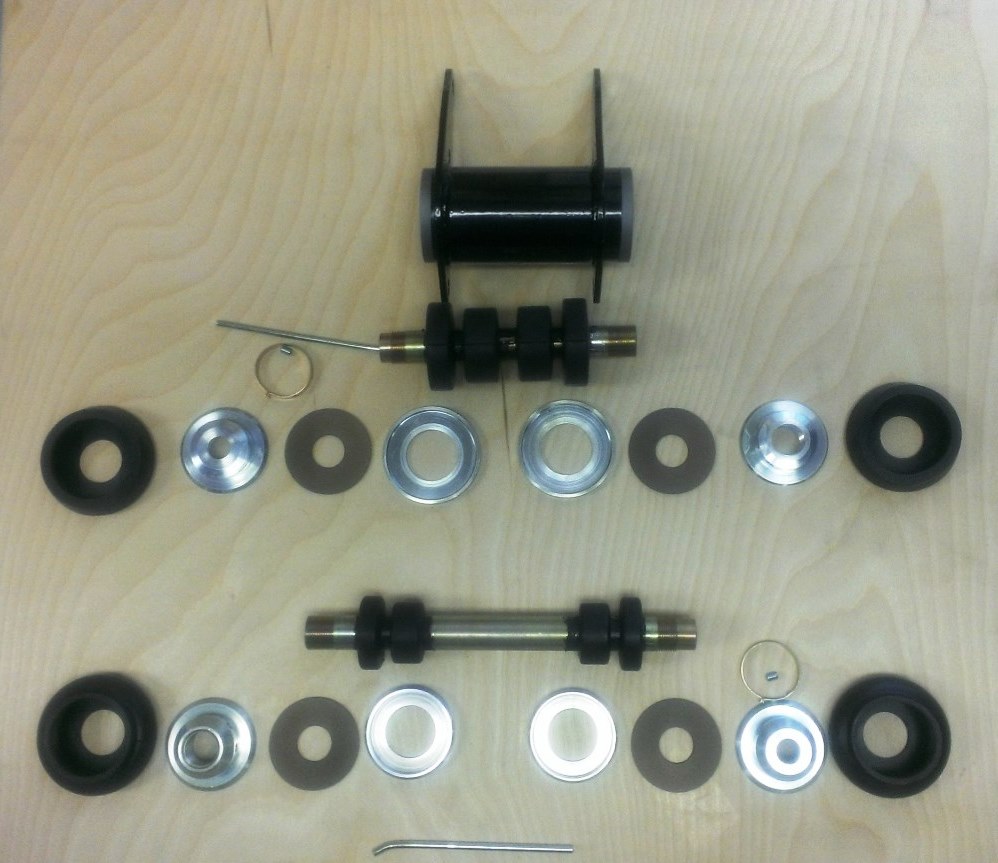
March 22, 2018 I'm installing the MKIII type vernier Isolastic mounts. Here are the kits laid out in the order
of assembly. The kits from Andover Norton are nice, but the instructions are not good so I laid them out to be sure
I know how they go together.
April 2, 2018 The engine and gearbox are ready to be installed in the frame - now if I just had the frame back from the
painter :-(.
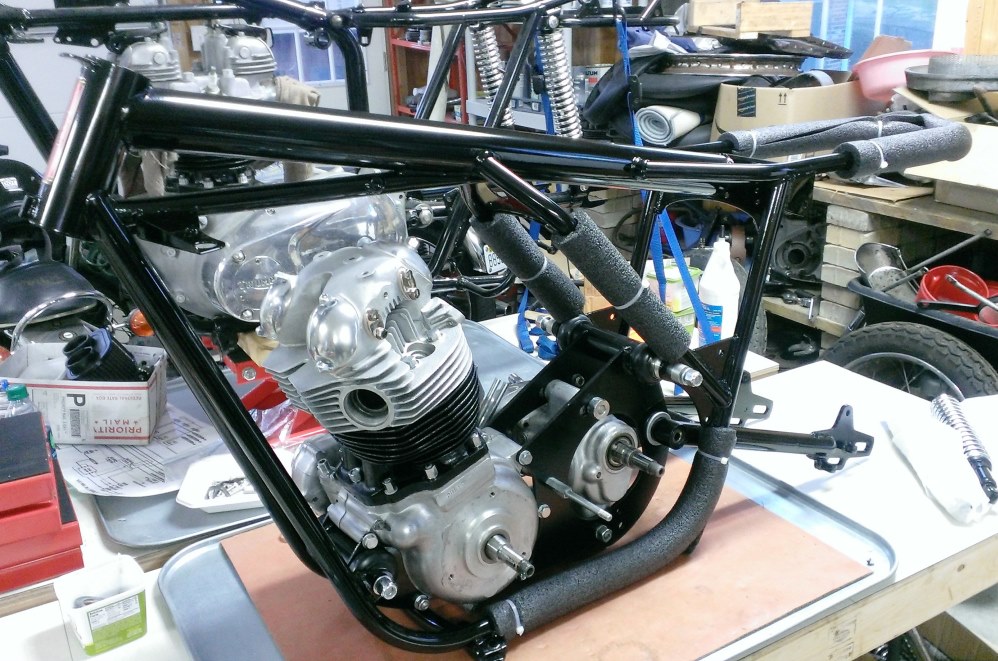
April 8, 2018 I got the frame back this afternoon and made some progress. The new VIN plate and new steering head bearings
are installed. The power unit is installed in the frame using the vernier isolastics (not adjusted yet). And, the swing
arm is installed with all new bushings and seals. I've re-plated the swingarm end caps and will install them and the shocks
next.
April 15, 2018 The swingarm, rear shocks, and oil filter are installed. The triple tree, battery box, air cleaner rear,
head steady and a few other parts are blasted, powder coated, and installed. I forgot to order fork bushings so the front
end is stuck until those parts arrive. I ordered the wrong gearbox sprocket so I'm waiting for the right one to arrive -
that's got the primary stuck. I didn't realize when I took the bike apart that the rear oil tank mount was missing
so I'm waiting on a repair part for that to arrive.
The bike didn't have turn signals when I bought it. I'm planning to install them, but need a headlight shell
that will accept them. I've ordered two to try and I"ll use whichever doesn't work on the 1970 Bonneville
behind the Norton.
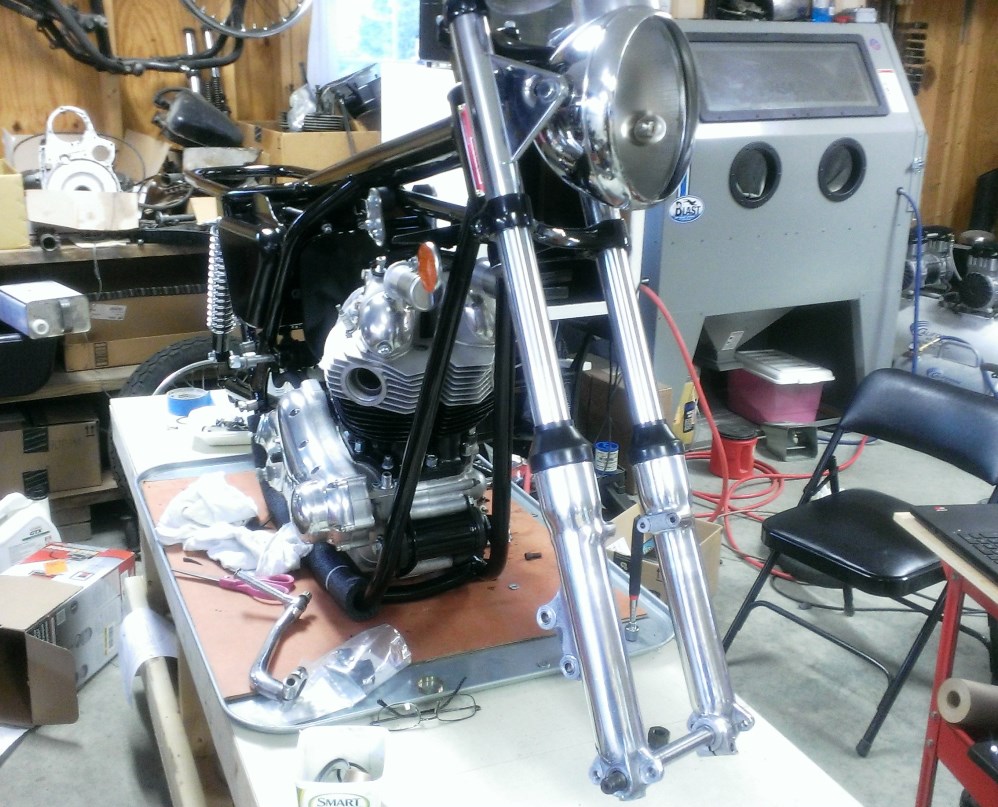
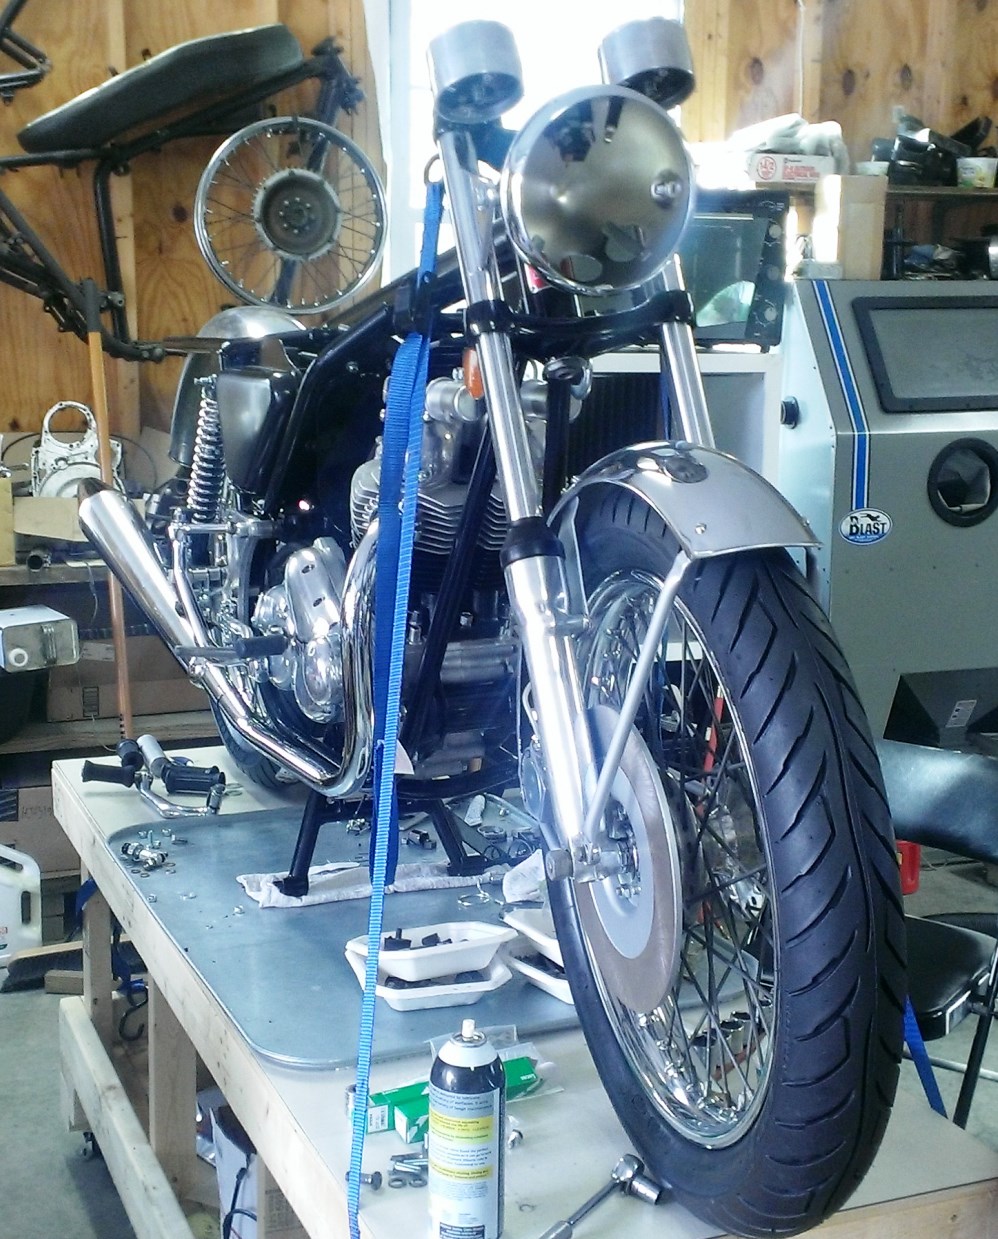
April 22, 2018 It turns out that the lower triple tree was bent. So, I ordered another used one, powder coated it
and it's installed. Look closely and you'll see that I'm not using the right headlight shell. I
don't like the jumble of connectors under the tank, so I'm wiring it like a Trident with most of the connections
in the headlight so I need three grommet holes.
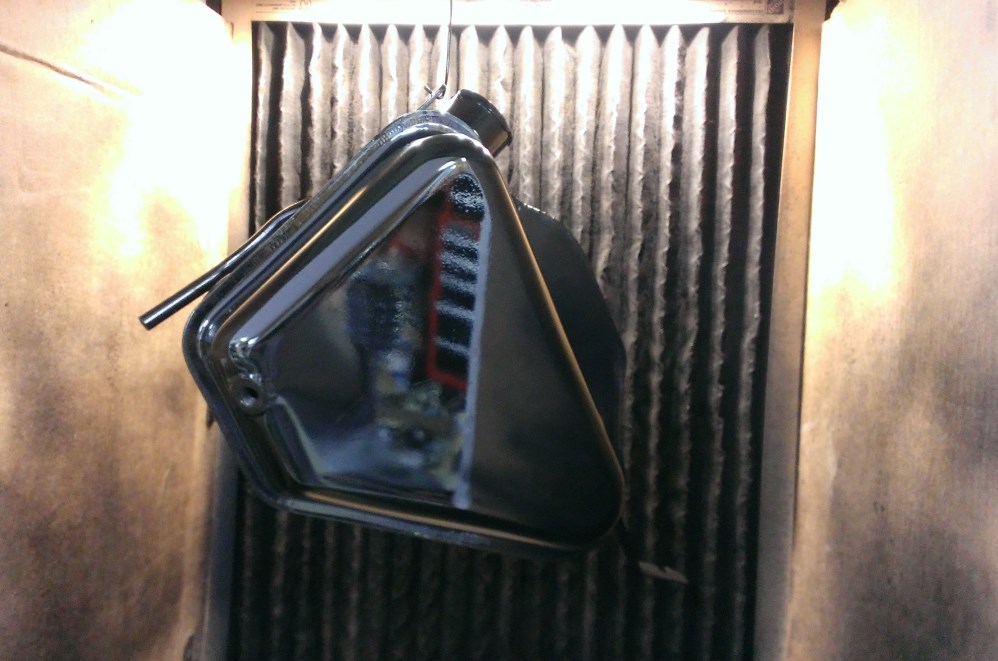
April 22, 2018 The last Andover order hasn't arrived so I bought some steel and made a rear oil tank mount. In
the second picture, the oil tank is repaired, hanging from the new tab, and painted. I paint in my homemade powder coating
cabinet - I just line it with cardboard so it says easy to clean.
April 29, 2018 The last Andover order arrived so I was able to finish the front forks. Also, the oil tank is repaired, painted
and installed. The coil mount is restored and it, the coils and the reflectors are installed. I'll be installing
Tri-Spark ignition and PodTronics voltage regulator, so the coils are 12-volt and no condensers are installed.
Not shown, but done is the fiberglass taillight housing. The mountings were missing, there were chips and scratches, and
a big hole in the front. That's all restored and painted now. The rear fender is in decent shape - no rust but 46 year old
chrome. It has been carefully cleaned and polished and will be installed soon.
Another medical problem is slowing me down. I dislocated a bone in my foot and now it looks like I have a torn tendon
that will require surgery - getting old is getting old!
May 11, 2018 Had to have MRIs and then foot surgery 5/9/18. Before that, I could walk some and I got both wheels striped
and cleaned. Waiting for the bearings to arrive to finish them. But, I was surprised to find out after surgery that I can't
walk for two weeks so I'm stuck, AGAIN!
May 28, 2018 Still limping from my 6" cut and very swollen foot. The surgery was more complicated than the surgeon
expected. I got the 40 stiches out on May 24th and have been working a little at a time.
The rear wheel is finished and installed - all new bearings, seals, brake shoes, and tire. The tail light is complete and
ready to install, but I'll do that when I'm wiring. The primary is finished except for setting the chain tension.
I have to cut the rear chain to length but will wait until I adjust the primary to do that. The chain guard is cleaned and
straightened and ready to go on.
The front wheel is cleaned and ready for bearings and a tire. The disk was sent out to be surfaced and should be back
this week. Still have to restore the front fender.
June 2, 2018 Front disk came back. After painting the center of it, the front wheel is finished and installed - all new
bearings, seals, and tire.
The front fender is restored, as are the fender stays. it's not installed yet - paint drying. I had to drill out the rivets
for the center stay. The stay was very bent in multiple places and I couldn't straighten in attached to the fender. It looks
new now.
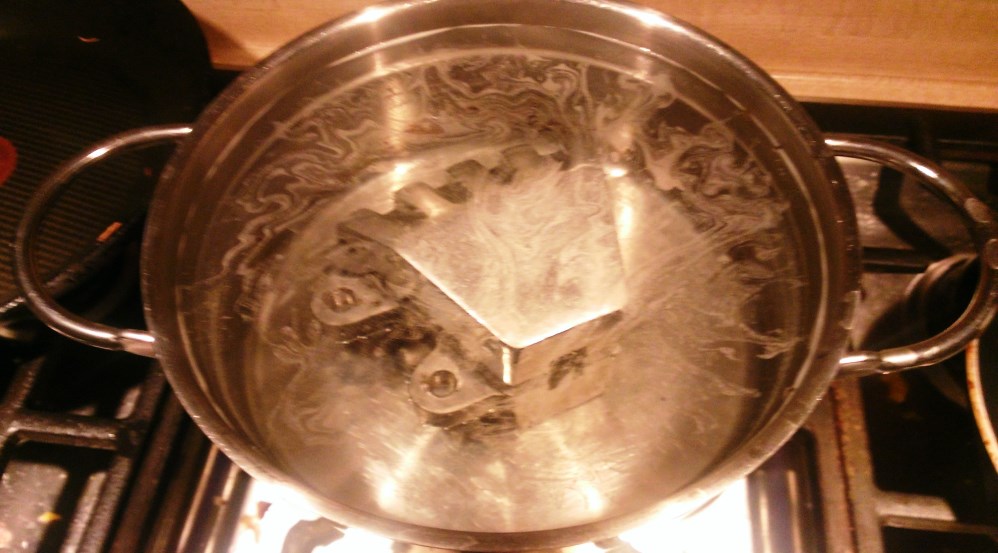
Yum! Boiled Caliper! The caliper was sitting for 40+ years so getting the pistons out was an issue. The outer one
came out with some WD40, brass brushing, and prying. The inner one, as usual was tough. After cleaning everything as well
as possible, into a pot it went for an hour boil in plain tap water with the opening down. Then some slamming on a piece
of wood, again with the opening down. It didn't move. Then I boiled longer and with the opening up, dropped an ice cube
in the piston. I did this a few times with slamming on the piece of wood in between. It finally started moving so a few
more repeats and it was out. The caliper is in great condition. It did darken some but a little time on the buffer and it
will be right again.
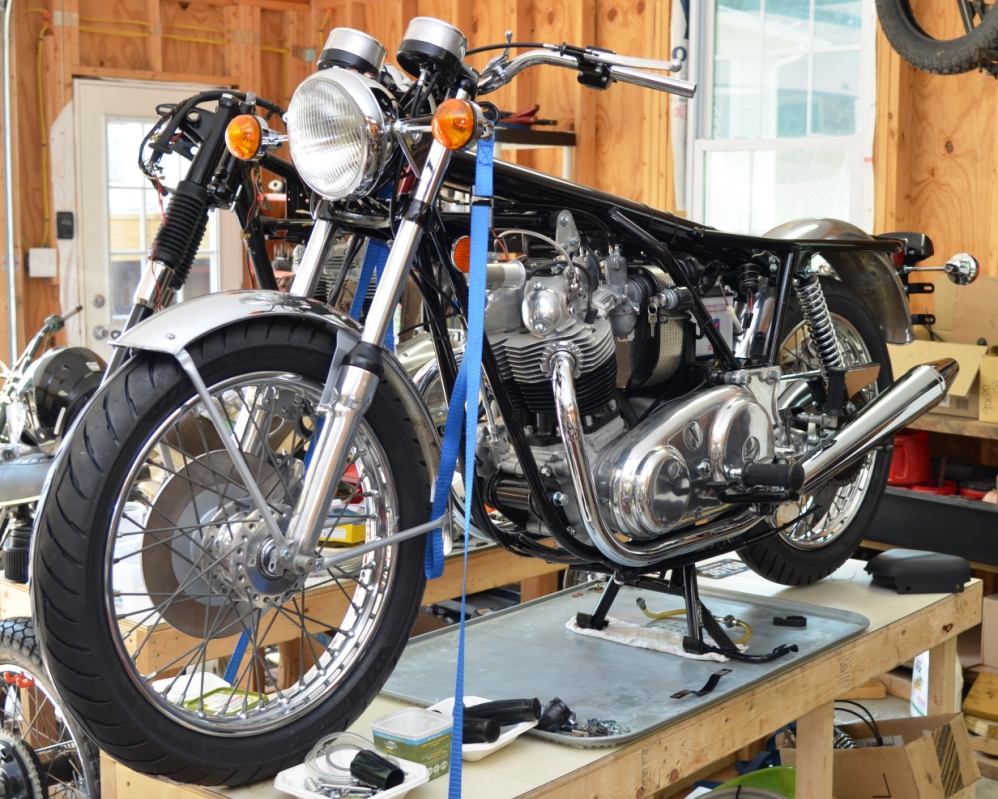
June 19, 2018 Making progress but waiting for parts, my foot, and the heat are slowing me down. The timing side of the bike
is almost done. The exhaust system is mounted to check fit which is fine.
The drive side is coming along as well. The rear brake pedal was a real rusty mess so I decided to try chrome powder coat.
It looked good, but when compared to actual chrome, it was apparent that it was not chrome. I decided to try to polish it
to make it brighter - bad idea! The somewhat chrome look instantly turned to battleship gray. New brake pedals cost way
too much so I striped the powder coat and the remaining chrome and powder coated it black.
I also realized that the rear air cleaner plate that I beautifully restored was missing the ignition switch bracket! So,
I went through my junk and found one with the bracket. After much straightening, brazing, reforming, and then powder coating
it looks good and is installed. It also became the mount for the horn and PodTronics voltage regulator.
The speedometer and tachometer are back from the restorer and are mounted.
June 28, 2018 Been working on a lot of little things. The biggest pain has been the rear brake cable. I bought a new one
but it is so heavy duty that is won't sit in the bosses correctly and binds the cable.
I've finished installing the side stand, passenger pegs and exhaust system. So, I need to install the carbs, restore
the handlebar controls, rebuild the master cylinder, and do the wiring. I don't like the way Nortons are wired
so I'll document how I do it. See: Norton Wiring to see how I do it, and the Wiring Helper page for general info on wiring vintage British motorcycles.
July 11, 2018 I bought a NOS rear brake cable that resolved that problem. Between the 4th of July holiday, extreme heat
in Virginia, and working on the wiring I haven't had a lot to report. I'm hoping to have it almost done this weekend and
maybe even started.
July 14, 2018 I took the master cylinder apart (hard after 40+ years). Surprisingly, the important areas turned out to be
good but the paint was not. I cleaned it and the clutch lever mount, planning to touch up the paint. The I realized that
it would be too much work to make them look good so I blasted them and powder coated them. So, tomorrow the handlebar controls
can go on the bike and the wiring can be completed.
July 16, 2018 I started to rebuild the master cylinder and realized that the piston was badly pitted in one area.
It probably would have worked, but I decided to order new.
July 19, 2018 The wiring is done except for connecting the front brake switch and making the simple harnesses for the instrument
lights. The Tri-Spark ignition is installed,statically timed, and tested.
I'm waiting for the master cylinder parts to arrive so I can finish that. The only other things left are making the throttle
and choke cables, installing the carbs (they are already rebuilt), deciding which tank to use, and installing it. I'll probably
decide to polish the original tank as it has original paint, and use that; but, I have to see how that looks first.
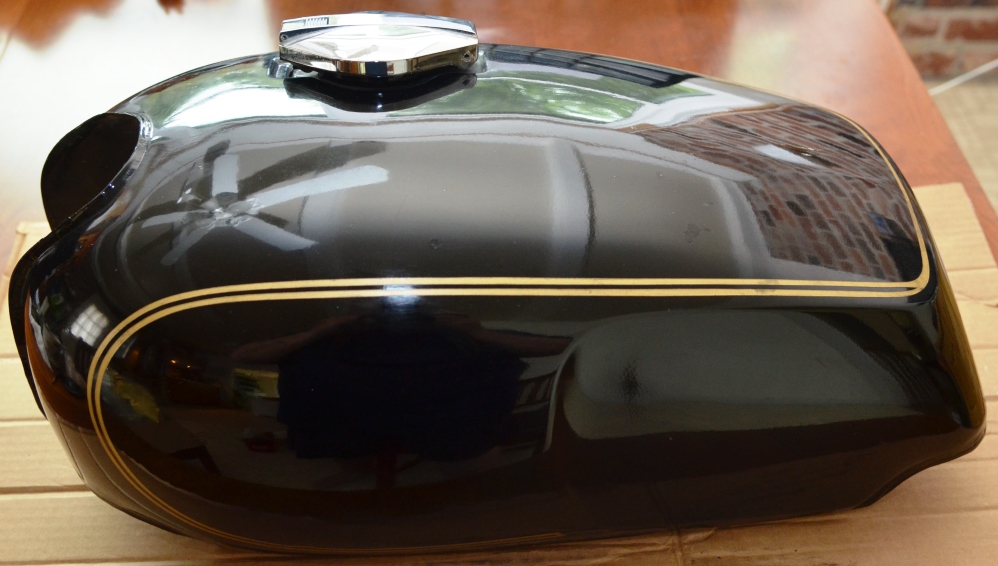
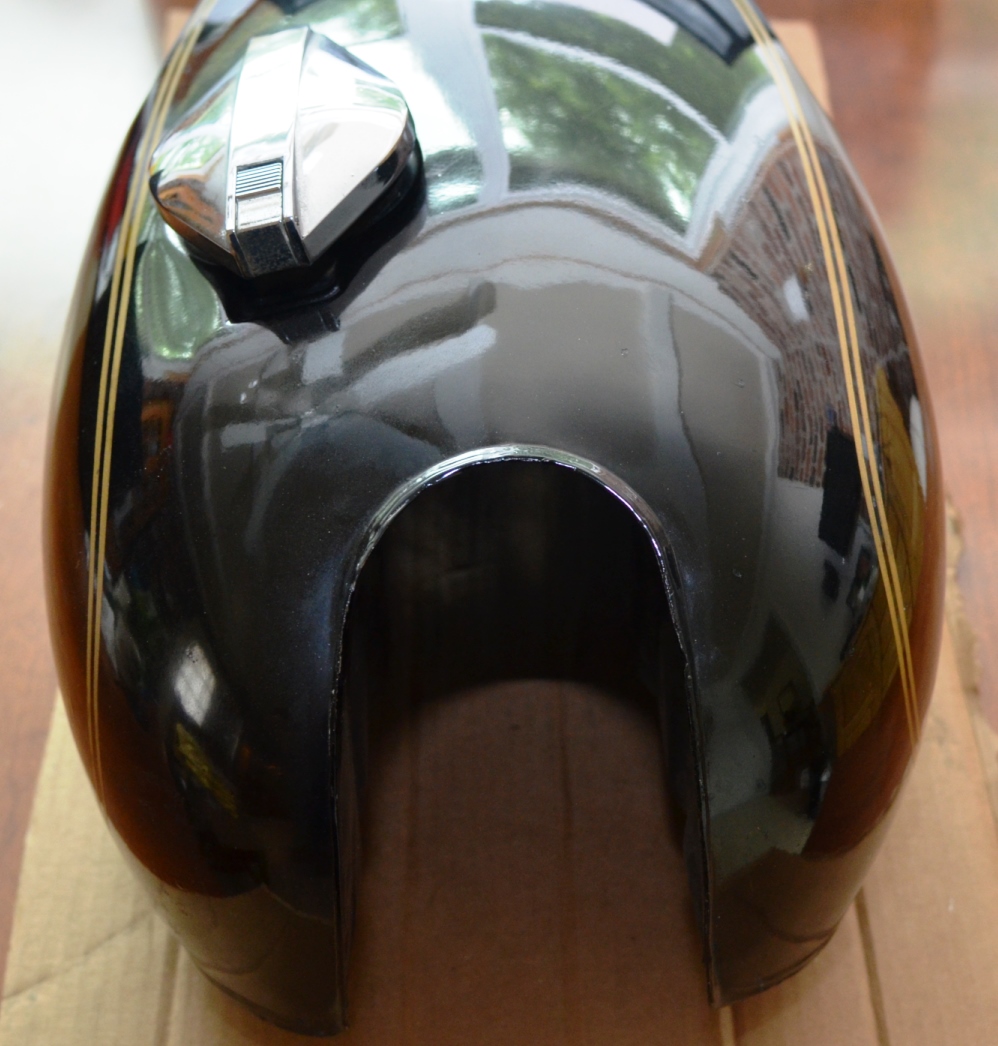
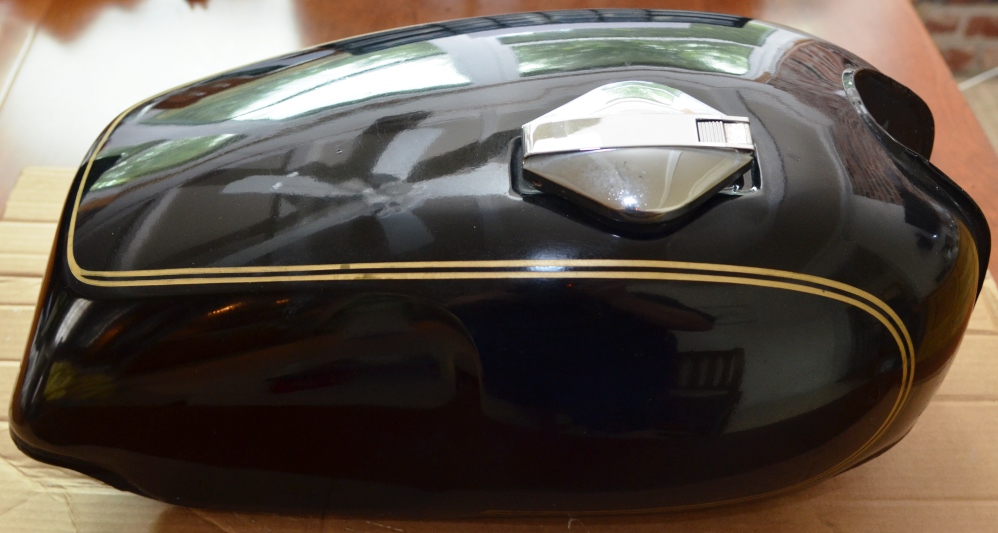
July 20, 2018 The tank was in a pole barn for about 42 years. Since it wasn't in the sun, it didn't fade.
However, the surface oxidized quite a bit and it had some chips in the paint that exposed the primer. After carefully
fixing the chips, I spent several hours cleaning and then using polishing compound to remove the oxidation. It was
interesting that the rag would turn brown, not black. Once an area felt smooth and looked black, I stopped.
Then I used a cleaner/wax to finish it. It looks quite good but does have blemishes. There are spots in the gold lining
that are dark and there are some tiny bubbles on the side. Since it is original paint I consider it an asset to the bike.
July 29, 2018 Just about done! I made all new cables for the carbs and they are installed now. The oil tank cover had no
dents, but has some scratches so it's been sanded and spot primed. After final sanding, it will be painted.
The left side cover (tool box) had dents, rust, and peeling paint. After sand blasting, I beat out the dents and used
minimal bondo. It looks good in primer so after final sanding I'll paint it. I still need to make the fuel
lines and haven't decided on how to do that. I would rather do them like on Triumph's but since I'm using
the standard air box, that won't work. Everything I have in stock is for 5/16" lines and Norton used 1/4"
lines.
August 3, 2018 it's been hot and humid in Virginia! I painted the side covers even though the humidity was higher than I
like. My humidistat said that is was on the edge of normal to high. When I was done I had two beautiful gloss black covers.
August 4, 2018 My beautiful glass black covers turned into beautiful matt black covers overnight :-(. They flashed. So,
now I have to wait a week, lightly sand them, and wait for a low humidity day to try again.
August 5, 2018 Start day! Finished up a bunch of little things and took the bike down from the stand. Adjusted
the rear chain, handlebars, added oil, installed the tank and seat and it was time to start it. Didn't go well.
I guess I had a "senior moment" because somehow I had the timing off 90 degrees. I've installed Tri-Spark
enough that I never have trouble and rarely even need to touch up the timing when checked with a strobe.
It now starts and idles, but is missing at higher RPMs. I'll have to fiddle with the carb sync I suppose.
Now I wish I had made separate throttle cables like I do on Triumphs. Having a junction box and single-pull throttle means
adjusting at the top of the carbs which is hard with the tank installed. So, left to do:
- Finish the side covers
- Straighten out the carbs
- Make a battery hold down. Since I mounted it non-standard and installed the horn and PODtronics in the battery area,
the standard hold downs won't work.
- Polish it up.
- Take pictures.
August 15, The side covers are repainted and look good. It's been way too hot to work on the bike so it's still
where it was otherwise.
September 8, 2018 It still very hot and now it's rainy, so I haven't finished. I did try to install the decals
on the side covers today since the paint is now cured. The decals I bought from Andover Norton were listed as "dryfix".
I expected to remove the backing, rub them down, and the remove the carrier. It turns out that they are stickers and
look like crap since they are a rectangle of clear plastic with the lettering inside. Fortunately, I only tried one.
I can't get it off and now have to blast and repaint - so annoyed!
September 18, 2018 My stepson and I worked on the miss today. We probably lost a gallon of sweat each - hot
and extremely humid. To make a long story short, the bike now runs great. I need to take it out for a decent
run and finalize the idle and pilot screw. Right now, it's idling at about 500 rpm which is a little low.
Still haven't finished the side covers and battery hold down.
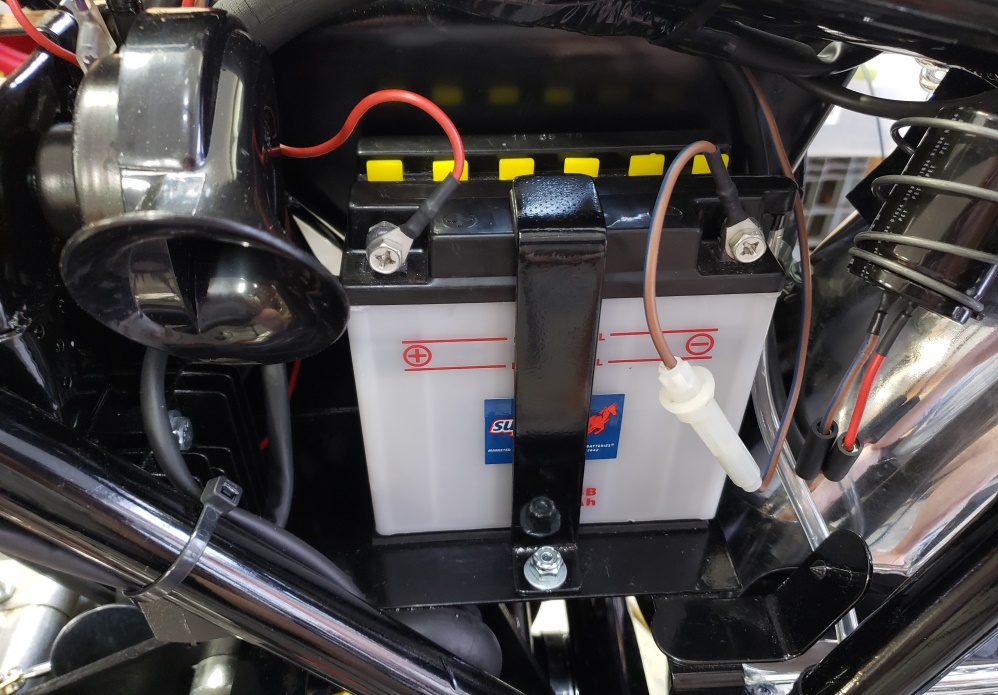
September 22, 2018 Took the voltage regulator and horn out of the battery area and tried the standard battery hold down
to see if I could make it work all work together. Decided that the standard hold down wasn't good anyway. So, I made the
hold down in the picture. The battery is very stable now and shock mounted as well. If I do one like this again I'll
weld a nut on the bottom and use a thumbscrew to hold the holder down, but this is no big deal to take apart so there's
no real issue.
September 24, 2018 Ordered some true dryfix decals.
October 8, 2018 The new decals arrived, but I can't get them off the sheet. I wrote to the guy who makes them and explained
the problem. He tried a set he made the same day and confirmed that they were not usable so he is making me a new set
November 3, 2018 finally got the replacement decals for the side covers yesterday. I haven't tried them yet. I also
haven't finished tuning. The bike needs about an hour of attention and it will be ready to go. So far, I have $8908.29 in direct
cost and about 135 hours of my time into this bike.
November 13, 2018 decided to send the side panels for CA for a professional paint job. I may also install a new tank
as the people who have been interested are not interested in the original paint tank.
February 7, 2019 the side covers are installed and I haven't decided on which tank to use. I also have to choose between
three seats. I have two originals that are decent and need a little paint touch up and one that looks new but is probably
a recover. I also have a new mirror for it now. The weather has been terrible and I've been working on the 1974 850
commando rebuild so I haven't finished the last few things on this one. I tried to take it out Tuesday for a ride and
to take pictures, but got a call from a customer with a problem and lost the chance.
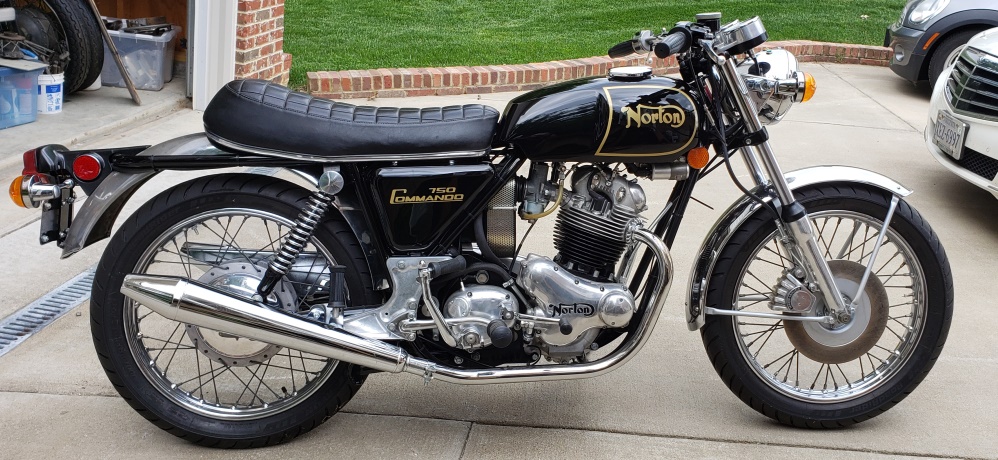
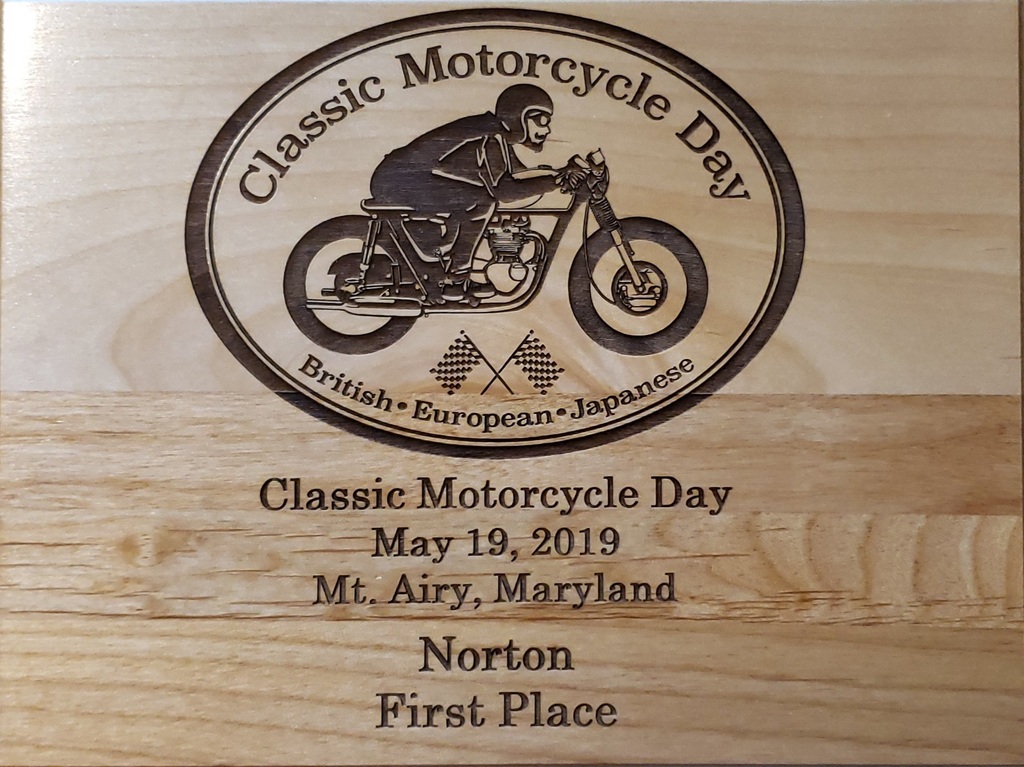
May 12, 2019 I haven't touched this bike for a couple of months. I'm planning to take it to the Classic Motorcycle Day next Sunday so its
time to get it ready. I decided that since the original paint tank is actually a 850 tank that I would put a
brand new, beautiful tank on it that is in the 750 style. Some EMGO products are junk, but the tank and side
covers on this bike are at least as good as OEM. The tank is heavy gage steel and baffled just like the OEM
tanks. So, now I need more to get whole. If I don't sell it at
the show, I'll put it on eBay with a starting bid of $12,000.
May 15, 2019 Took care of a few small things, installed the tank, checked the timing and took it out for a ride. It pulls much stronger than my 850 Commando Mk2A. Everything works and it handled well. it's all cleaned up, waxed, and ready for the show Sunday.
For those that have been reading, I thought the show was Saturday - I'm sure glad I found out I was wrong before going
there!
May 16, 2019 Surprise, surprise! Took First Place Norton at the show today!
January 1, 2020 After several listing on eBay and people wanting it and backing out, it sold today.
|